User Management
How-to guides related to users and roles.
Manage Roles
-
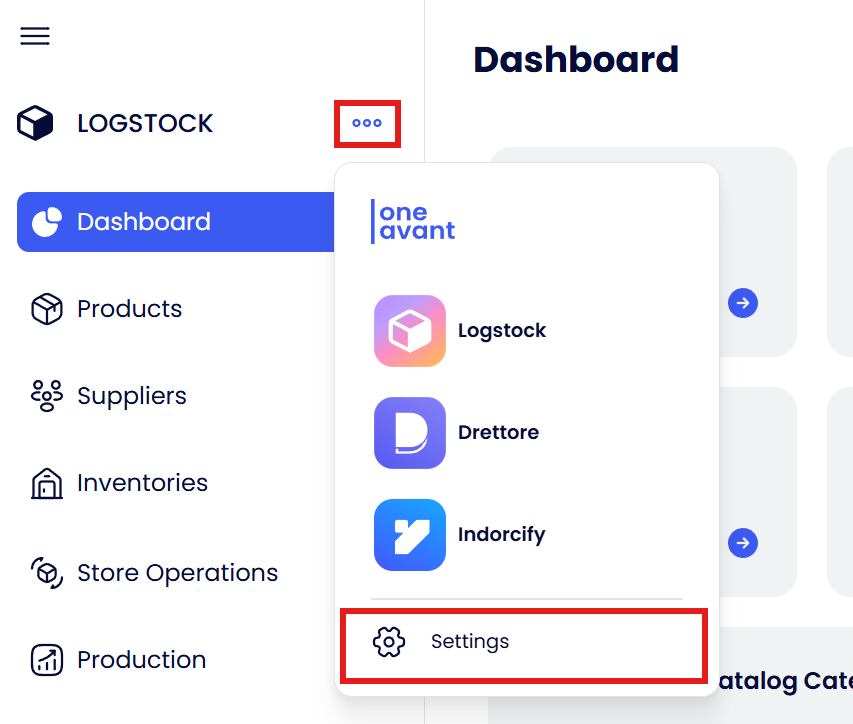
Navigate to Settings from the sidebar or the user menu.
-
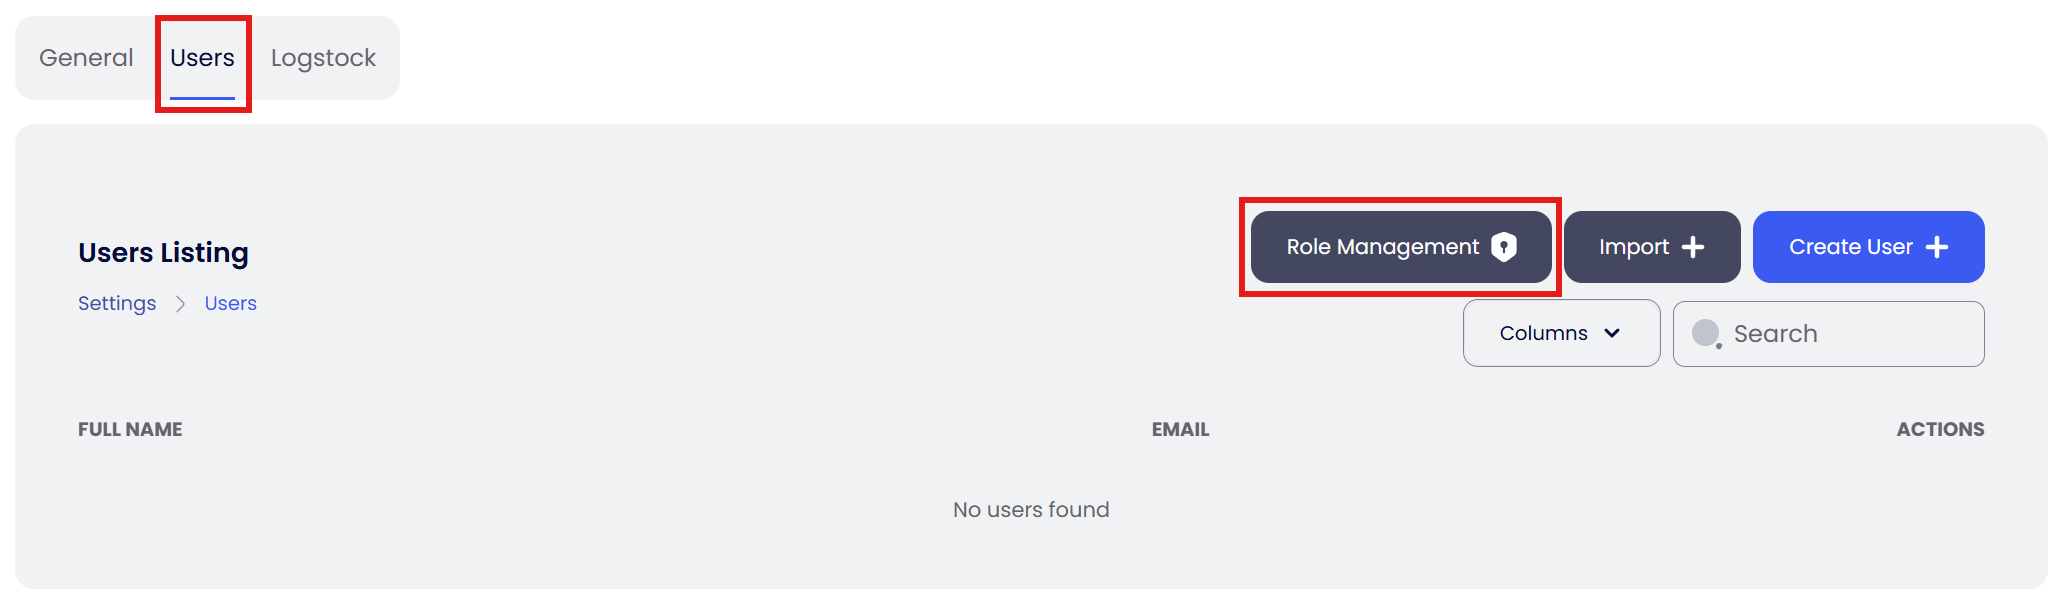
Click on the Users tab and then click the Roles Management button.
-
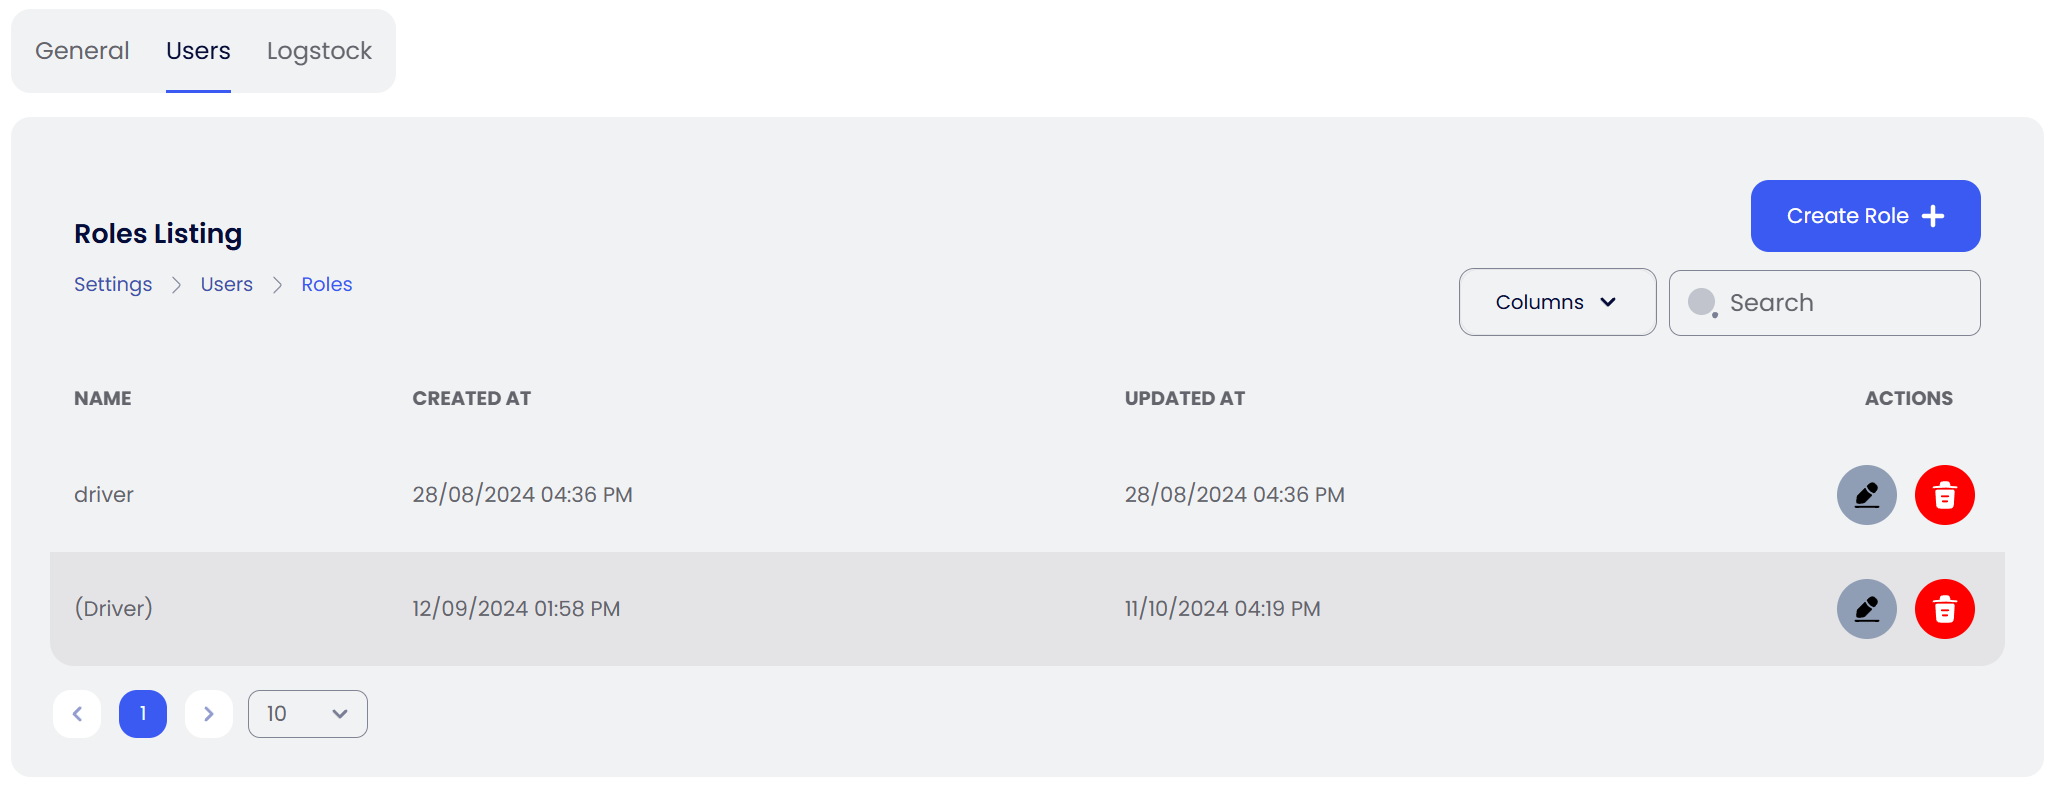
You will now be on the Roles list page showing a list of all the roles that are available in the system.
infoDepending on your tenant, you might see some pre-defined roles like Driver, Dispatcher, etc.
-
Click the Create Role button to open the add form. Fill out the form and select the permissions that you want to assign to this role. Example: If you want a role to only manage the Delivery & Dispatcher side of ERP, only select the relevant permissions.
info- You can filter out the permissions in each app section using the search field.
- If you want the role to have access to everything in the app, you can select the "All of <App>" checkbox and it will select all the permissions for that app.
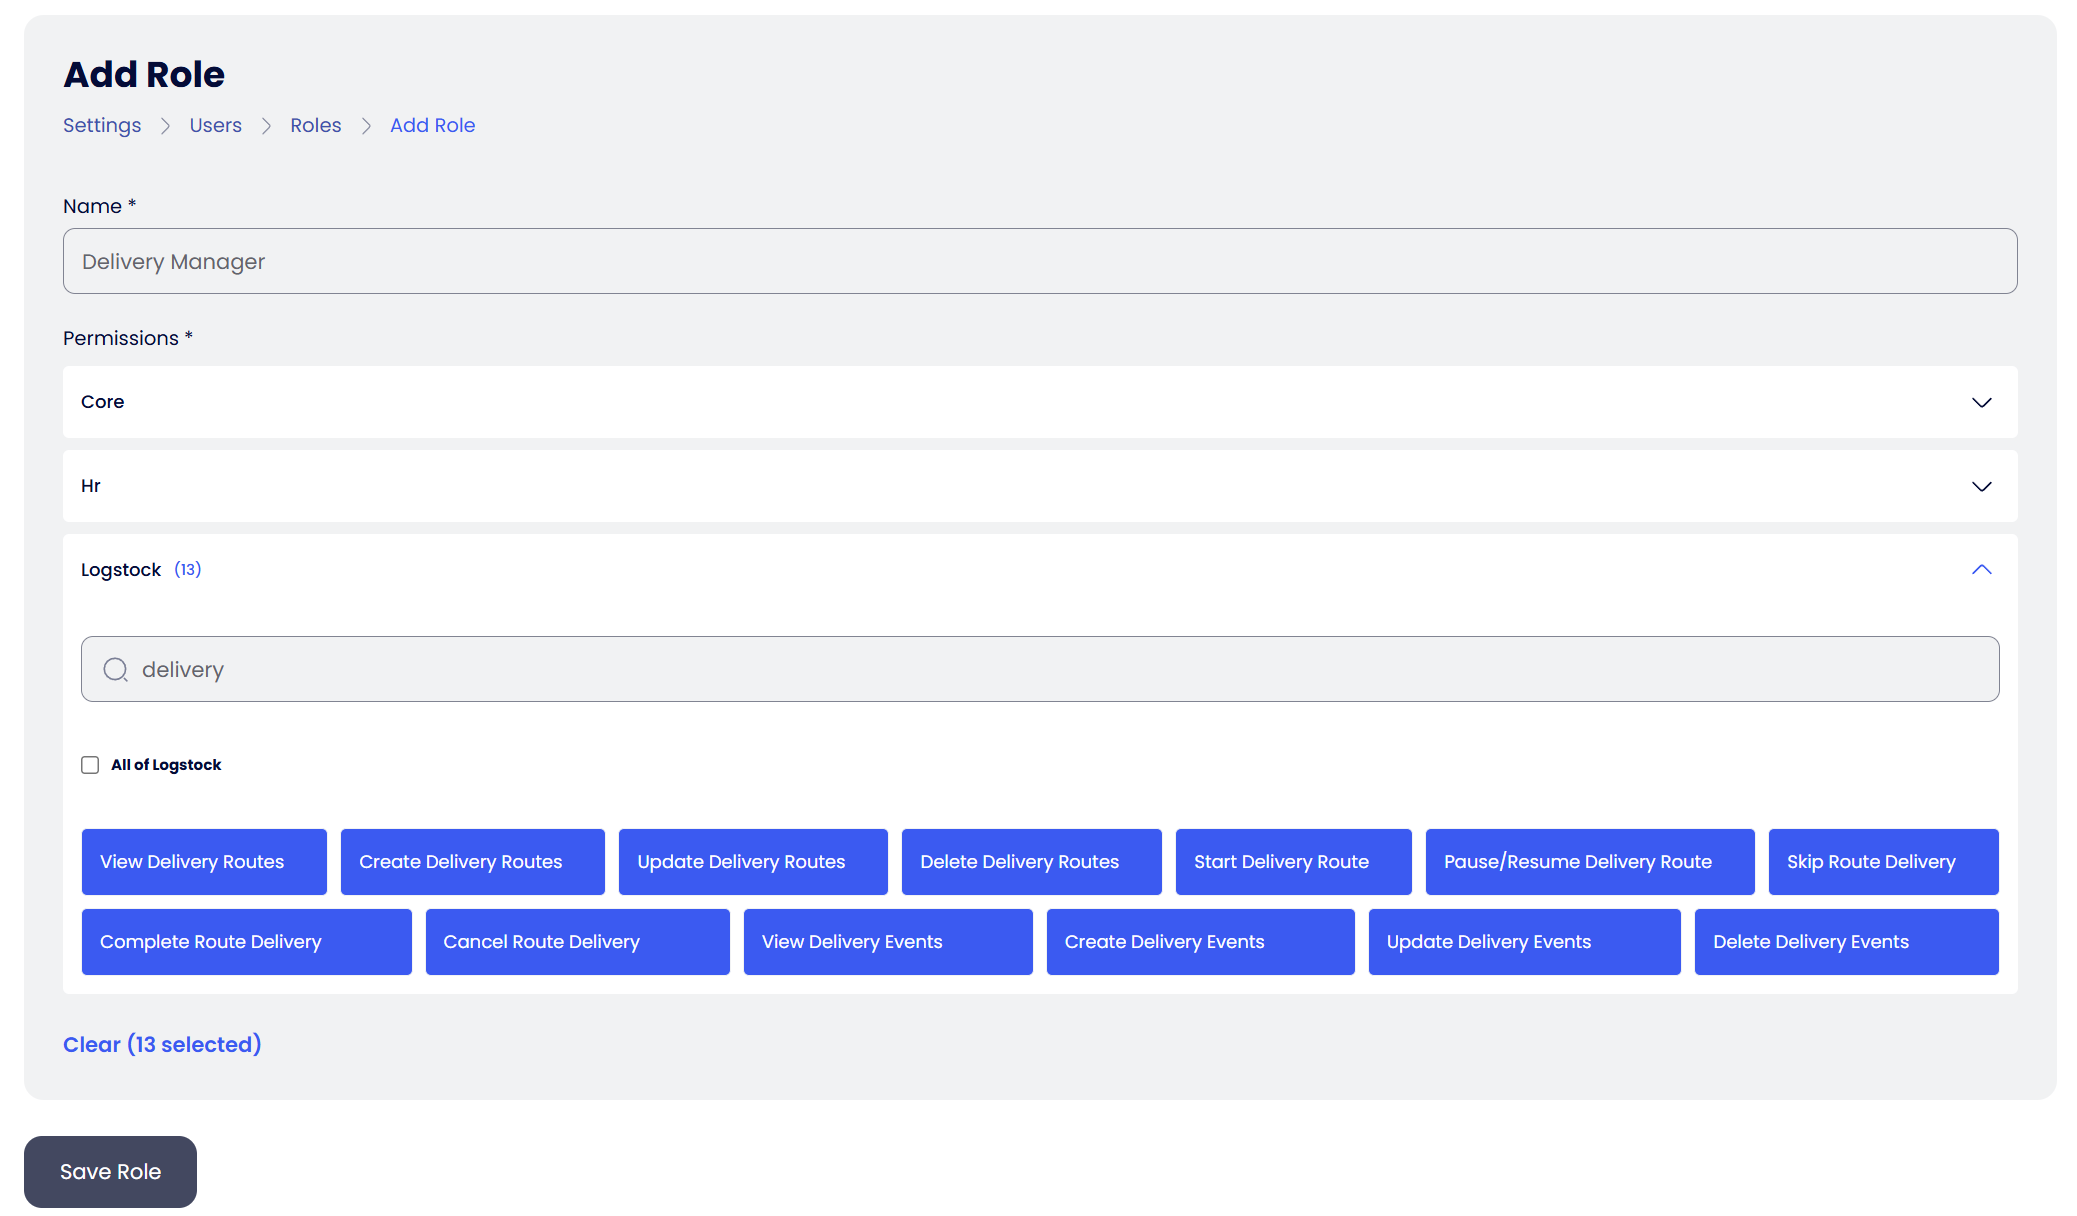
Once you've filled out the form, click the Save Role button to save this role.
-
Once saved, your newly added Role will start appearing on the Roles list page and will also be available for selection in the Roles dropdown available on Add/Edit Users form.

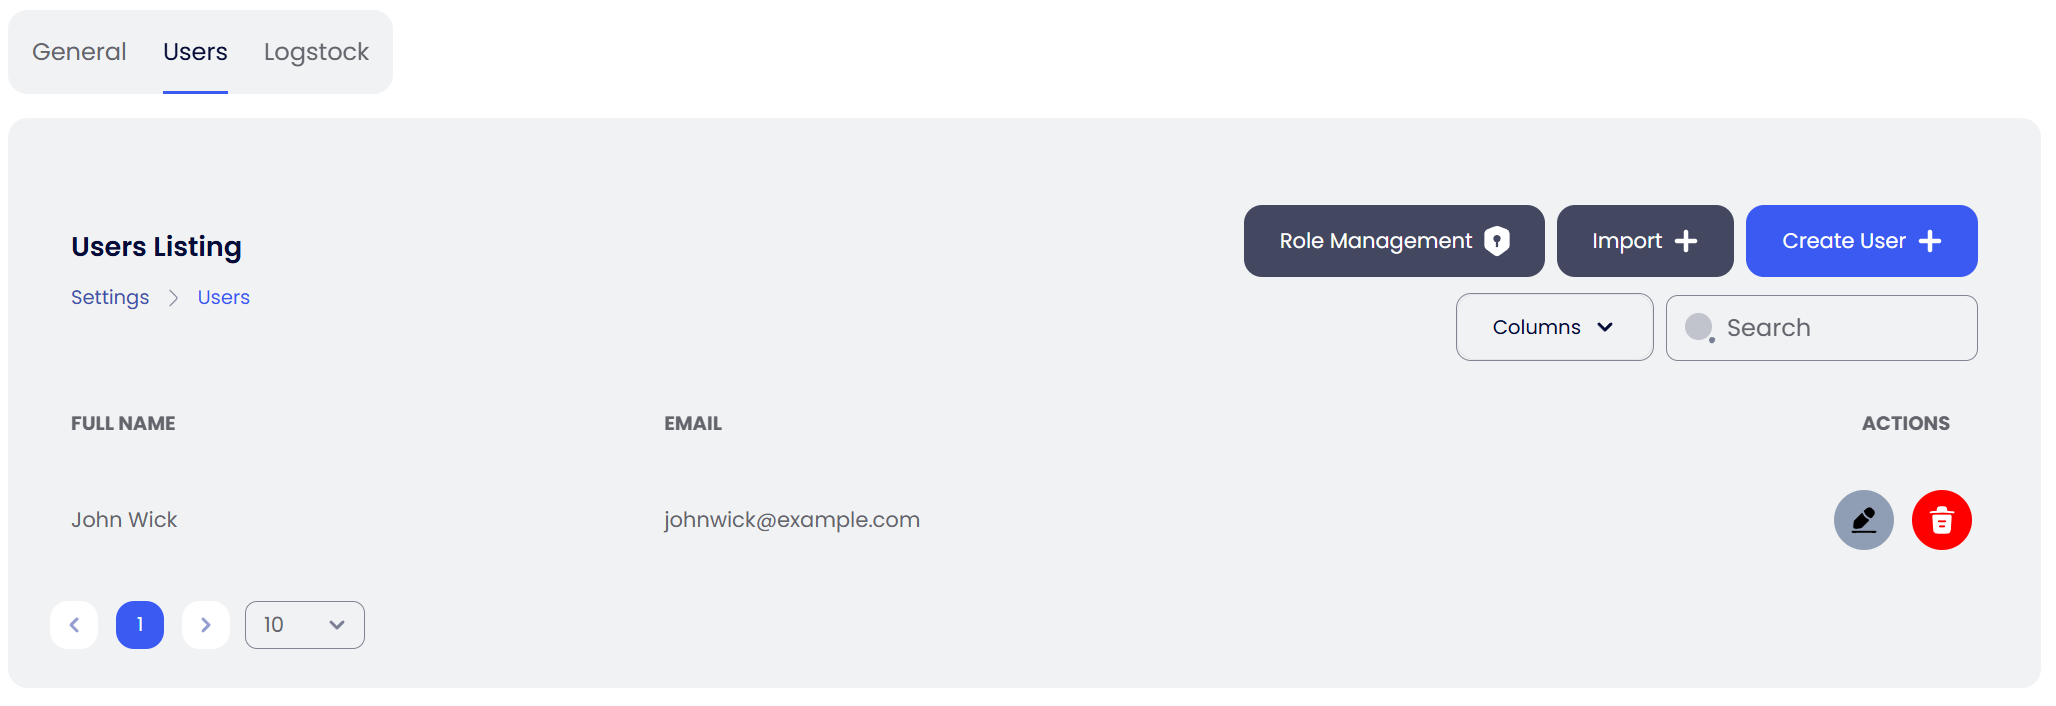
Manage Users
- Navigate to Settings and click on the Users tab.
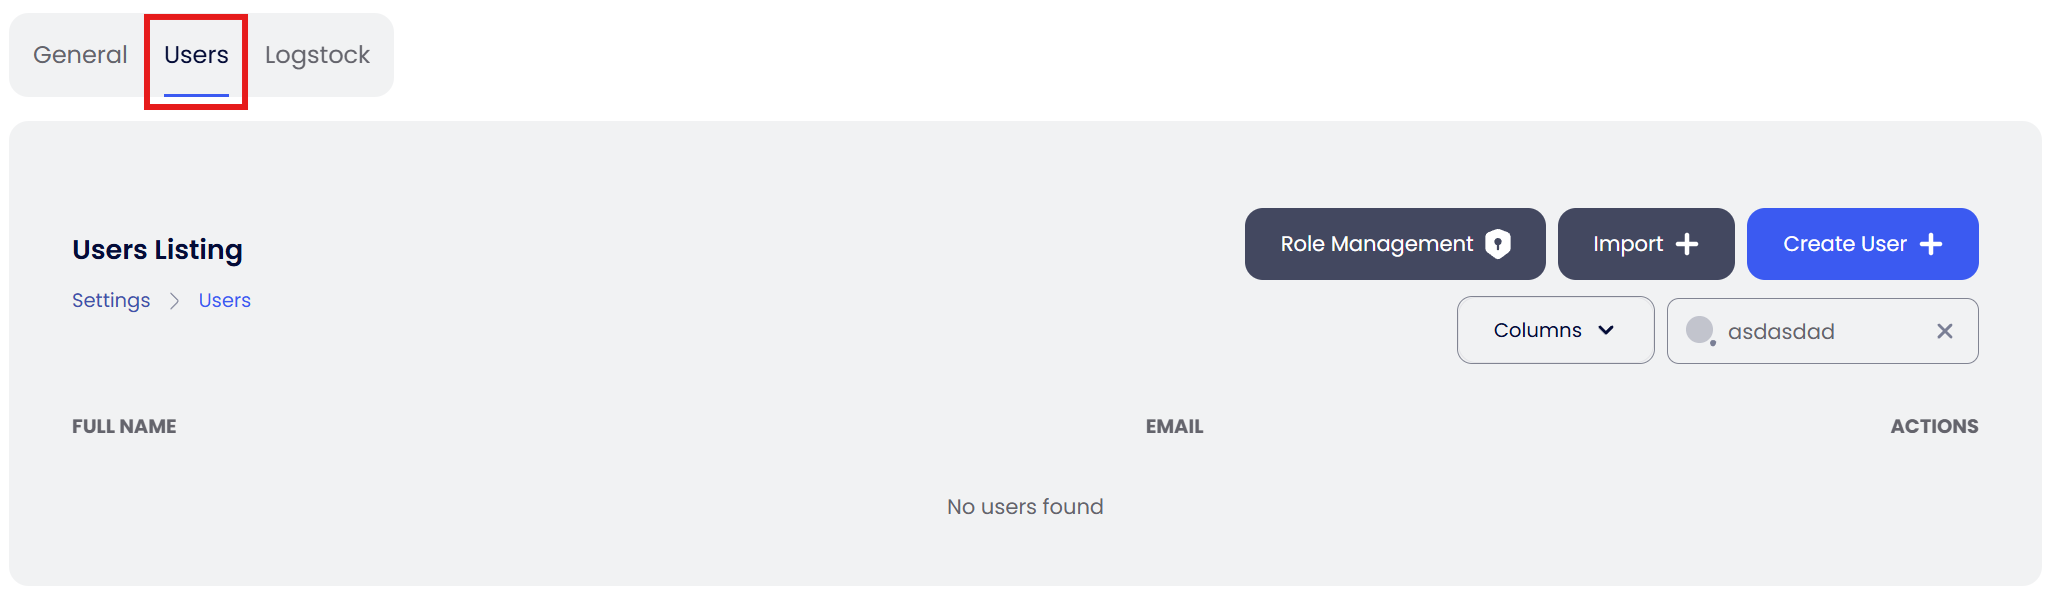
- Click the Create User button to open the user add form. Fill out the form and click Save User.
info
- Use a strong password with a mix of uppercase and lowercase letters, numbers, and special characters for better security.
- You can assign a role to your user to give them access to certain or all parts of the system. Click here to learn about Roles Management.
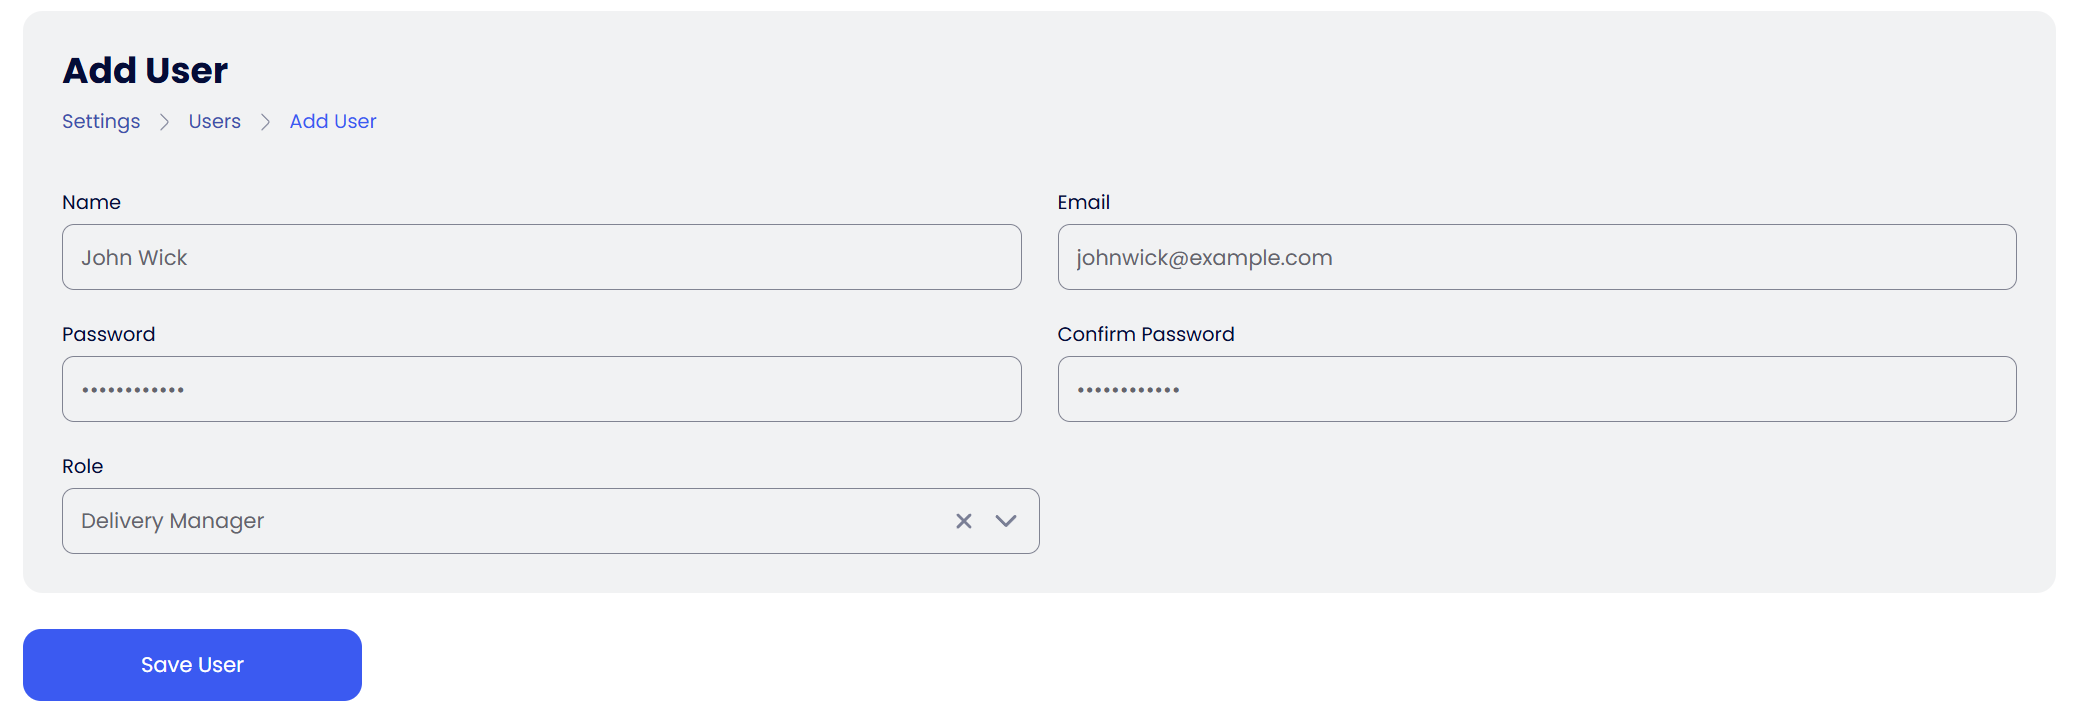
- Once saved, your newly added User will start appearing on the Users list page. This user can now log in to your tenant and perform the actions associated with their role.