Purchases
The purchases feature in the system allows users to manage procurement-related activities. It includes functionalities for creating purchase requisitions, purchase orders, and receiver reports. Users can add products, specify their suppliers, set required dates, and manage the flow of procurement efficiently. This feature ensures streamlined inventory management and effective supplier coordination, aiding in maintaining optimal stock levels.
Purchases Main Views
-
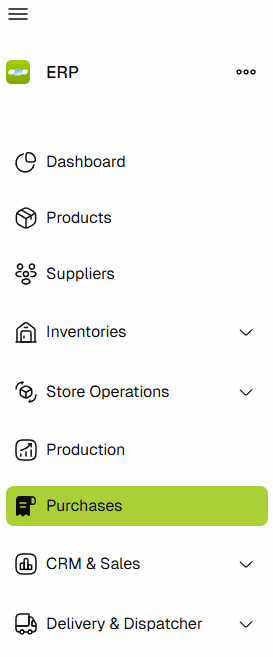
Navigate to Purchases by clicking on Purchases in the side menu.
-
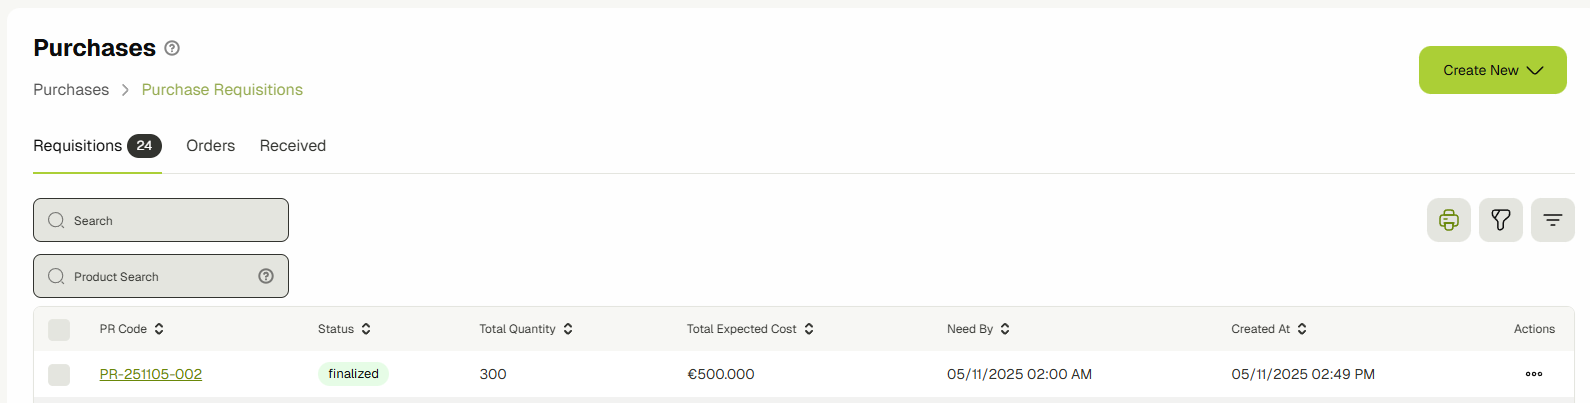
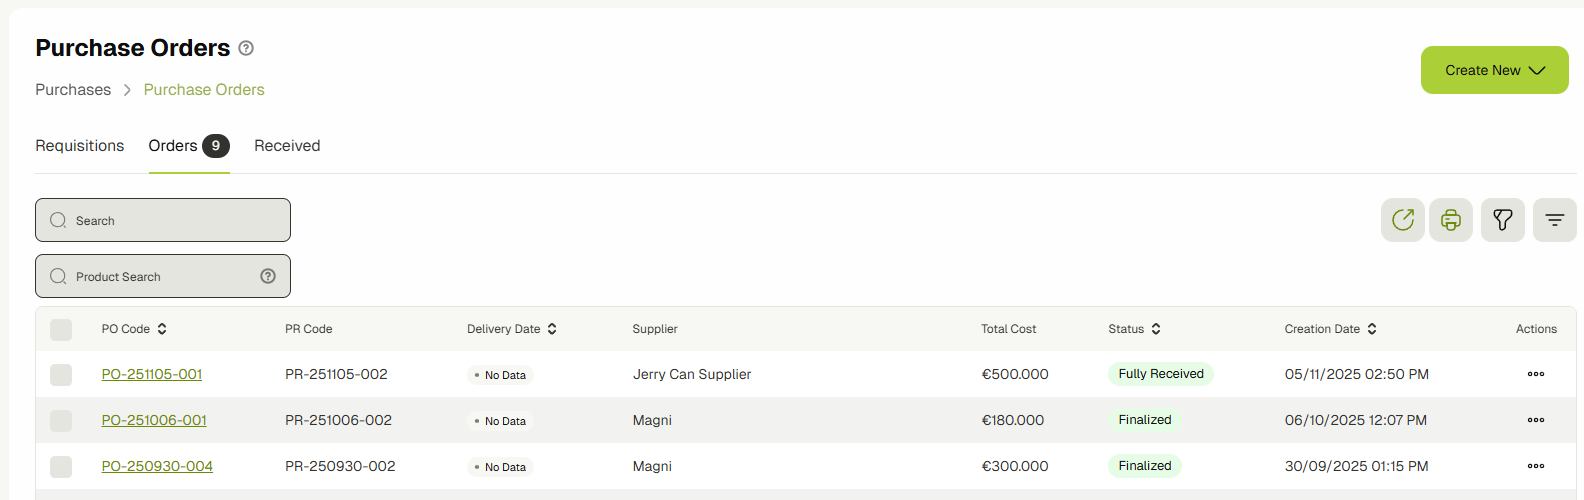
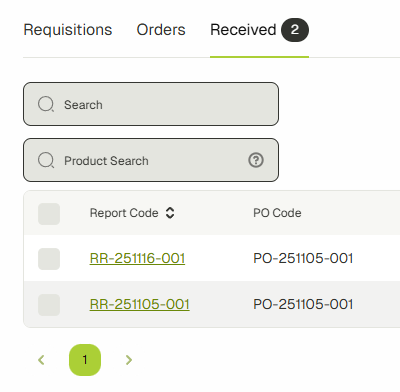
You will view the main Purchases page which displays 4 tabs and a table: Requisitions, Orders, Invoices, and Received.
-
You can switch between the types using the tabs and clicking on the desired type's tab.

-
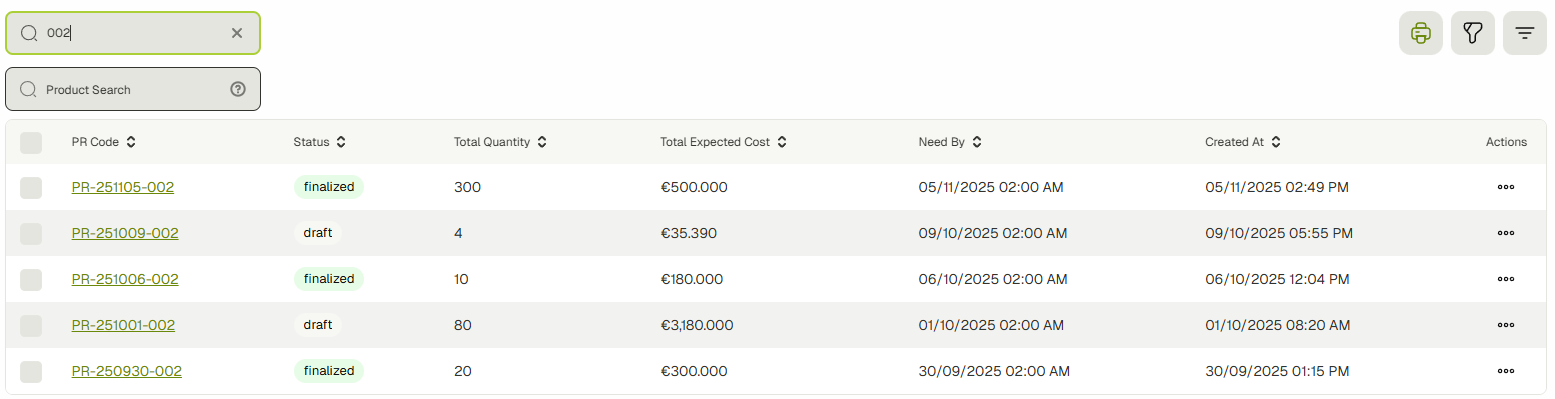
You can use the Search Input to search for specific rows.
-
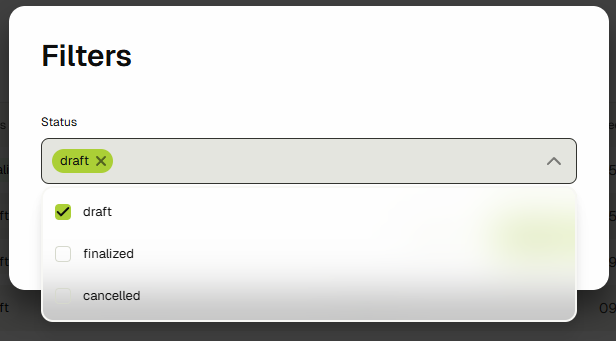
You can filter the rows by:
-
Clicking the filter icon button.

-
Selecting the filter of your choice.
-
Clicking apply to apply the filter.

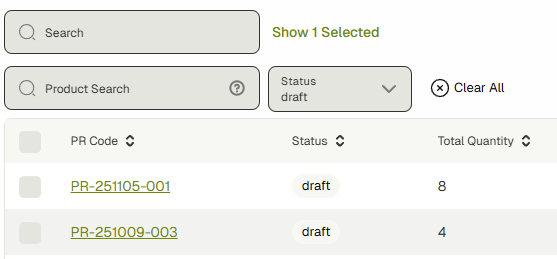
You will see the filtered rows and the applied filters. You can remove specific filters the same way, and you can click Clear All to remove all the filters.
-
-
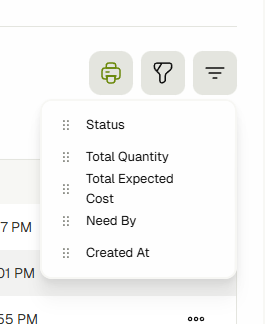
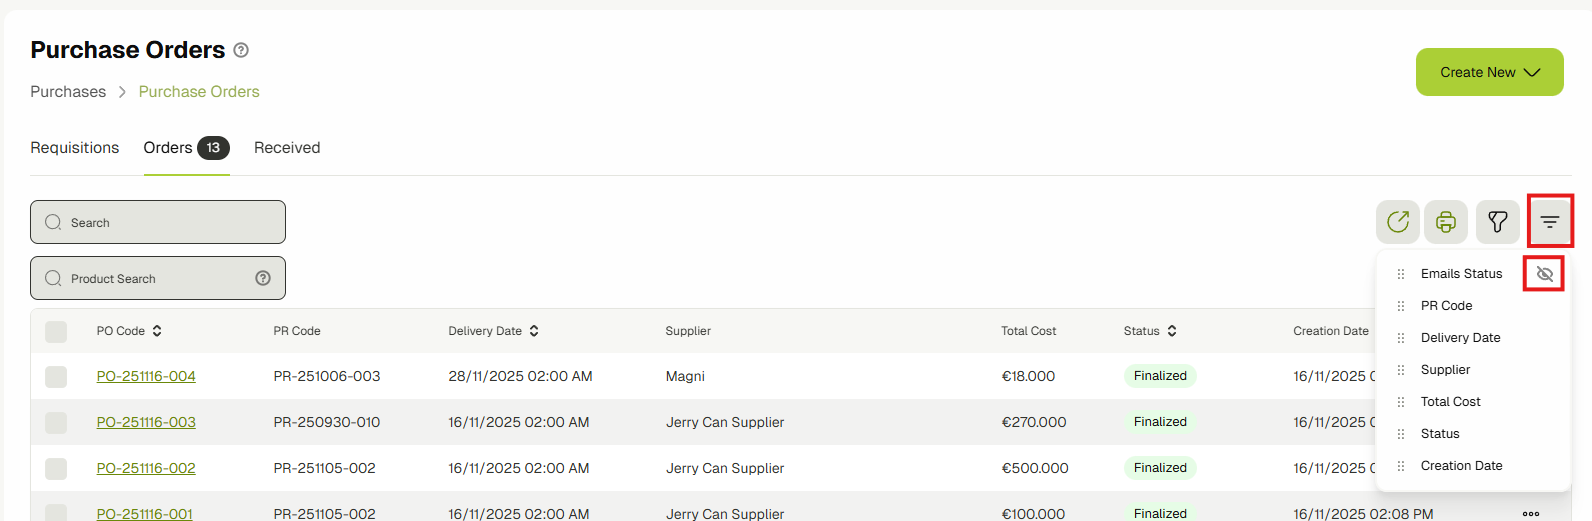
You can control showing/hiding table columns using the columns icon button. Click the drag and drop icon to move the column and change its order. Click the eye icon to show/hide columns from view.
-
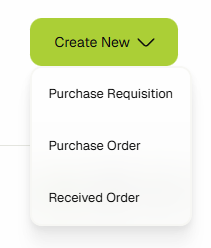
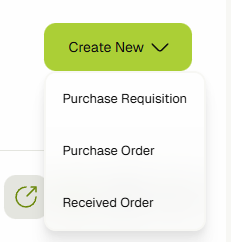
You can create a new PR or PO by clicking the Create New dropdown and clicking on the desired type.
Purchase Requisitions
-
Navigate to Purchase Requisitions by clicking on the Purchases link in the sidebar.

-
You will see the main view. To create a new Purchase Requisition, click the Create New dropdown and click Purchase Requisition.


-
You will view the Purchase Requisition Creation Form.

-
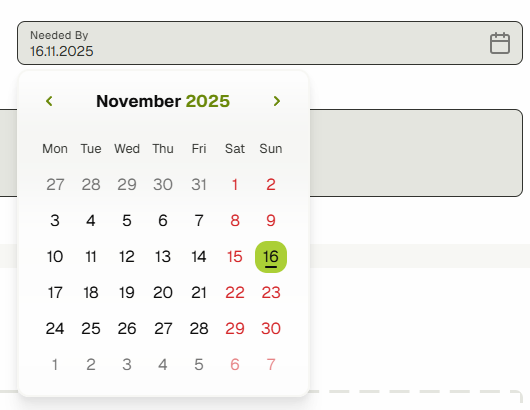
Click the calendar icon in the Needed By input, choose a date, and enable the Add Material button.
-
Write a description or generate one by clicking ✨ Generate Me.

-
Click Add to add products. A dialog will be opened. Select products and click add.


-
A table of the added products will appear.

-
In the Product Code column, click the edit icon button or open the menu to view the actions list and click Edit Material to edit the product. A dialog with a product form will be opened.


-
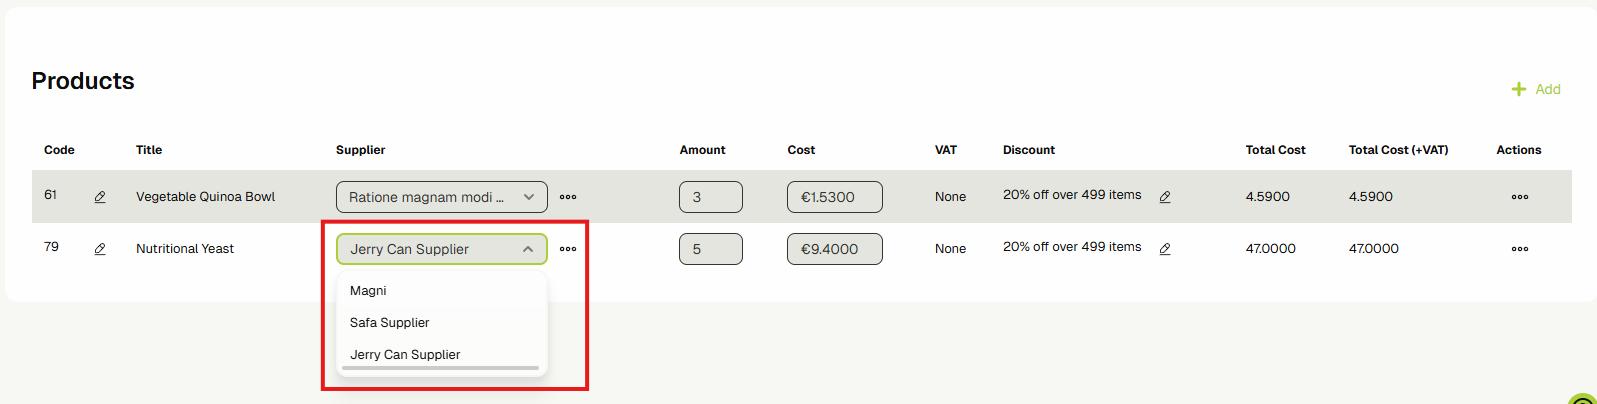
In the Supplier column, click the dropdown icon to choose between suppliers.
-
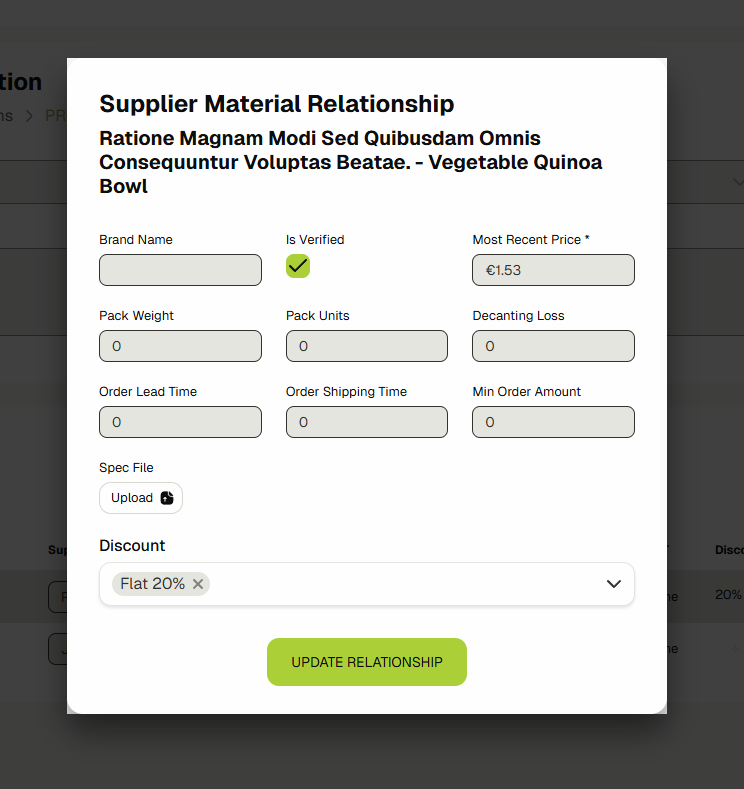
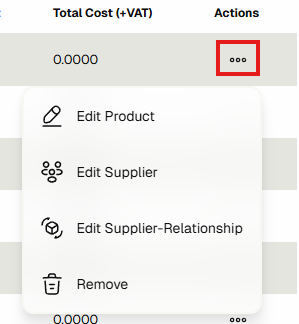
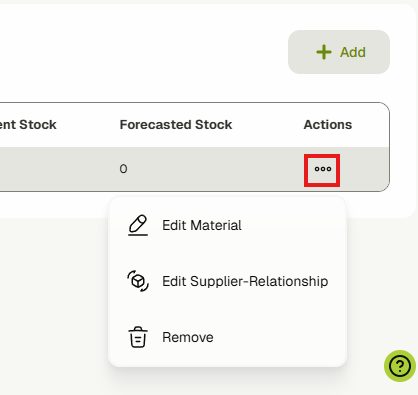
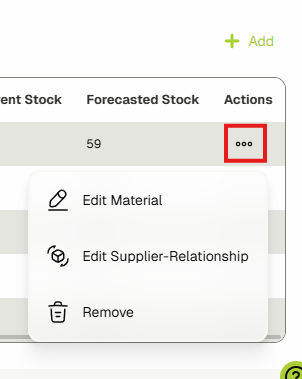
In the Supplier column, click the menu icon to open a menu of options.
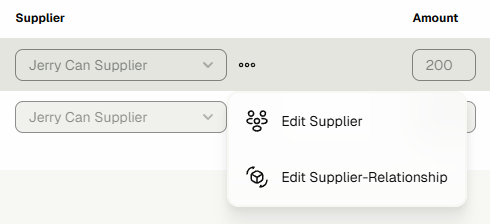
- To edit the supplier, click Edit Supplier.

- To edit the supplier-product relationship, click Edit Supplier-Relationship.
- To edit the supplier, click Edit Supplier.
-
Click on the Amount and Cost data cells and type in them to update them, which will automatically update the total cost.

-
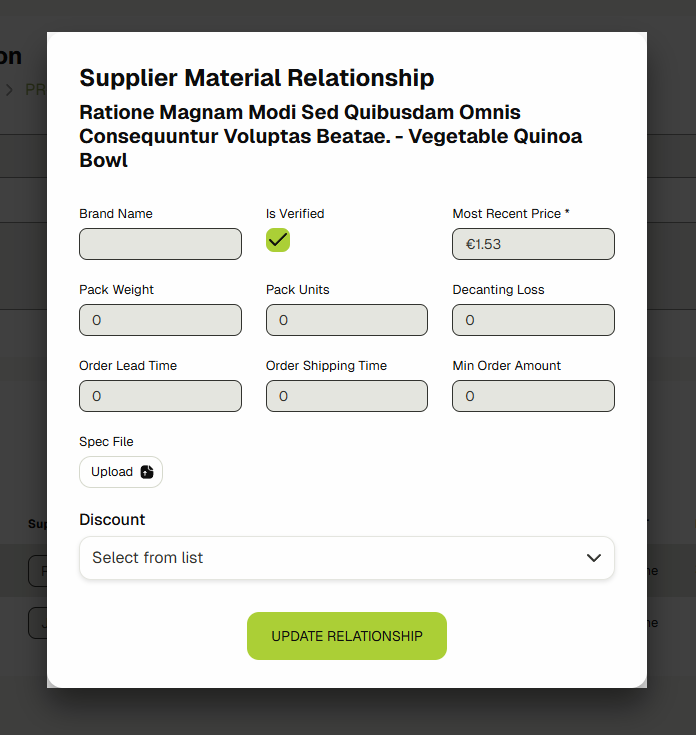
In the Discount column, click on the edit icon to edit the discount. A dialog will be opened with the form inside it.

-
Click the menu icon under the Actions column to view the row actions. To remove a row from the products, click Remove.
-
Click Save Requisition to save your changes.

-
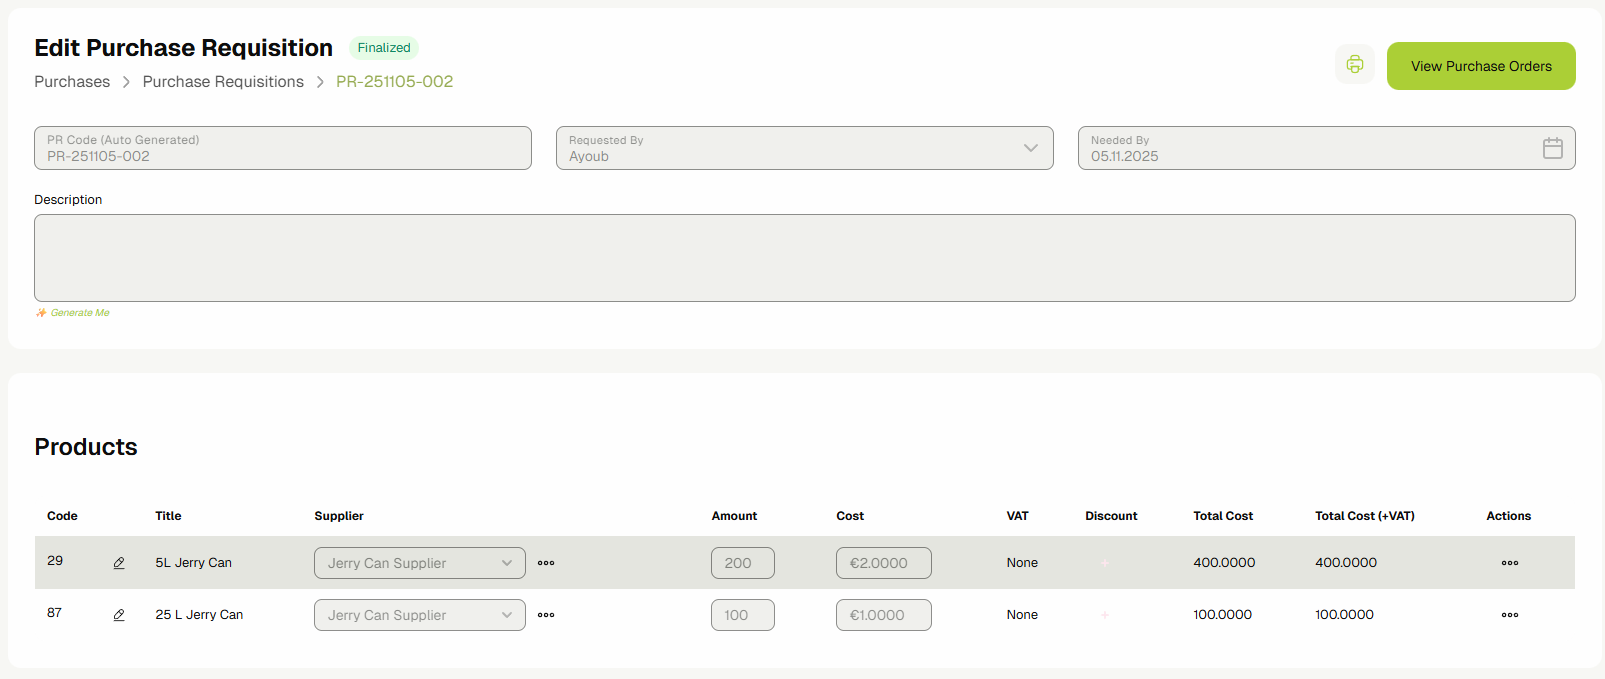
You are now in the Purchase Requisition Edit View.

You can also navigate to this view from the Purchase Requisitions table view by either:
- Clicking the link in the first column data cell.

- Clicking the menu icon in the Actions column and clicking Edit.
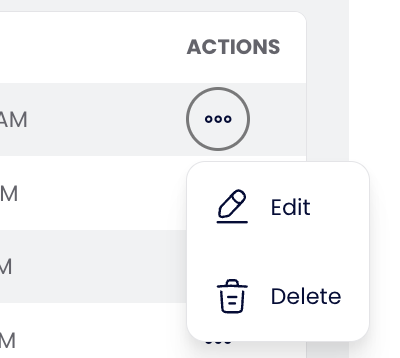
- Clicking the link in the first column data cell.
-
To be able to edit and update the Purchase Requisition, click the edit icon button. Edit the details and click Update Requisition.


-
To print the Purchase Requisition, click the print icon. To cancel it, click the trash icon.

-
To finalize the Purchase Requisition and create a Purchase Order, click Create POs.

-
The Purchase Requisition is now finalized and a PO has been created for it. To view it, you can click View Purchase Orders.
-
You will be navigated to the Purchase Orders main view with the POs based on the PR displayed.
-
You can move on and work on the PO from there.
Purchase Orders
-
Navigate to Purchase Orders by clicking on the Purchases link in the sidebar and selecting the Purchase Orders tab. To create a new Purchase Order, click the Create New dropdown and click Purchase Order.


-
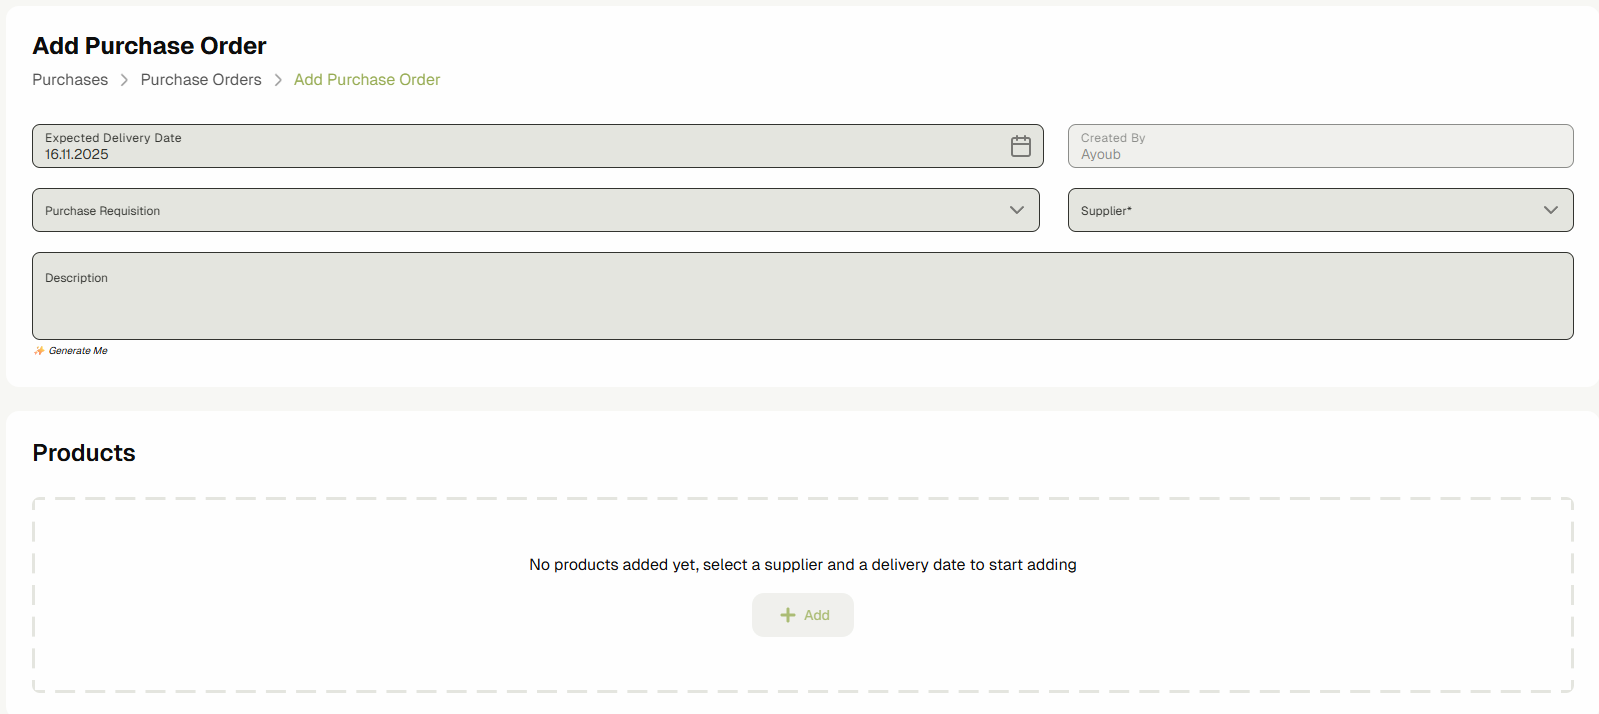
You will view the Purchase Order Creation Form.
-
Fill the inputs. For the Description input, you can also use the ✨ Generate Me button to autogenerate the text.

-
If you want to base this Purchase Order on a Purchase Requisition, select a PR and then a Supplier. You will see a popup asking if you would like to import the products from the PR. If yes, click Yes.

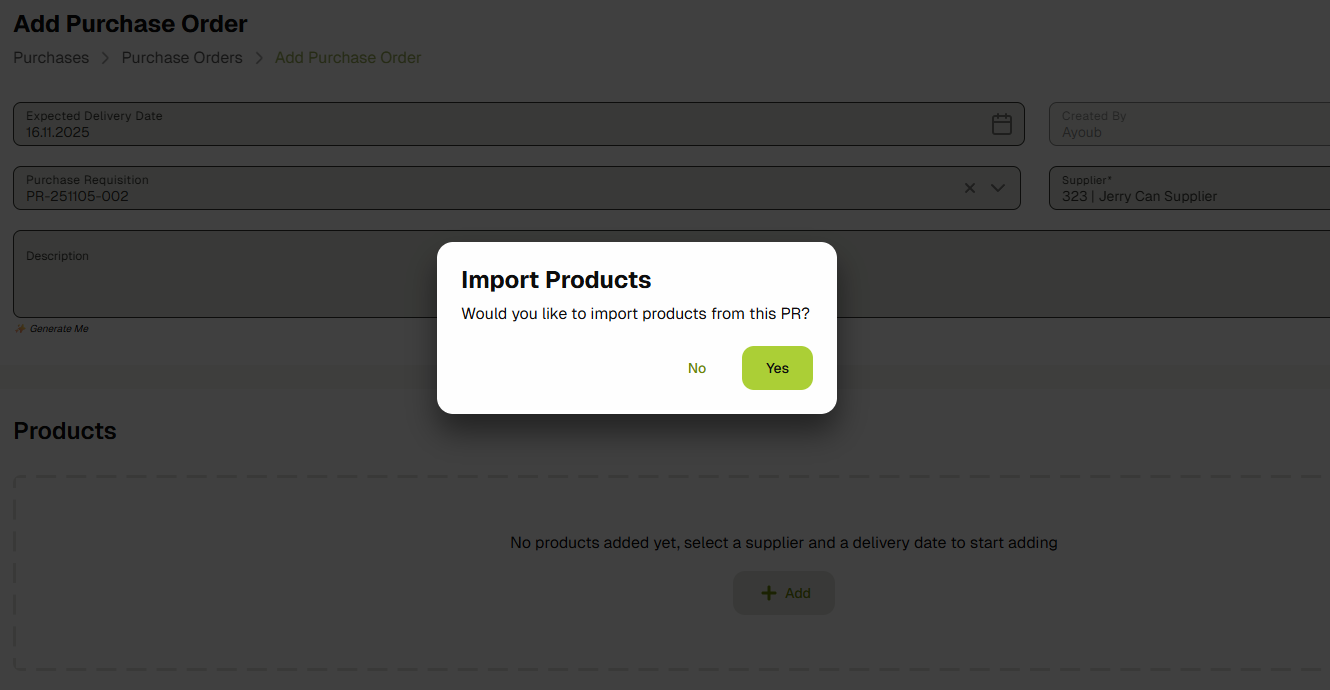
Once the table is populated, if a product has a discount you will find a checked checkbox in the Discount column, which means that the discount will be applied. If you do not want to apply the discount, uncheck it.
-
To manually add products, select a Supplier first and then click Add. A dialog will be opened. Select products and click add.


-
A table of the added products will appear.

-
In the Product Code column, click the edit icon button or open the menu to view the actions list and click Edit Material to edit the product. A dialog with a product form will be opened.

-
To edit the supplier-product relationship, click Edit Supplier-Relationship.
-
Click on the Amount and Cost data cells and type in them to update them, which will automatically update the total cost.

-
To remove a row from the products, click the menu icon under the Actions column to view the row actions, and click Remove.
-
Click Save Purchase Order to save your changes.

-
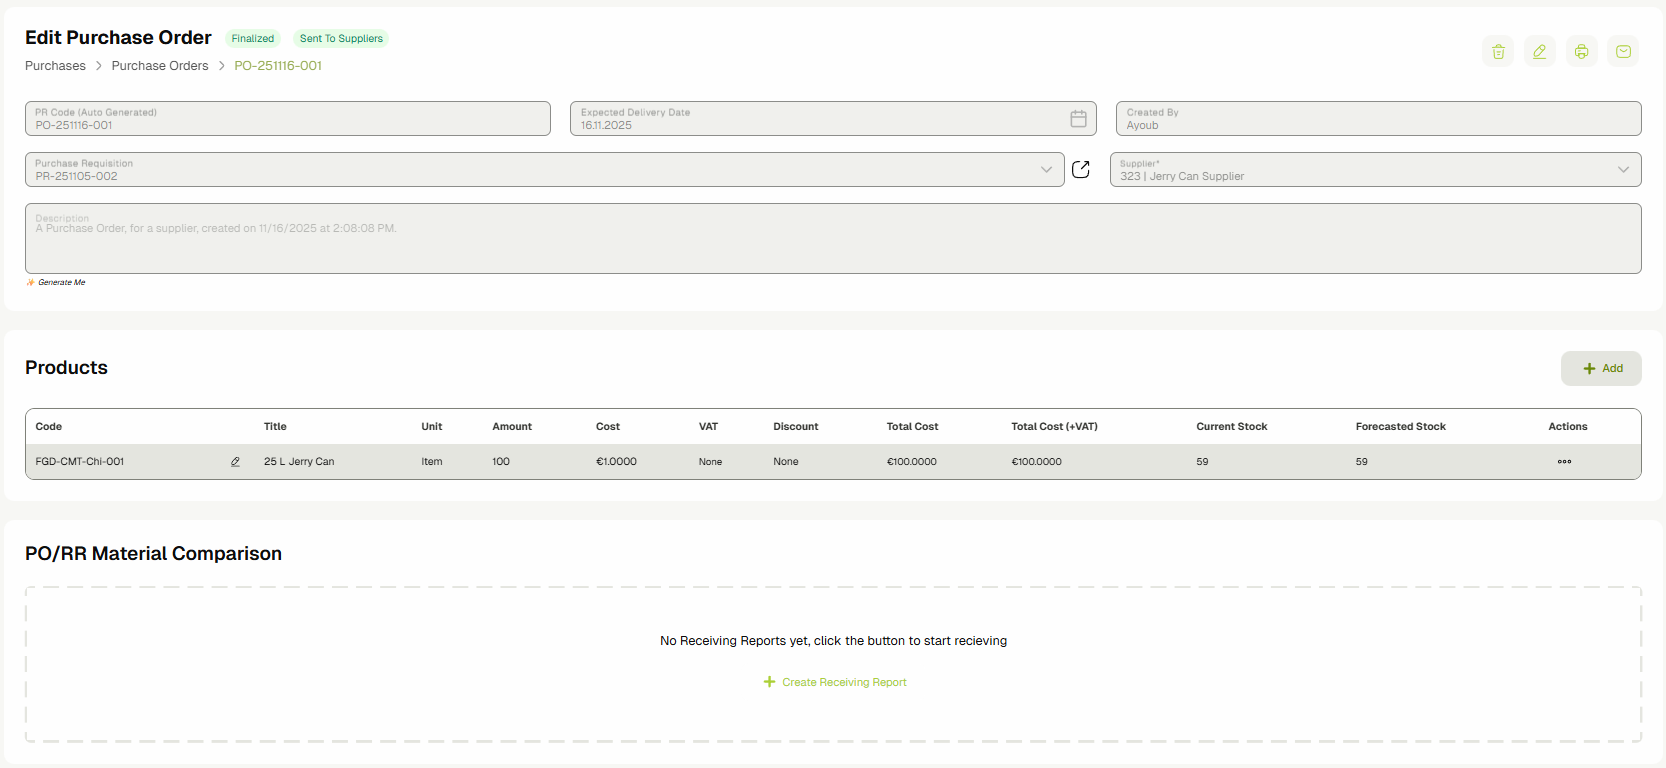
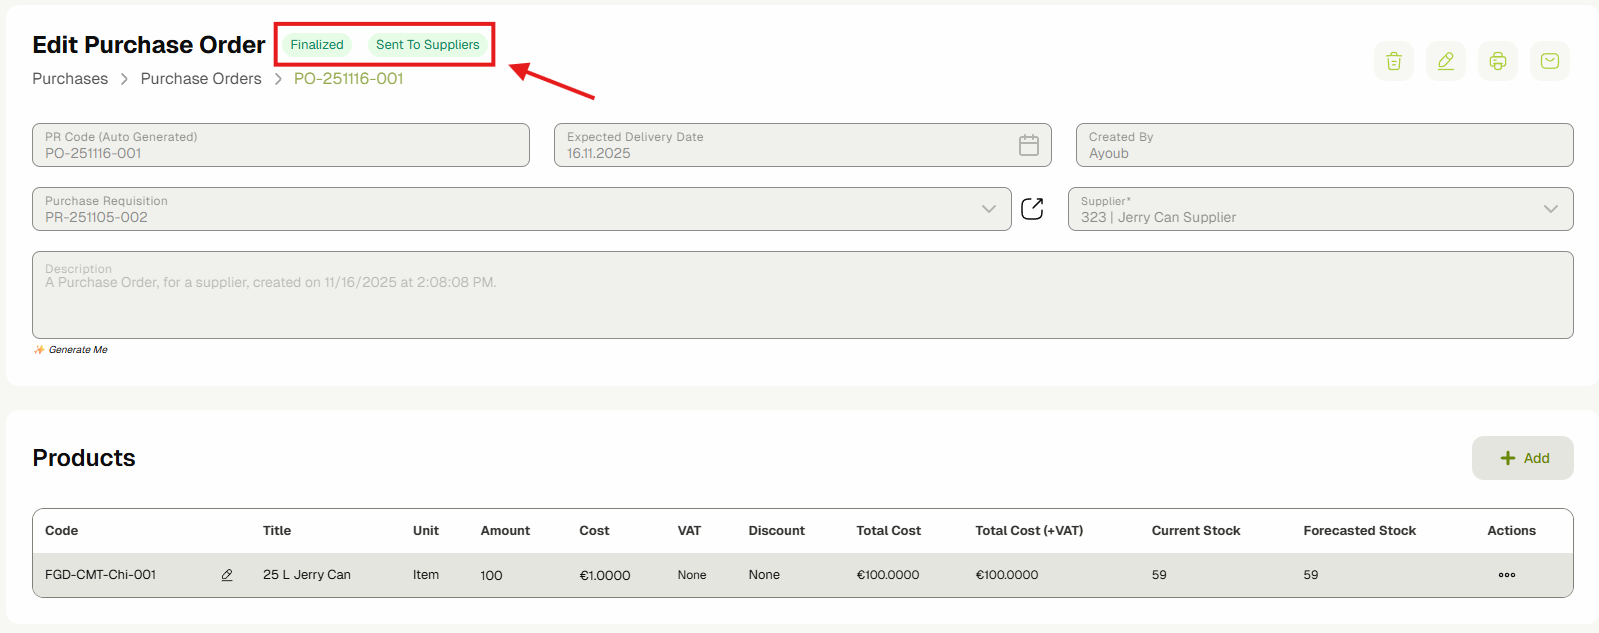
You are now in the Purchase Order Edit View.
You can also navigate to this view from the Purchase Orders table view by either:
- Clicking the link in the first column data cell.
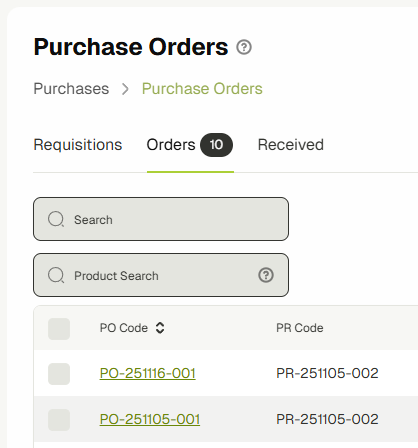
- Clicking the menu icon in the Actions column and clicking Edit.

- Clicking the link in the first column data cell.
-
To be able to edit and update the Purchase Order, click the edit icon button. Edit the details and click Update Purchase Order.


-
To print the Purchase Order, click the print icon. To cancel it, click the trash icon.
-
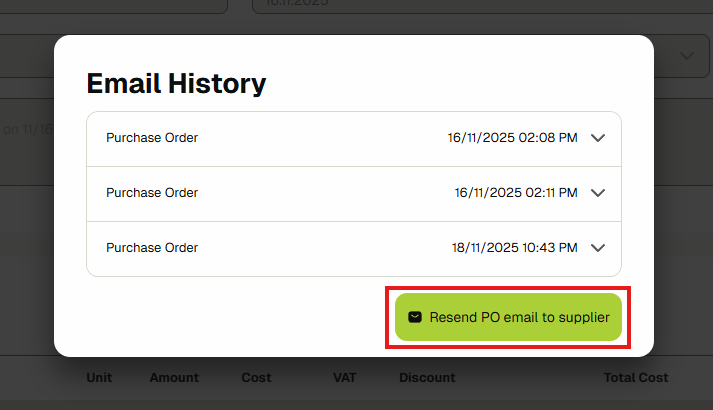
To send and view PO emails, click the mail icon button.
A modal will open up. Click Resend PO email to supplier to resend.

Click on the PO dropdown to view each email.

-
To create a receiving report for this PO, click Create Receiving Report.
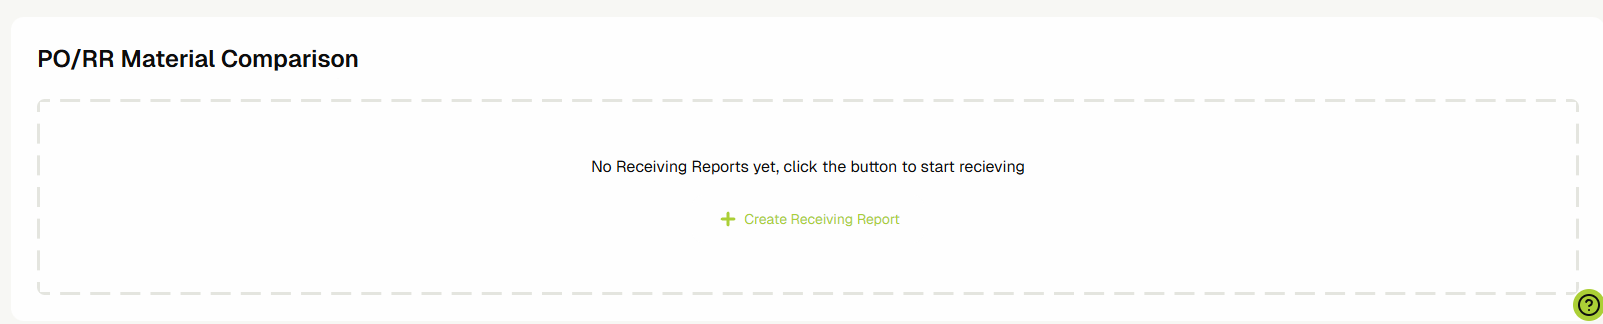
You will be redirected to the Create Receiving Report Form View with the PO and supplier already selected, and with the option to import the products from the PO.
-
You can move on to Receiving Reports from here.
Receiving Reports
-
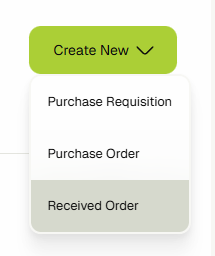
Navigate to Receiving Reports by clicking on the Purchases link in the sidebar and selecting the Receiving Reports tab. To create a new report, click the Create New dropdown and click Received Order.

-
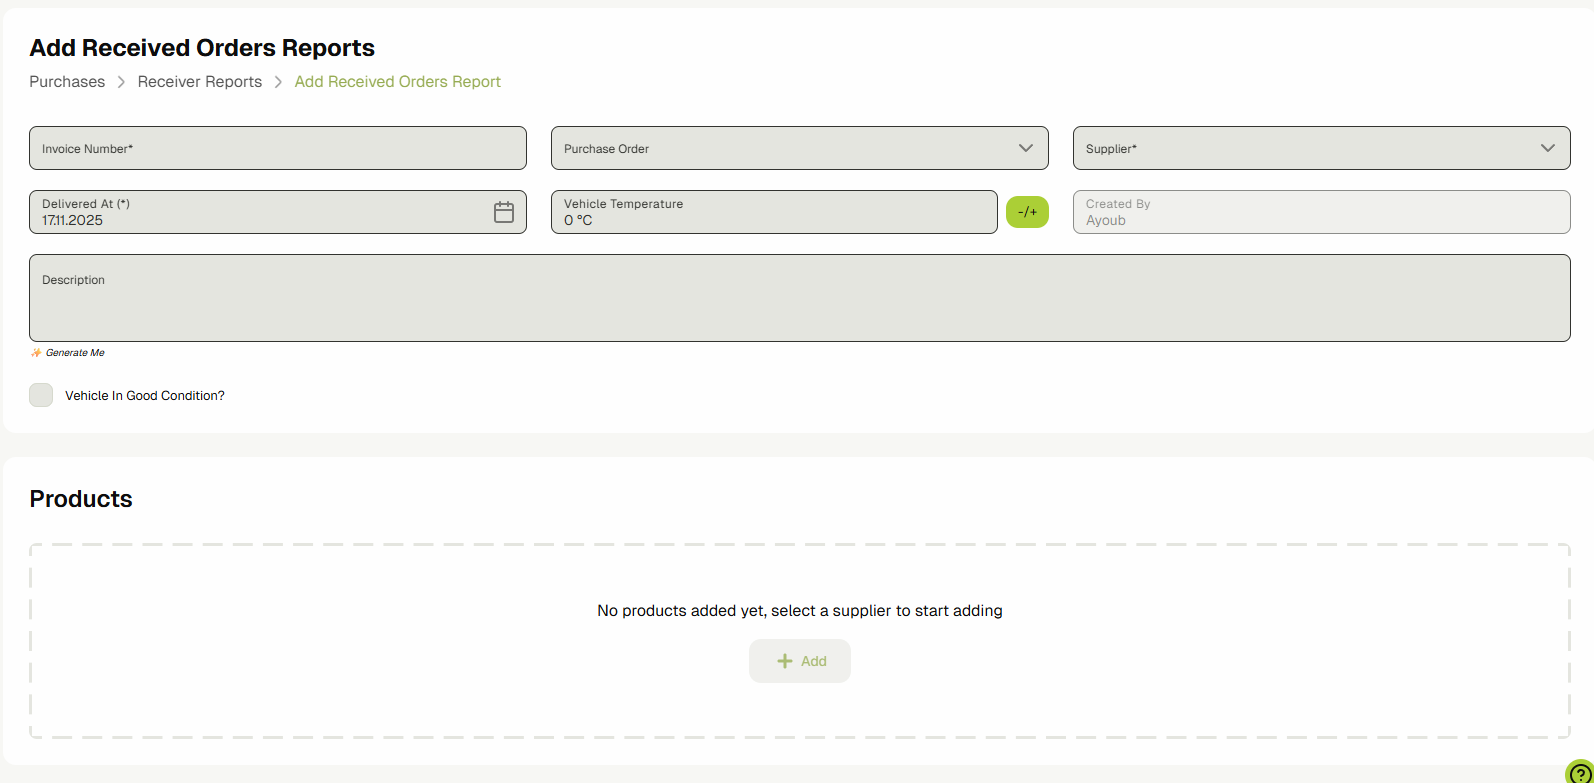
You will view the Receiving Report Creation Form.
-
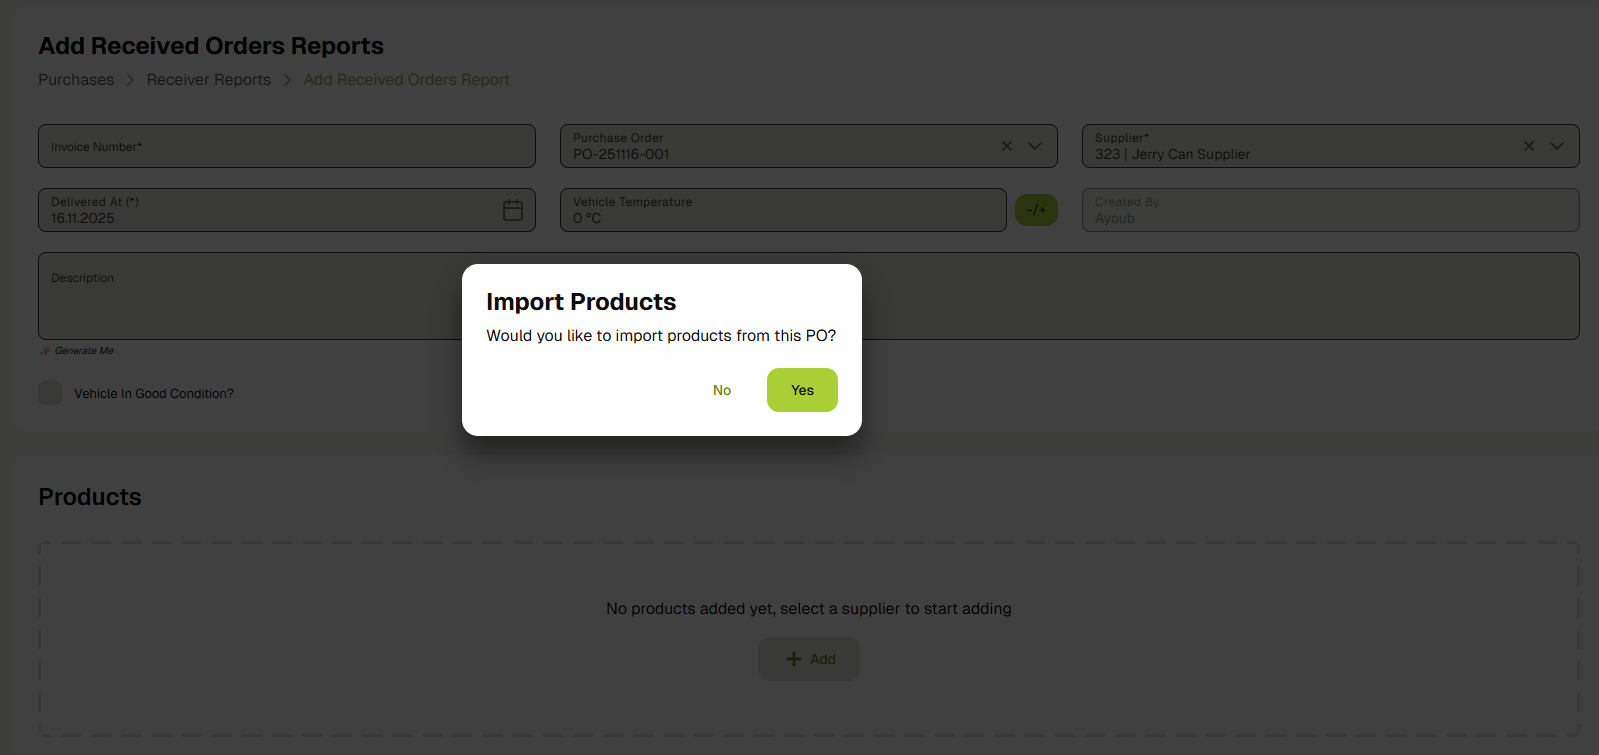
Fill the inputs. If you would like to base this report on a Purchase Order, select a PO. You will view a popup asking if you would like to import the products from the PO. If yes, click Yes.
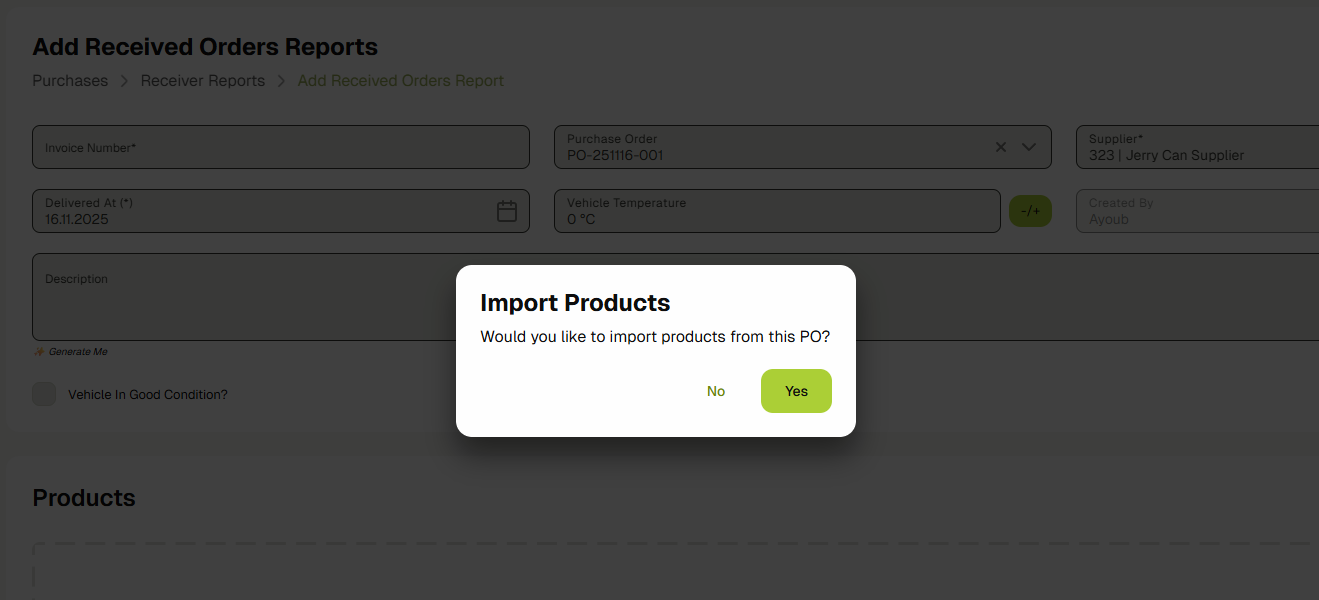

The Received Amount and Invoiced Amount will both be populated with the PO amount, and you can update them as you please.
-
Write a description or generate one by clicking ✨ Generate Me.
-
You can add products manually by clicking the Add button after making sure a Supplier is selected.

-
A table of the added products will appear.

-
In the Product Code column, click the edit icon button or open the menu to view the actions list and click Edit Material to edit the product. A dialog with a product form will be opened.

-
To edit the supplier-product relationship, click Edit Supplier-Relationship.
-
For Lot Label, Temp, Packaging, Batch no, Barcode, Exp. Date, Amount, and Cost, click each one's respective cell to be able to type or update them.
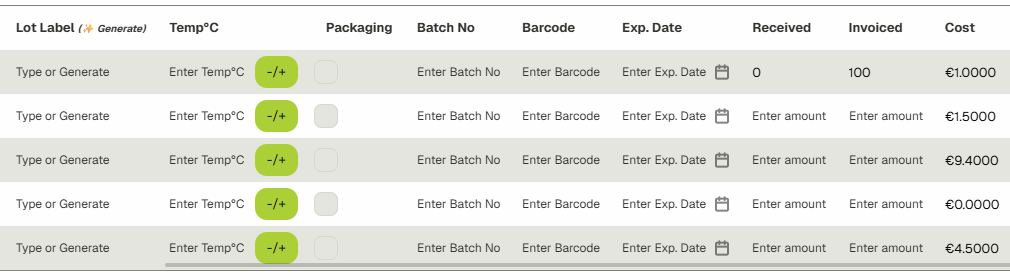
-
For Lot Labels, you can click (✨ Generate) to generate lot labels for all the products.

-
Click the menu icon under the Actions column to view the row actions. To remove a row from the products, click Remove.
-
Click Save Receiving Report to save your changes.

-
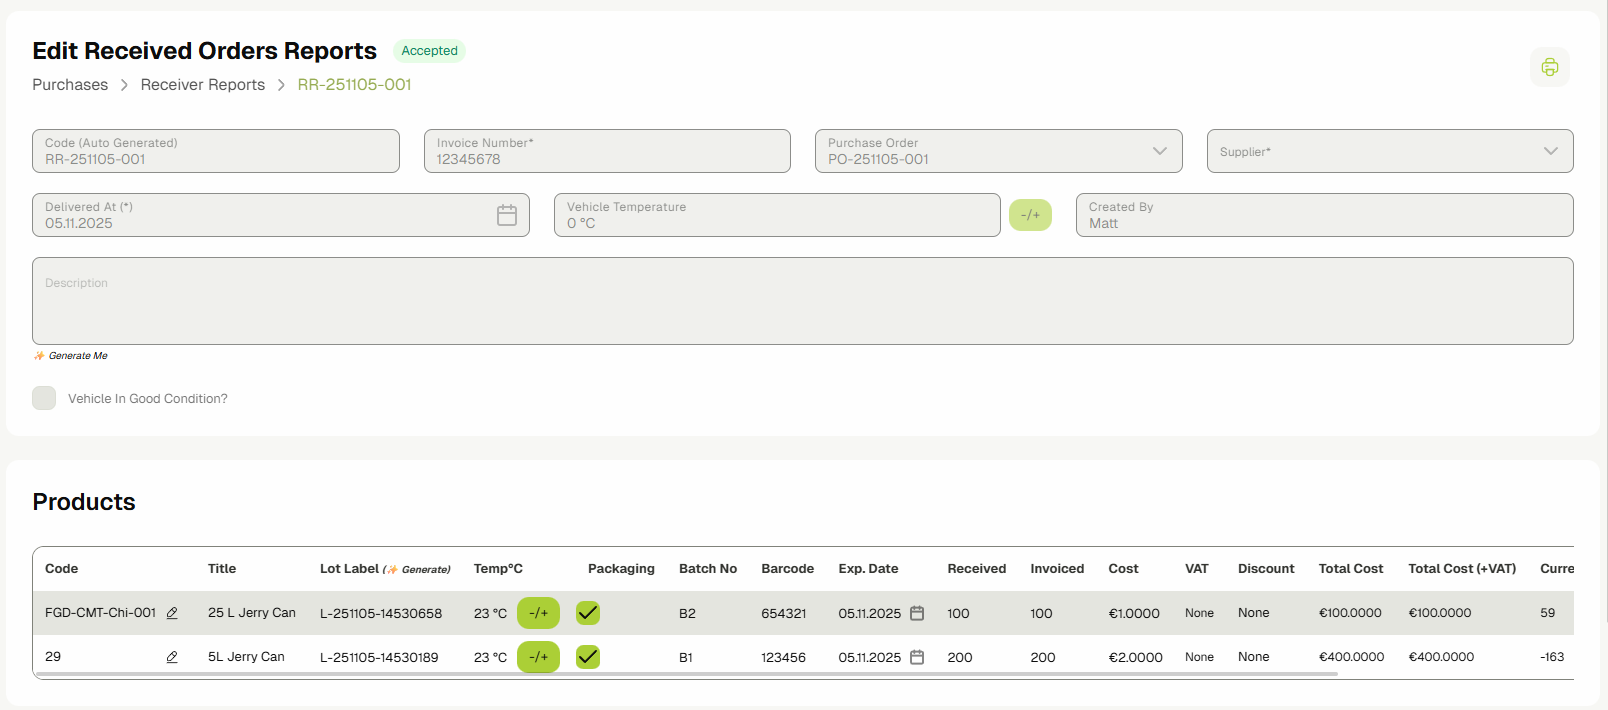
You are now in the Receiving Report Edit View.
You can also navigate to this view from the Receiving Reports table view by either:
- Clicking the link in the first column data cell.
- Clicking the menu icon in the Actions column and clicking Edit.

- Clicking the link in the first column data cell.
-
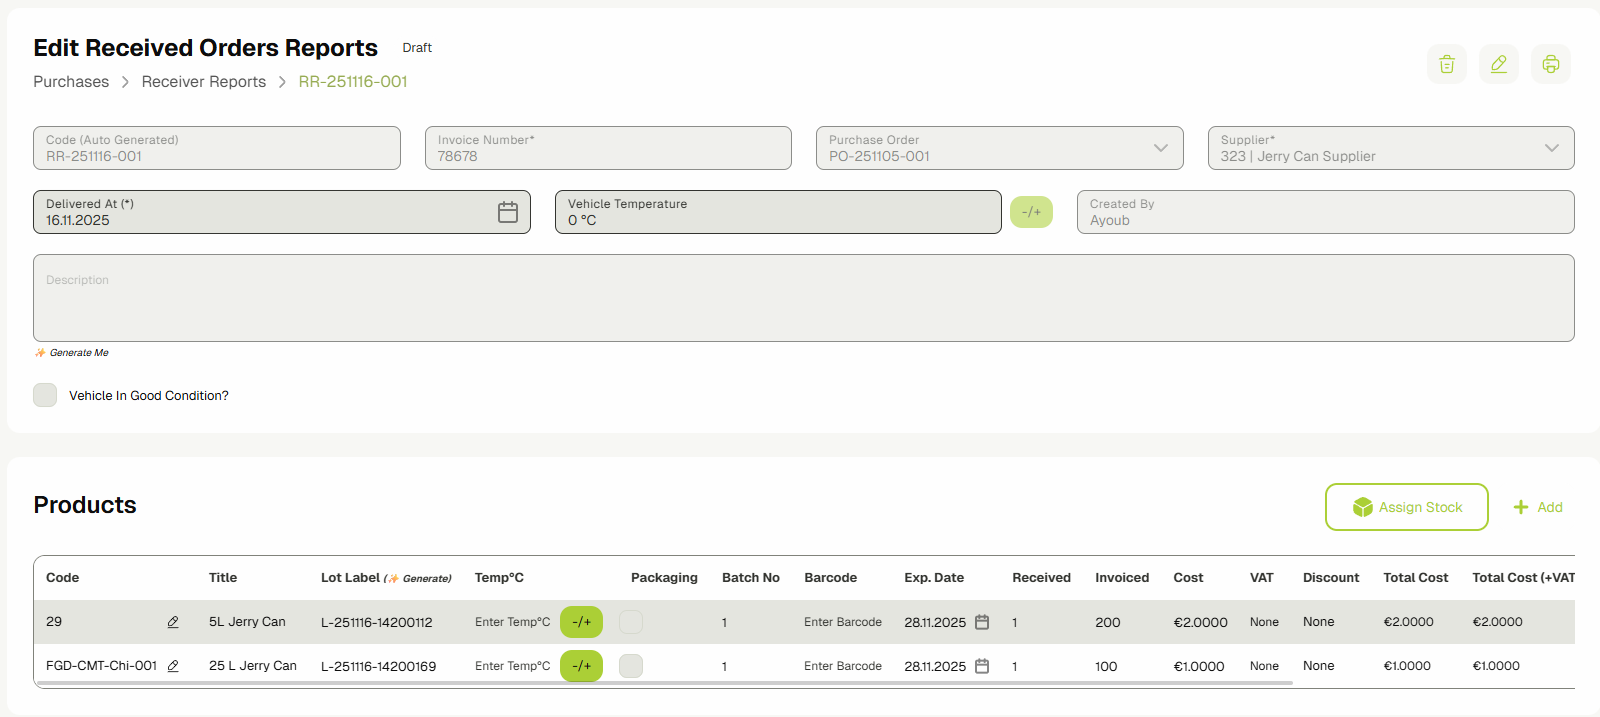
To be able to edit and update the Receiving Report**,** click the edit icon button. Edit the details and click Update Receiving Report.


-
To complete and add the stock to the inventories, click Assign Stock.

You will view this popup. Select the inventories and click Add Stock.

-
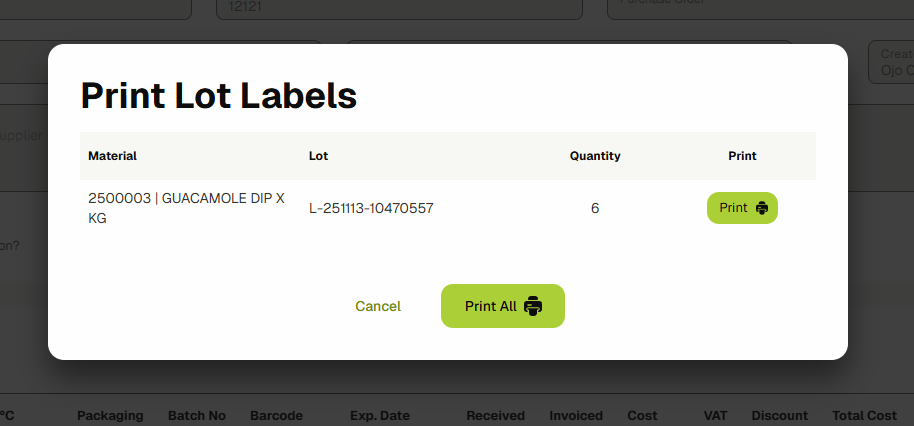
You will see a popup asking you if you would like to print the new lot labels. If yes, click Print or Print All.
-
The Receiving Report is accepted.
-
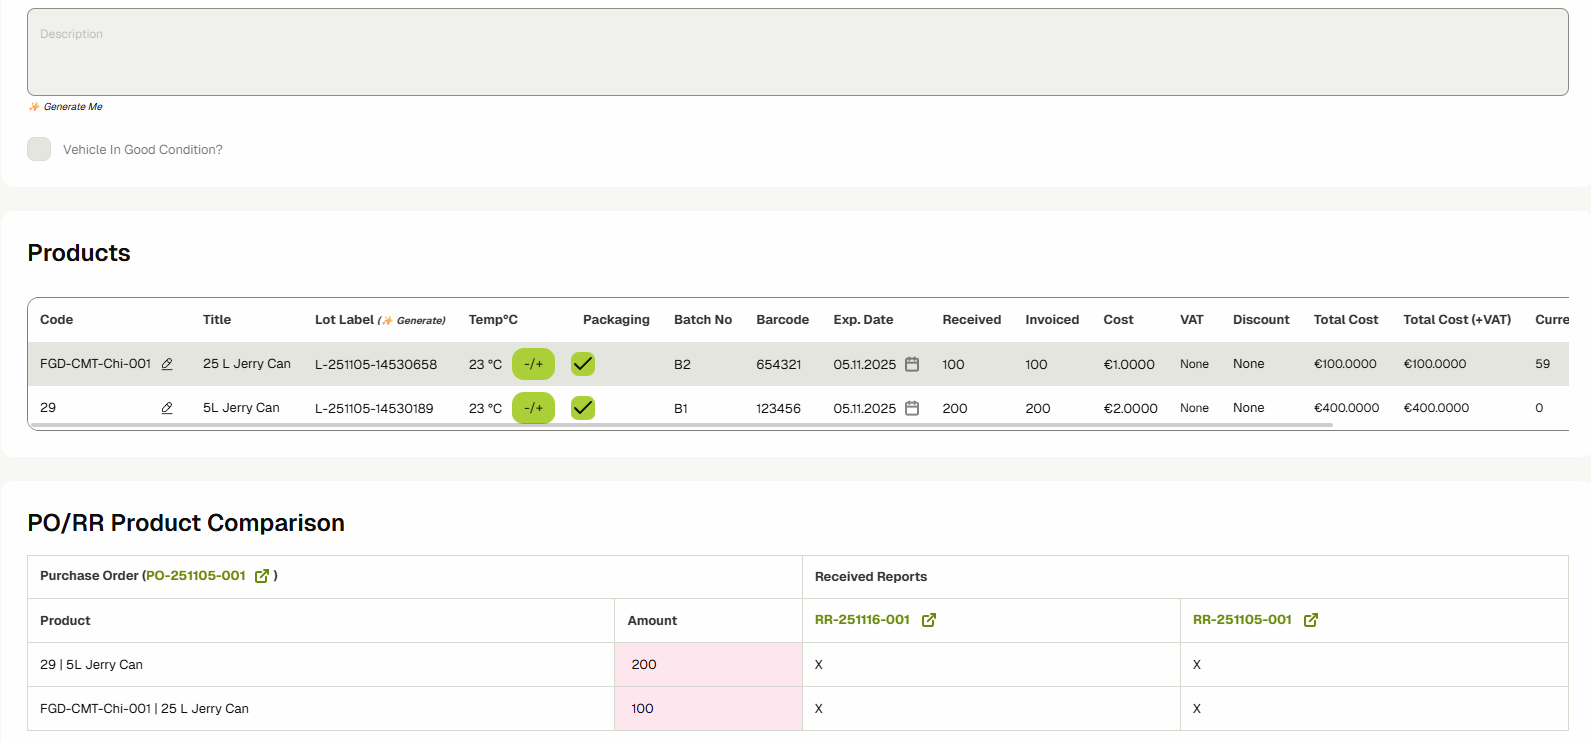
If the RR is linked to a Purchase Order, you will be able to view the product comparison in the last section of the page. Click the Purchase Order code to view the PO.

-
You can also create a Receiving Report from the PO view by clicking on Create Receiving Report.

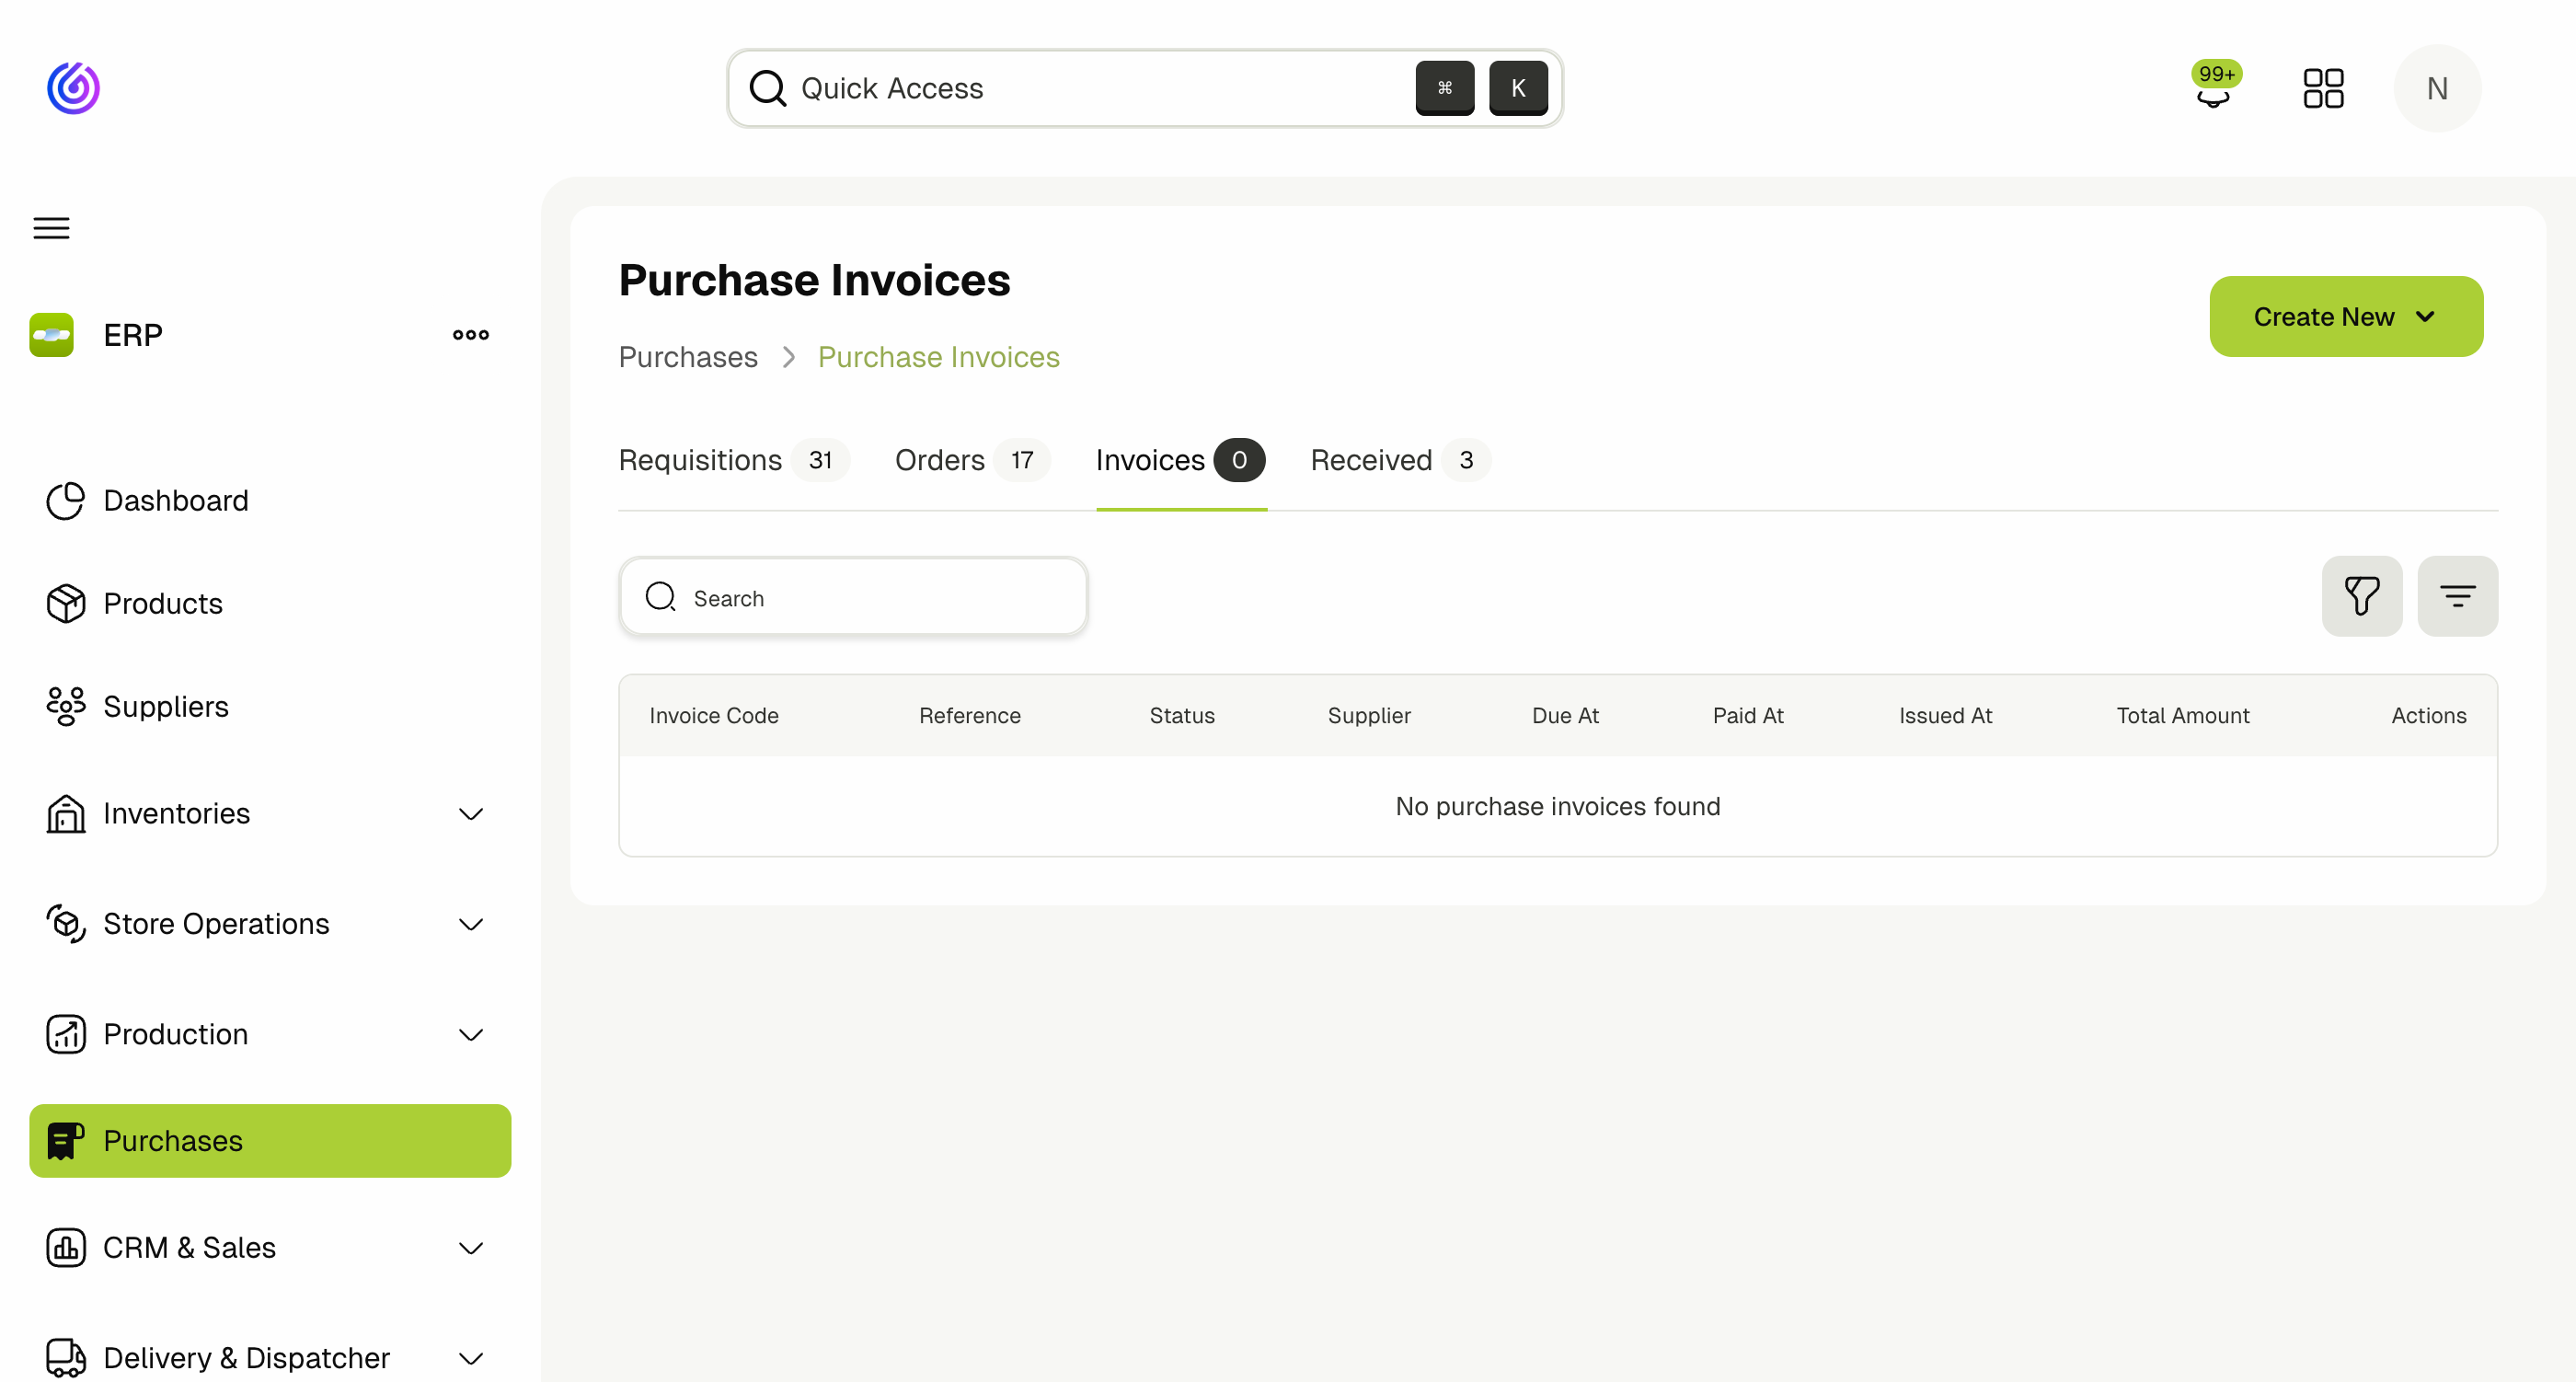
Purchase Invoices
Purchase Invoices allow you to record and track supplier invoices against your Purchase Orders and Receiving Reports. This helps reconcile what you ordered, what you received, and what you were billed for.
Creating a Purchase Invoice
- Navigate to Purchases and select the Invoices tab.
- Click Create New and select Purchase Invoice.
- Fill in the invoice details:
- Invoice Number — the supplier's invoice reference.
- Invoice Date — the date on the supplier's invoice.
- Supplier — select the supplier who issued the invoice.
- Currency and Exchange Rate — set if the invoice is in a foreign currency.
- Due Date — when the invoice payment is due.
- Link the invoice to existing Purchase Orders and/or Receiving Reports to cross-reference delivered quantities with invoiced amounts.
- Add Invoice Items — either manually or imported from linked POs/RRs.
- Attach the original invoice document if needed.
- Click Save to create the invoice.
Invoice Table Columns
| Column | Description |
|---|---|
| Invoice Code | System-generated invoice identifier |
| Reference | The supplier's invoice number |
| Status | Current status of the invoice |
| Supplier | The supplier who issued the invoice |
| Due At | Payment due date |
| Paid At | Date the invoice was paid |
| Issued At | Date the invoice was issued |
| Total Amount | Total amount on the invoice |
Managing Purchase Invoices
From the invoices list, you can:
- Search for invoices by code, reference, or supplier.
- Filter invoices by status, date range, or supplier.
- Edit an invoice by clicking the edit action in the Actions column.
- Delete a draft invoice by clicking the delete action.
Material & Purchase Requisition Integration
ERP seamlessly connects material requisitions with purchase orders, automating procurement and ensuring efficient stock management. This guide covers how material requisitions can trigger alerts of insufficient stocks and trigger purchase requisition creation.
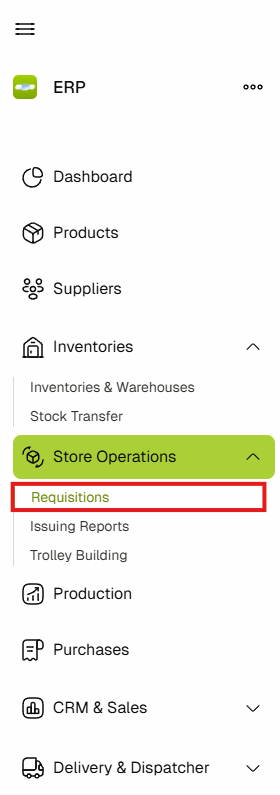
First, navigate to the Material Requisitions page by expanding Store Operations and clicking on Requisitions from the sidebar.
A table of all material requisitions will be displayed on the screen. In order to check for stock shortage, filter the results by a specific date range.
It is important to select the date range, otherwise no check will be made for missing materials.

Once a date range has been selected, the system performs a check on the missing materials from requisitions that fall within the specified date range. If there are missing materials, an alert will be displayed at the top of the page prompting you to generate a purchase requisition for the missing materials.
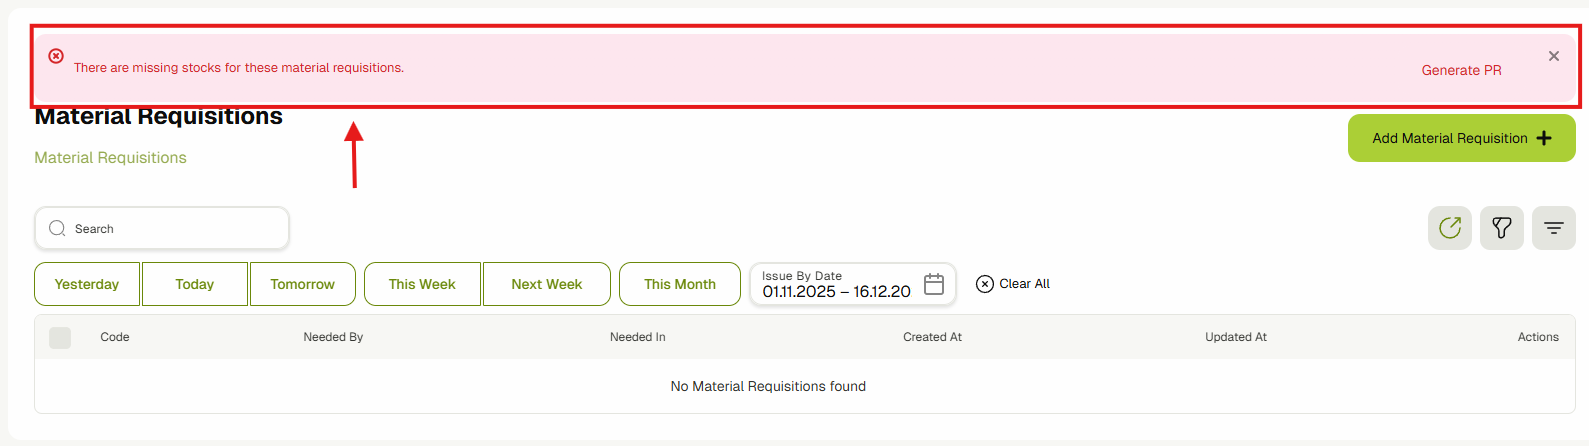
Click on Generate PR to navigate to the purchase requisition generation page, which will display the materials that are missing alongside some details for each material.
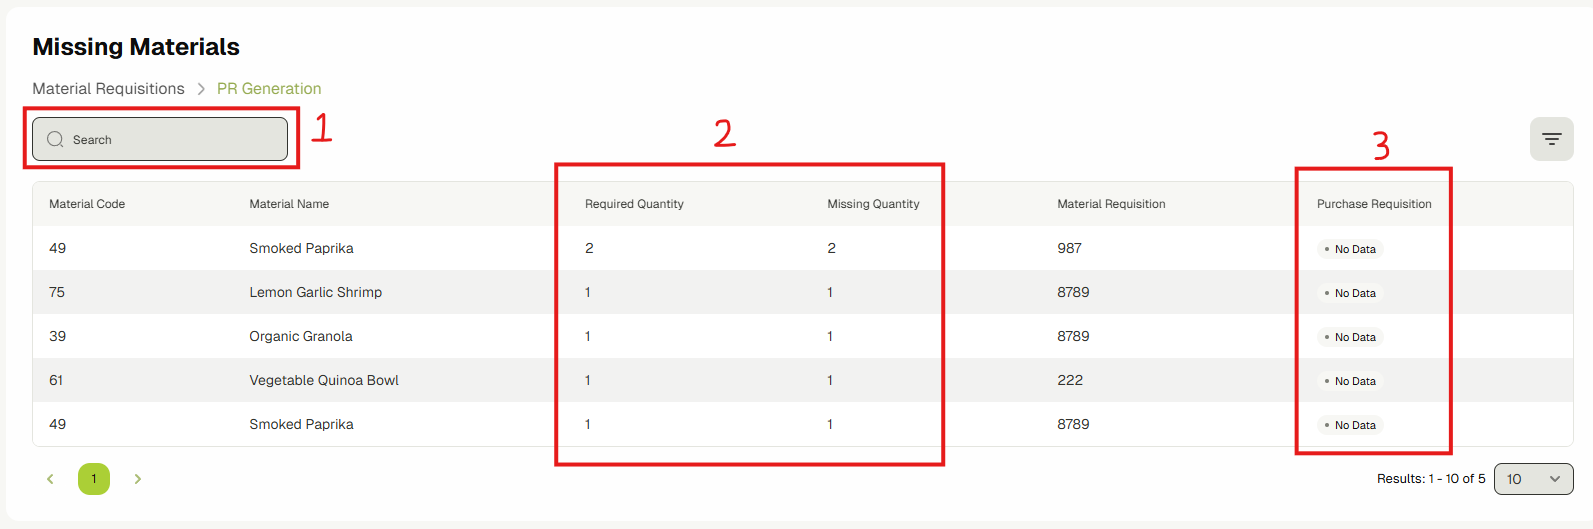
The first section in this page shows the missing materials by the time of its relative material requisition's date.
- Use the Search field to search through the missing materials within the given date range.
- REQUIRED QUANTITY represents the total quantity that is needed by the material requisition; MISSING QUANTITY represents how much of the total quantity is missing from stock.
- Some materials might already be linked to a PURCHASE REQUISITION but have had their quantities updated. If there is a shortage, they will appear again in this table.
The second section controls how purchase requisitions will be generated.

A default PR can be defined to create a purchase requisition for all materials that are found in the missing materials above.
- You can either define a Needed By date, or select an existing Purchase Requisition.
- If a date is selected for Needed By, the system will generate a new purchase requisition.
- If an existing Purchase Requisition is selected, the system will append the missing quantities of those materials to it.
You can also choose to generate purchase requisitions for specific material requisitions, materials, or categories of materials by clicking on PR for Specific Materials.
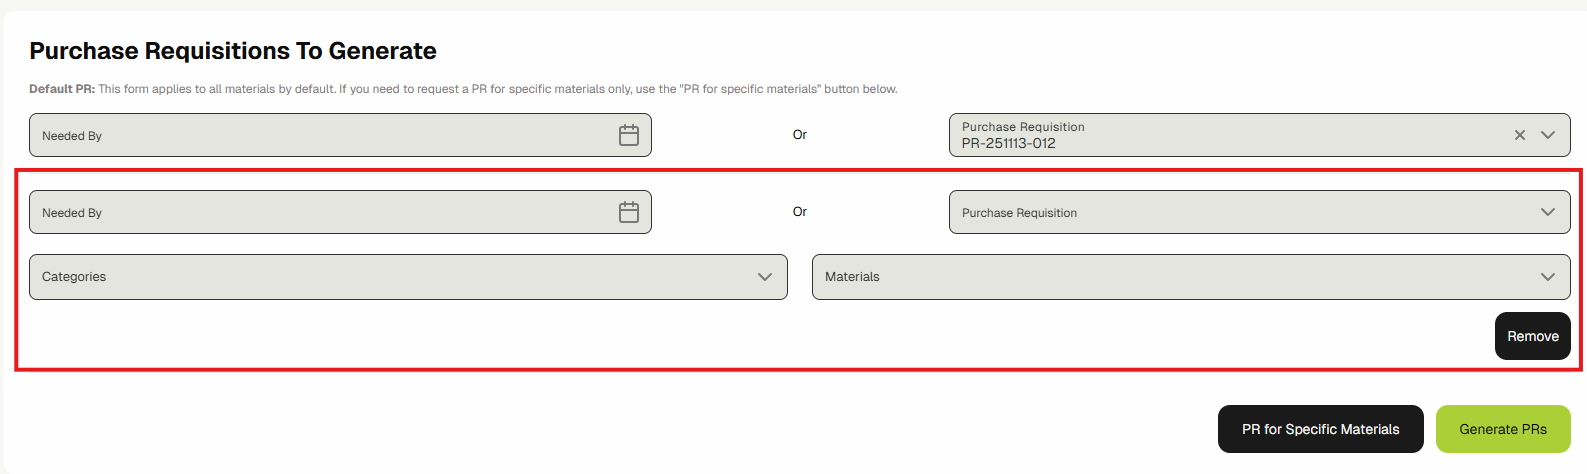
This will add a new entry for a separate purchase requisition that will be generated based on the given parameters. You can add multiple entries to generate multiple purchase requisitions.
Once everything is good, press Generate PRs and the system will navigate you to the purchase requisitions upon successful completion.
Integration with Stock Alerts
When checking for missing stock from material requisitions, the system takes into account the stock alert conditions that might be triggered when issuing. For more details on stock alerts, please refer to the Stock Alerts section.
Supplier Specific Details
Some suppliers have a minimum order amount and pack units configured for the materials they supply, which will be taken into account when generating purchase requisitions from material requisitions.
In the following example, material FETA CHEESE is supplied by M&Z LTD with the following supply details.

- Pack Units or KG per pack set to 20.
- Min Order Amount set to 50.
This means that the supplier can supply a minimum of 50 kg of FETA CHEESE, and that each pack contains 20 kg.
Let's create a material requisition for this material. First, we will check the stock of FETA CHEESE by copying its specific material code and searching for it inside the calendar view ( Inventories > Calendar View ).

We can see that the stock is 64. To test how the integration generates a purchase requisition while taking the supplier details into account, there are 2 possible scenarios.
- Requesting between 65 and 115 will cause the missing stock to be between 1 and 50. This will generate a purchase requisition for 60 at all times, which is forced by both the minimum order amount being 50, and the pack units of 20 rounding up the stock to 60.
- Requesting above 115 will be rounded up to match the configured pack units.
If both the Min Order Amount and Pack Units are set to 0, no round up will occur and whatever amount is missing will be the final amount put in the purchase requisition.
Notes
- Only materials of types that have suppliers are shown in this page; other missing materials will be filtered out automatically because they can't be purchased.
- If a material has a type that accepts suppliers, but it doesn't have a supplier, it will be skipped when generating the purchase requisitions, but will still be shown in the missing materials table.
- The same alert will be shown inside the material requisition page in case that specific requisition is missing material stocks.
Sending Purchase Order Emails to Suppliers
OneAvant allows users to send Purchase Orders directly to suppliers via email, including a secure link to a hosted PDF version of the PO. The system provides a streamlined interface to manage communication, view the history of sent emails, and resend them when needed—ensuring suppliers always have easy access to the latest order details.
Tracking the Email Status of Purchase Orders
The system tracks Purchase Order emails through the Email Status, which is visible in the table view. If the column is not visible, users can enable it using the column selector to monitor delivery status at a glance.
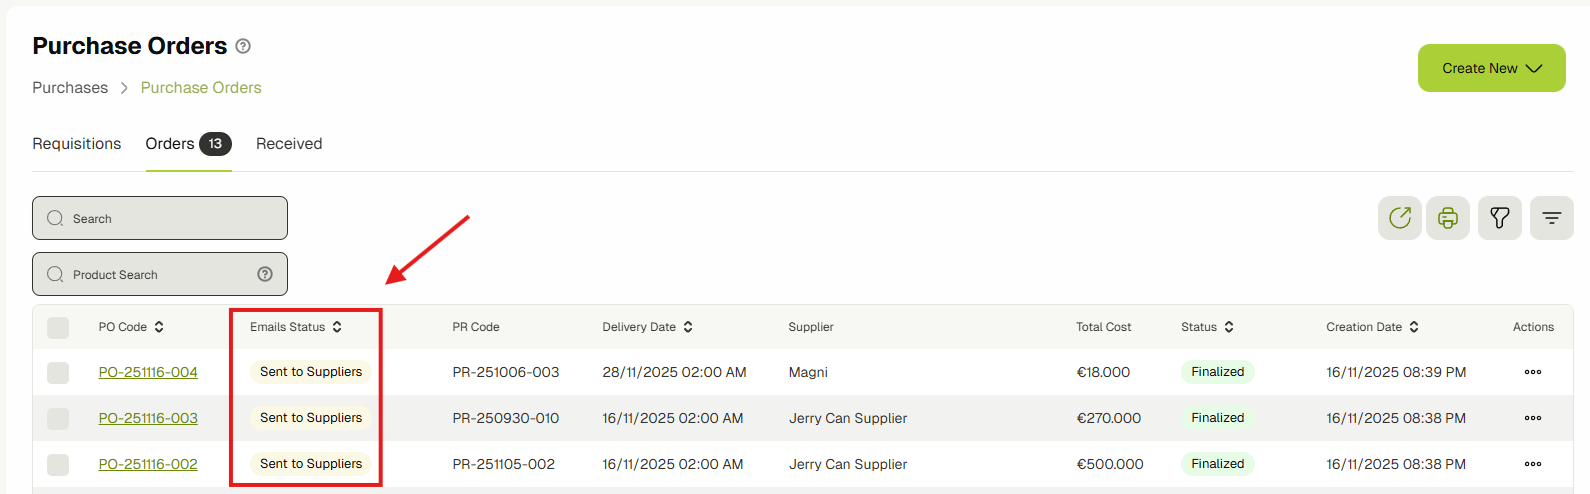
The Email Status can be one of the following:
- None – no email has been sent yet
- Sent to Suppliers – the PO email has been sent but not yet viewed
- Viewed by Some Suppliers – at least one supplier has viewed the PO
- Viewed by All Suppliers – all recipients have viewed the PO
Sending Emails to Suppliers
To send Purchase Order emails, navigate to a draft or finalized Purchase Order and click the email icon. A dialog will open showing a history of any previously sent emails and prompting the user to confirm sending the emails to suppliers.

Once emails are sent, the system will automatically finalize the Purchase Order by changing its status to Finalized and updating the email status to Sent to Suppliers.
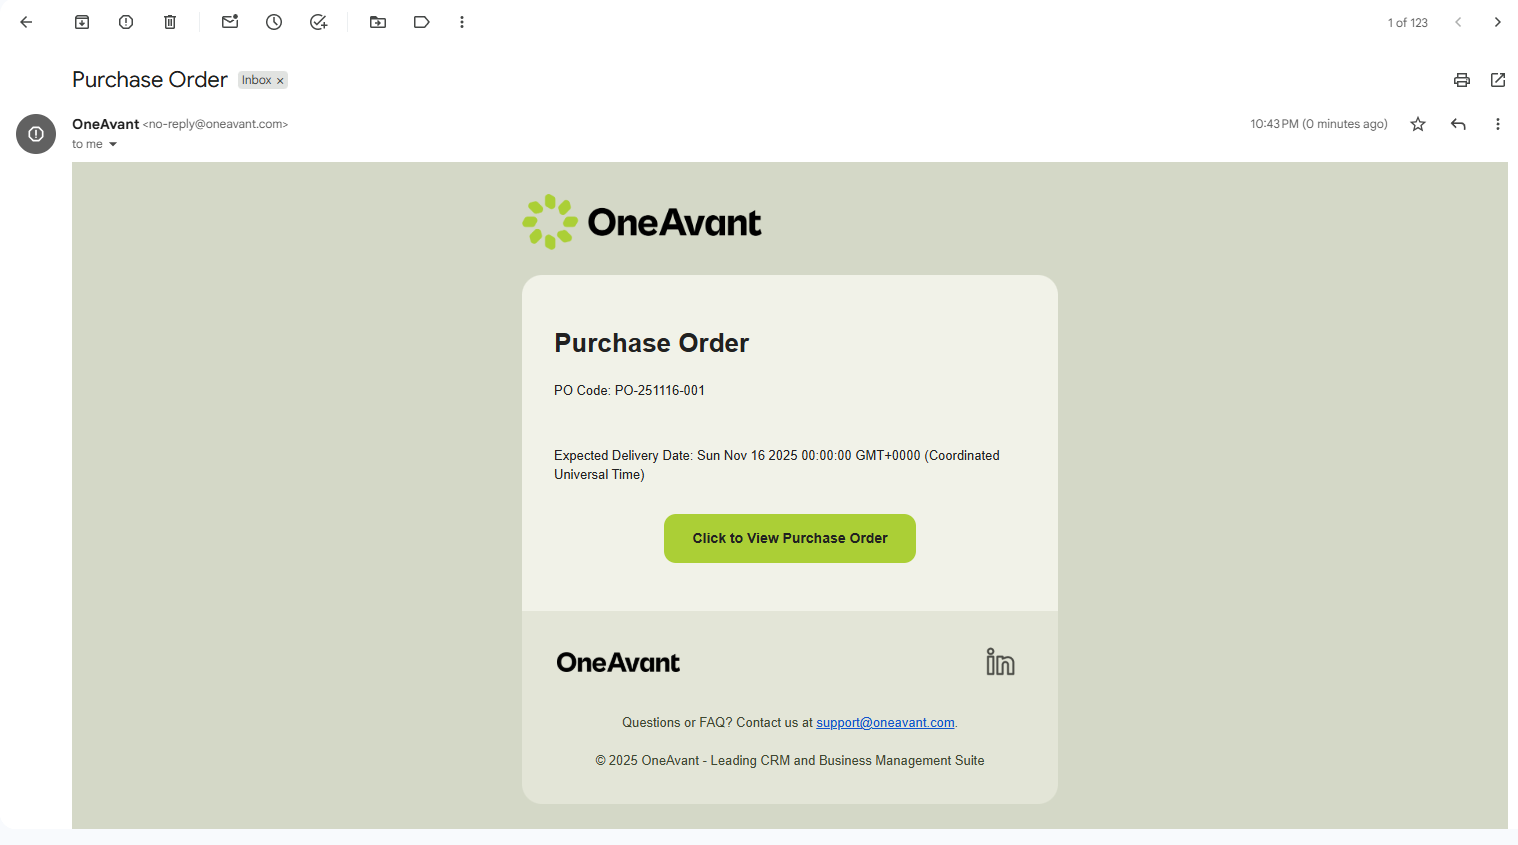
Viewing Sent Purchase Order Emails
Suppliers will then receive an email with a "Click to View Purchase Order" button. Clicking this link opens a hosted page displaying the Purchase Order PDF. The system will automatically update the email status in the PO view to either Viewed by Some Suppliers or Viewed by All Suppliers, depending on how many recipients have opened the link.