Store Operations
Issuing Reports & Material Requisitions (v2 BETA)
In our latest update, we have streamlined the experience of managing and operating issuing reports and material requisitions, which focuses on ease of access, performance, and support for mobile devices.
This article will dive into how to enable the new view and operate it.
Getting Started
Accessing the New View
After opening a Material Requisition or an Issuing report, you will find on the top left corner a button that enables the new view, which will only enable the view in the browser that you are using, so if you are using multiple devices, you are required to switch for each one.
You can switch to the original view from this button in the same location.
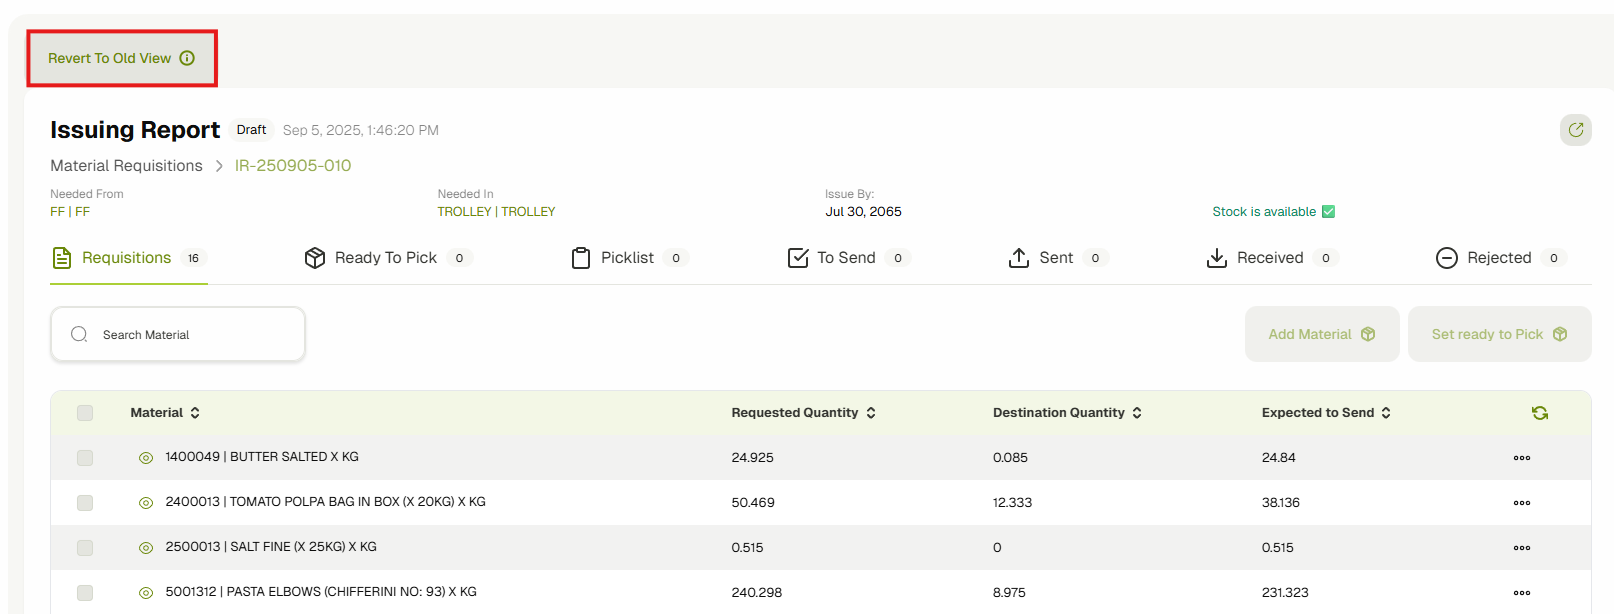
This view will be the default once it is out of BETA.
Information Overview
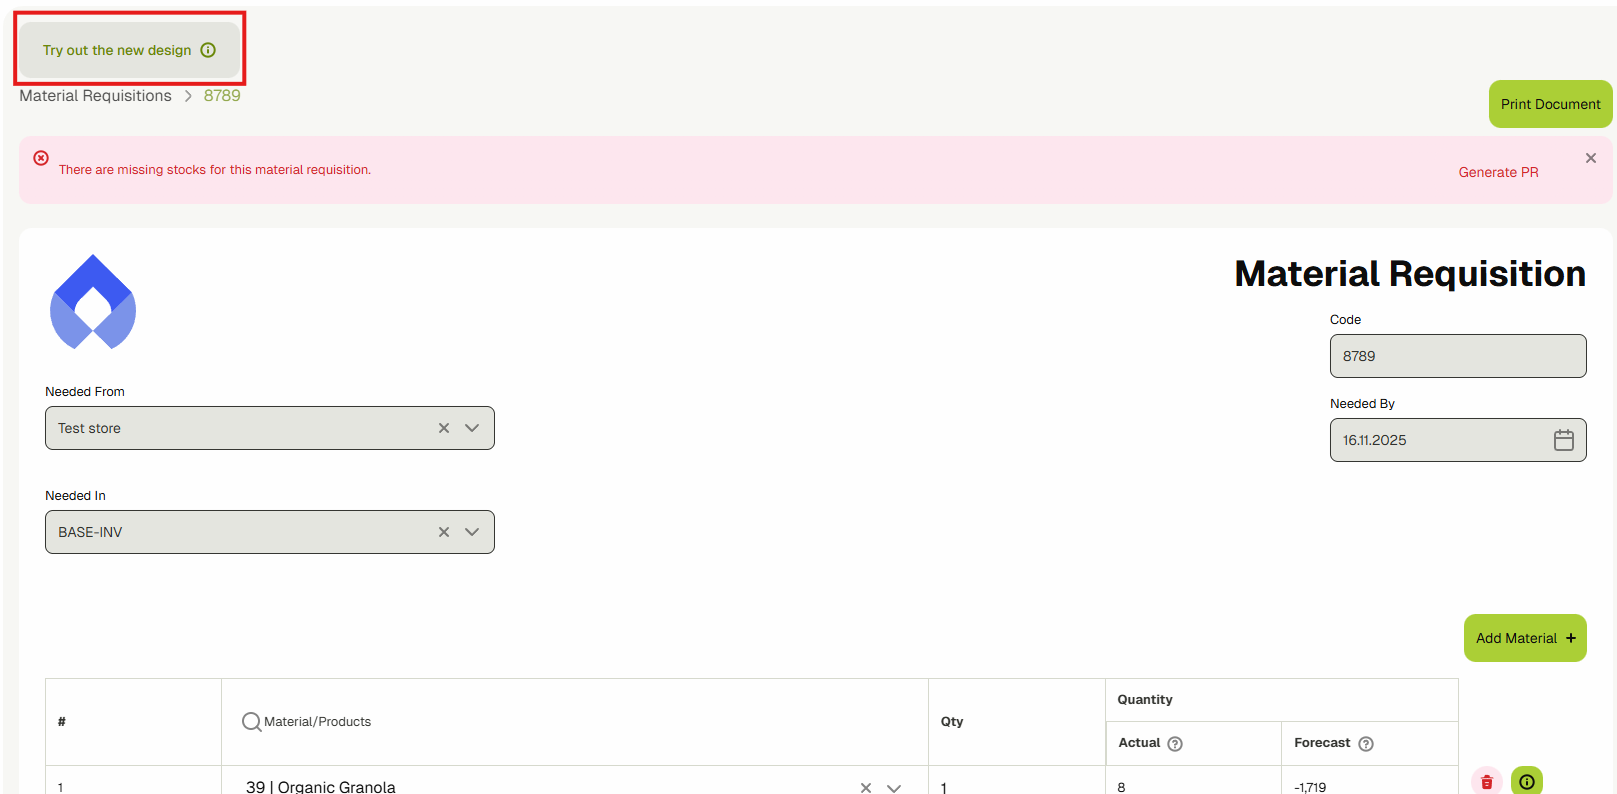
In the top section, you will find general information regarding the issuing report/material requisition, including the source inventory ("Needed From"), the destination inventory ("Needed In"), and the issue date ("Issue By").
Also, it runs a check if the stock of the materials listed in the Requisitions is available at the "issue by" day, if not it will show a button which will take you to a form to create a Purchase Requisition for them.

Operations Available
3 types of operations can be done on the document: Requisition, Picking, and Sending. If the approval setting is enabled, the 4th type will be Receiving & Rejecting.
These operations can be represented in the following tabs:
- Requisition: in the Requisitions tab
- Picking: in both the "Ready to Pick" and "Picklist" tabs.
- Sending: in the "To Send" tab, and overviewed in the "Sent" tab.
- Receiving & Rejecting: Starts in the "Sent" tab to receive or reject, and then overviewed in "Received" and "Rejected".
Permissions & Inventories Access Control
Permissions
There is permission required for each type of operation, in which users can be permitted through their role in the Settings > Users > Roles Management. If the user doesn't have the required permission to operate, they will see that the operation button is disabled, and once hovered over or clicked on will show which permission is required to perform the action as shown below.
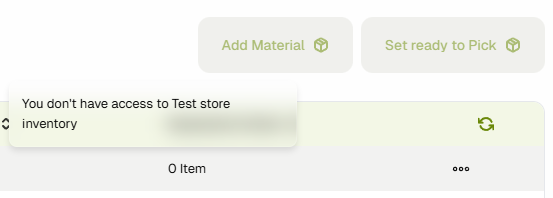
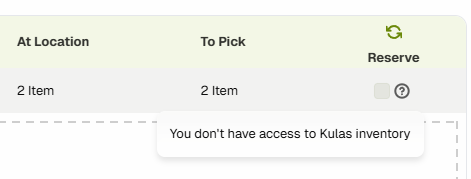
Inventories Access Control
The user must have been assigned to the inventories to perform the related actions, for example, if the user is operating on the issuing inventory materials, they will need to be assigned and have access to it; likewise, to the receiving inventory. The user will be prompted whenever they don't have access similar to the permissions above, as shown in the following screenshot.
Permissions & Access Control are both being checked simultaneously in most actions.
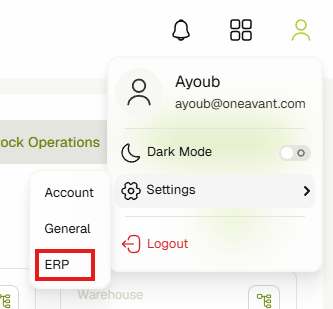
Settings
Some settings modify the behaviour of the document operations; these settings can be accessed from the top right corner under the profile menu:
Setting: Production > Issuing Reports > Approval
This setting enables the "Receiving & Rejecting" Operations.

Setting: General > Picklists > Picklist Reservation Verification
This enables the verification through QR scanning of the materials when reserving stocks in the picklist & when receiving.
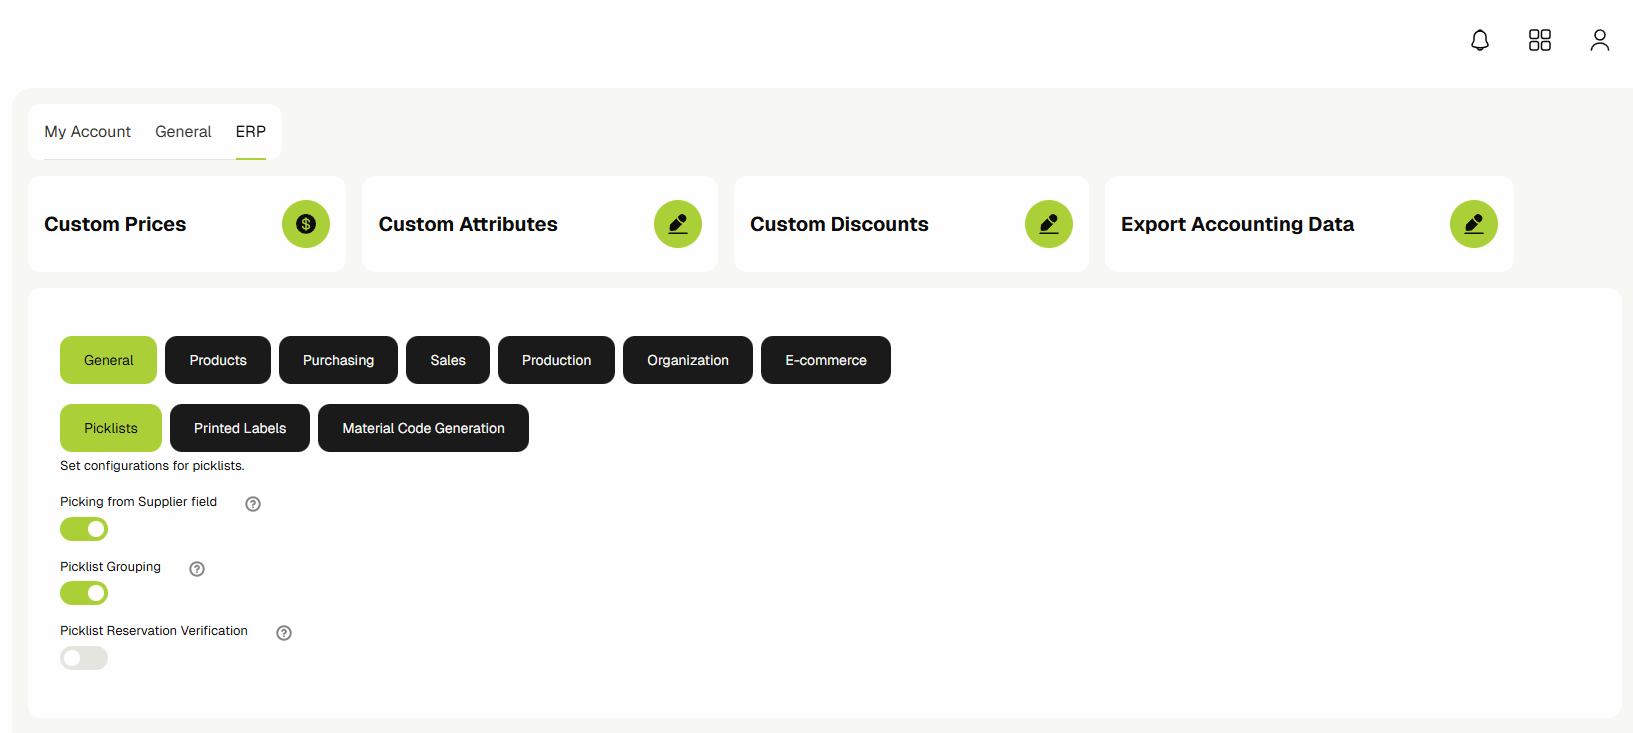
Setting: General > Picklists > Picklist From Supplier Field
This enables the Supplier filter in the picklist.

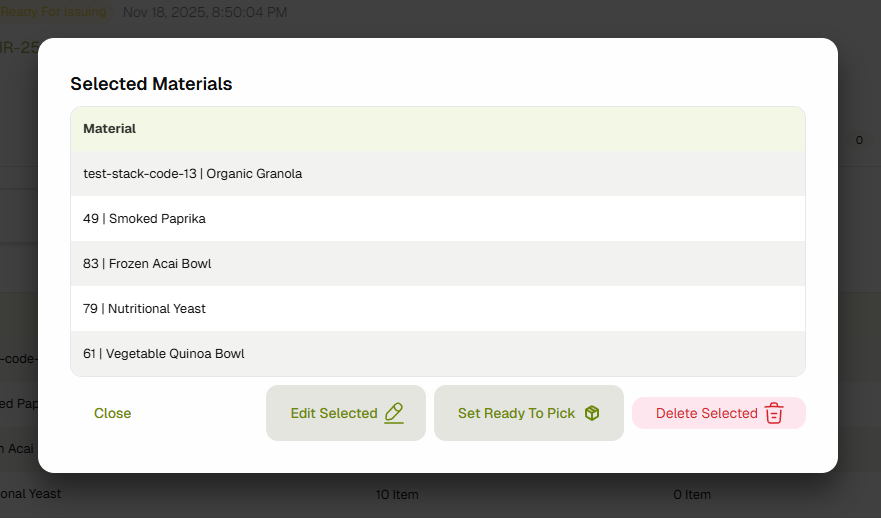
Bulk Materials Operations (Selection)
In each operation tab (except for picklist), you can select the materials by checking the checkbox. Once a material is selected, the "Show Selected" button will appear. Clicking it will open a dialog with available actions for the selected materials.
Materials Information
You can access the material's extra information by clicking on the material menu.

Requiring Documents (Required By)
This information is available whenever the material is generated by the system, indicating that it is required by another document.
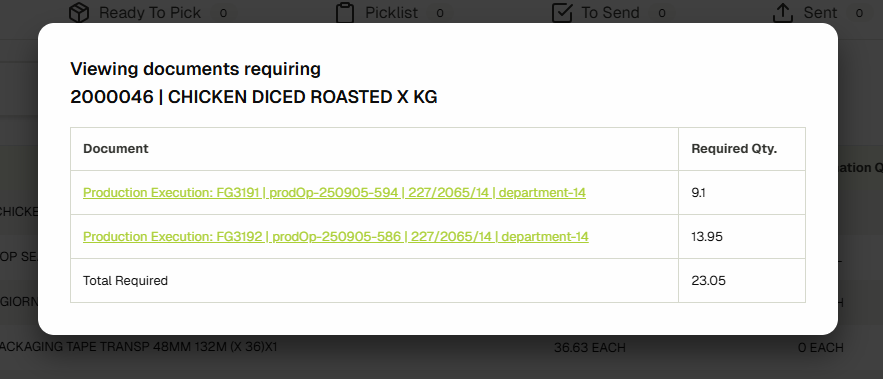
System-generated materials will restrict the modification of requisitions when deleting or updating the quantity.
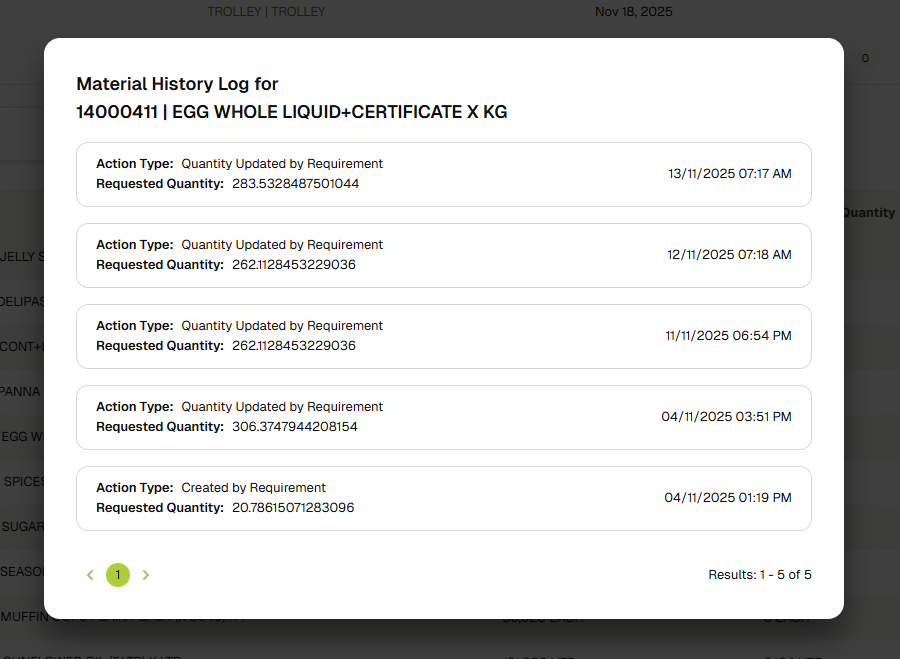
History Log
Shows the action history that occurred on this material.
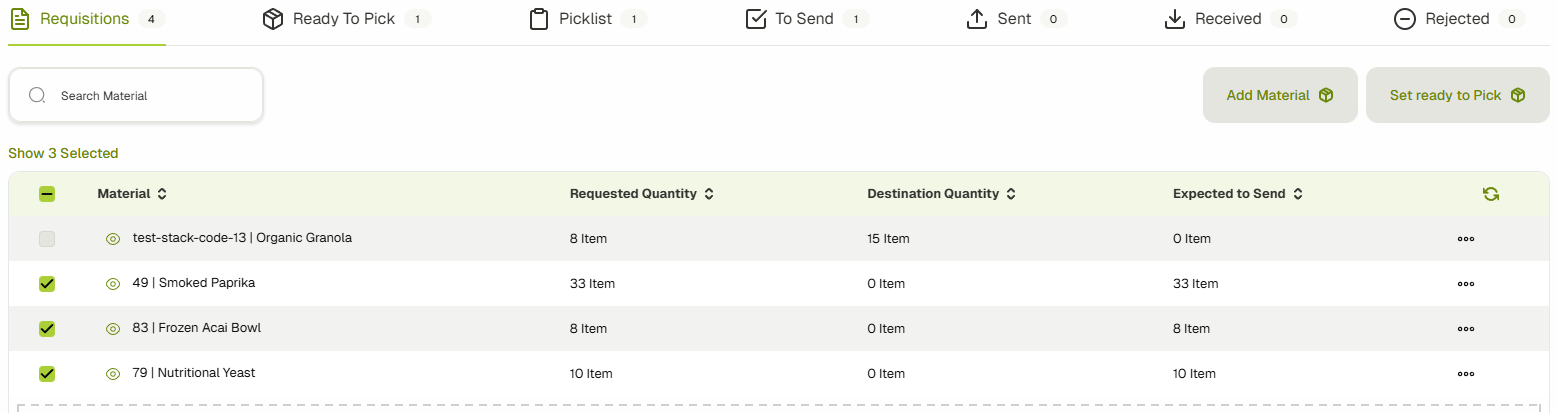
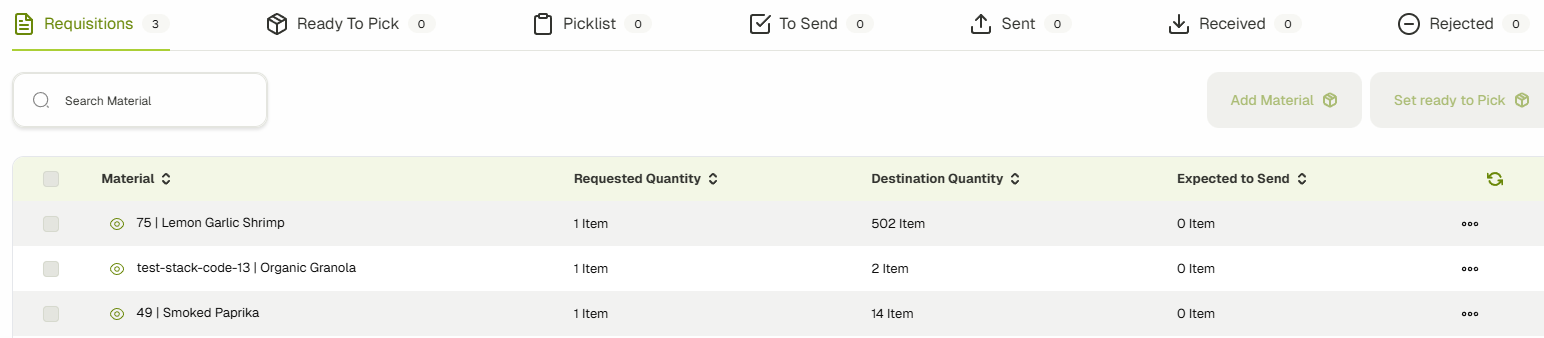
Material Requisitions
The requisitions tab represents the materials that are requested, whether manually inserted or system-generated. Requested Quantity is the initial quantity required at the destination inventory. Destination Quantity is the forecasted quantity in the destination inventory based on the material's "Calendar View". Expected To Send is the remaining quantity that should be sent to the Destination inventory (Requested Quantity - Destination Quantity).
Setting Ready To Pick
This moves the materials from requisitions to the "Ready to Pick" tab and the picklist to reserve stock. You can set specific materials or all materials as ready to pick.
Undo Ready To Pick (Reverting)
You can move materials back to requisitions from the "Ready to Pick" tab.
Reverting will only target materials that have not been picked yet. If a material appears in the "To Send" tab, it will not be reverted.
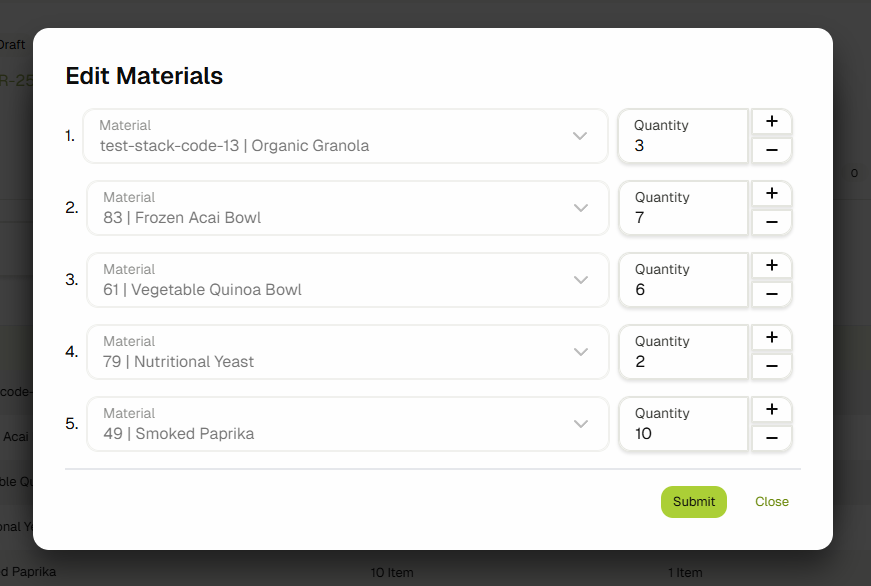
Adding Materials
Click the add button to open a dialog to add materials and set the requested quantity.
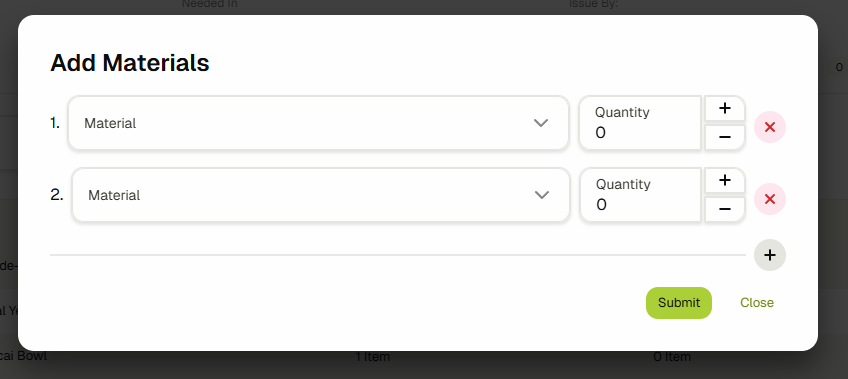
If the material already exists in the requisitions, the quantity will be added to the existing entry.
Editing Quantities
Edit quantities individually from the material menu or in bulk by selecting multiple materials.
Deleting Materials
Delete materials individually from the material menu or in bulk by selecting multiple materials.
Picklist (Reserving Stocks)
All materials in the "Ready to Pick" tab with an "Expected to Send" greater than zero will have a generated picklist. Once stock is reserved, the material will appear in the "To Send" tab.
Disabled QR Verification
In the picklist tab, reserve and unreserve stock by clicking the checkbox on the far right of each stock row.

Enabled QR Verification
If verification is enabled, click the checkbox or the scanner icon to reserve stock by scanning the QR code.
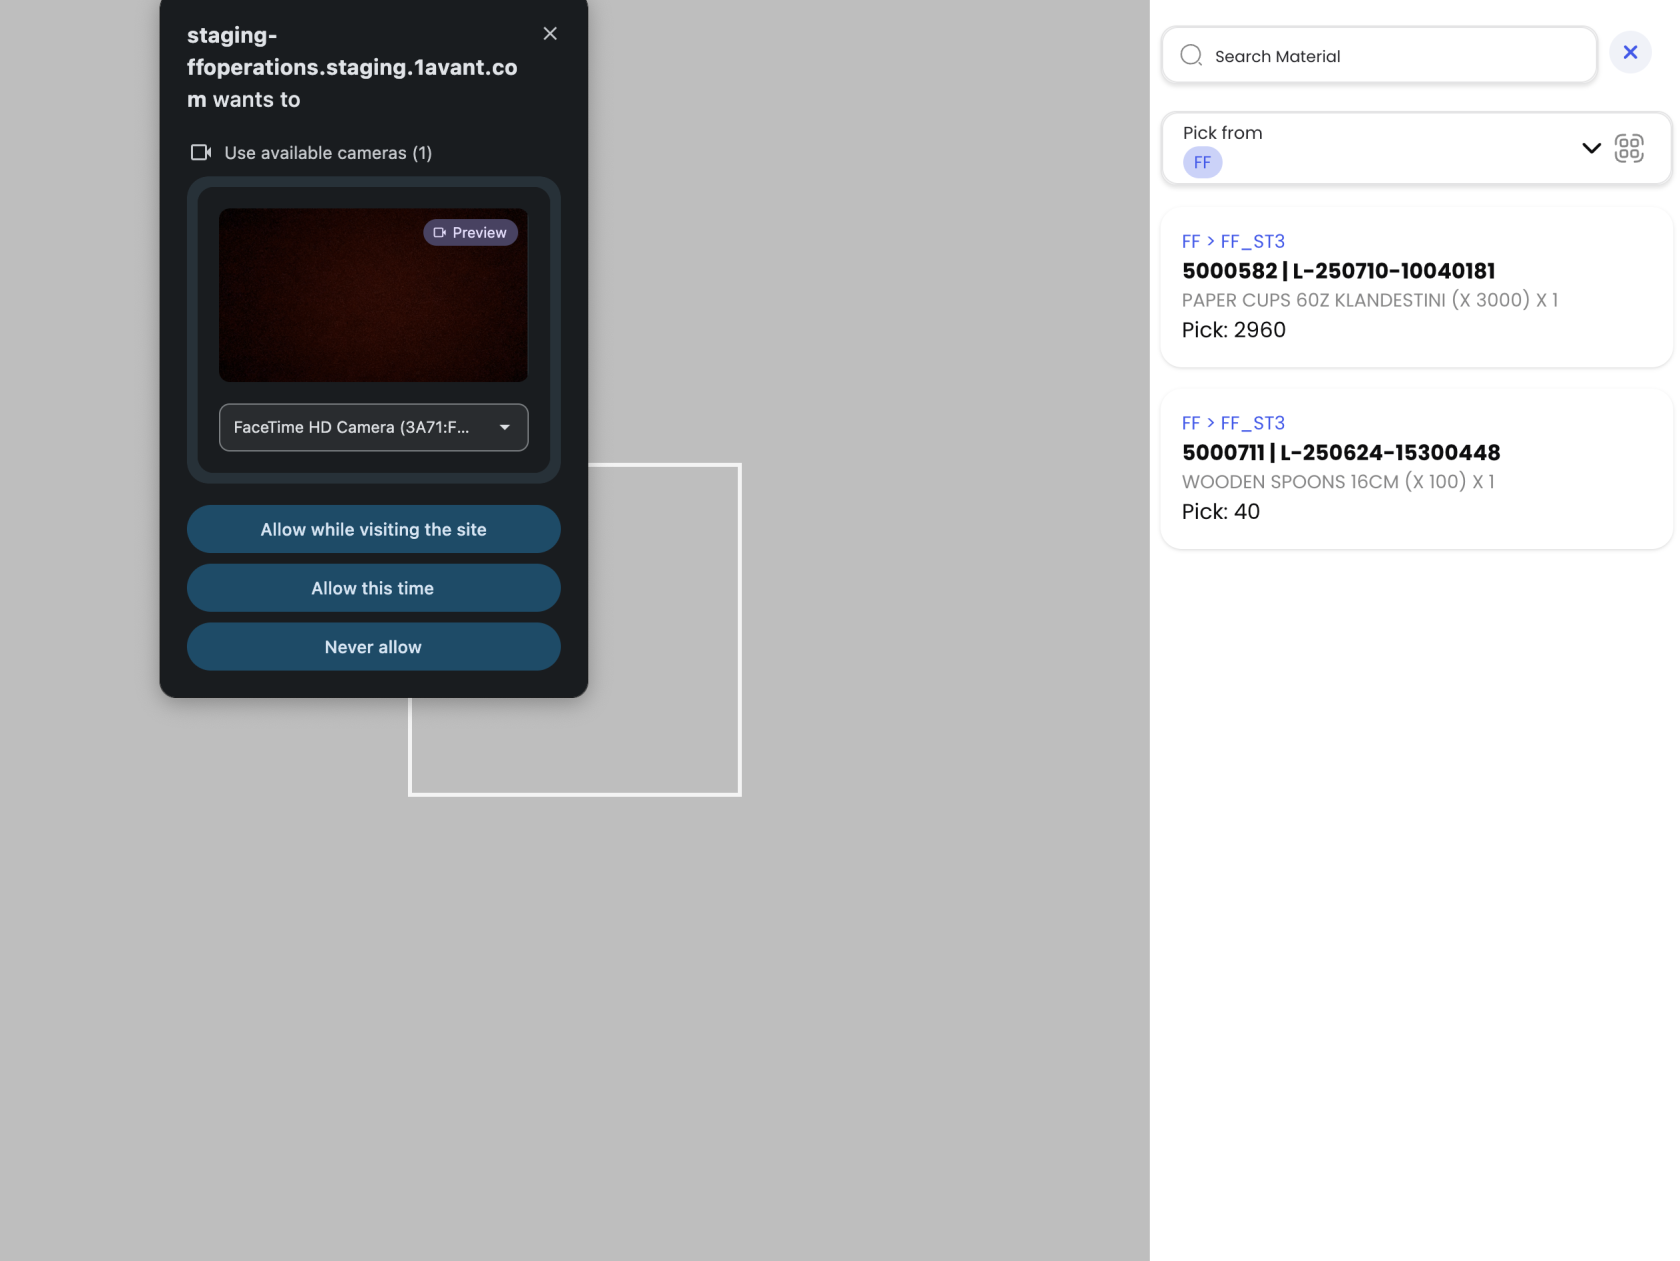
The scanner checks the QR against the stocks listed. You can use filters to narrow down the material you want to scan.
Generated Picklist Logic
The system uses First Expire First Out (FEFO) and First In First Out (FIFO) to decide which stock to pick. The quantity is always rounded up to full pack sizes.
For example, if 20KG of Flour is needed, and:
- Supplier A has two 15KG bags (one full, one with 5KG left) expiring on 2025-09-01
- Supplier B has a full 25KG bag expiring on 2025-09-12
The system will suggest picking 15KG from Supplier A and 25KG from Supplier B, totaling 40KG, because the packs cannot be split.
Sending Materials (Issuing)
After stocks are reserved, view the materials that can be sent in the "To Send" tab. Send specific materials individually or in bulk.
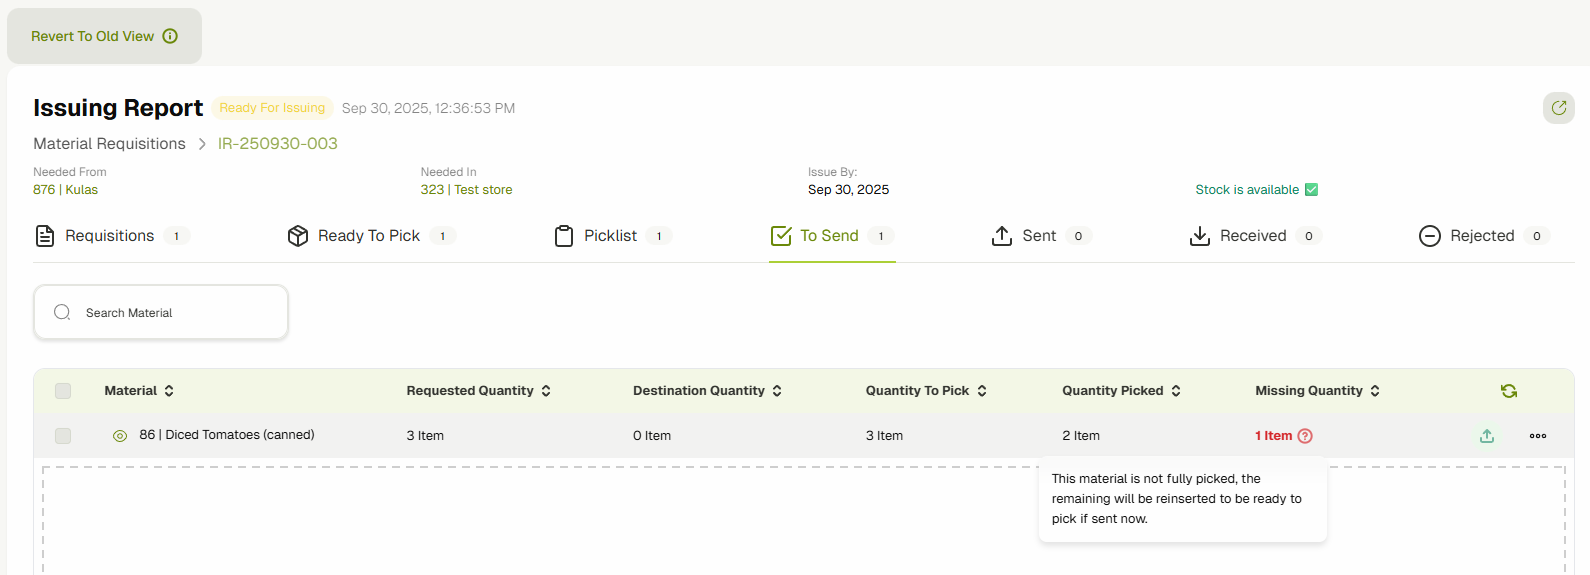
If a material is not fully picked, the remainder will be re-inserted into the "Ready to Pick" tab.
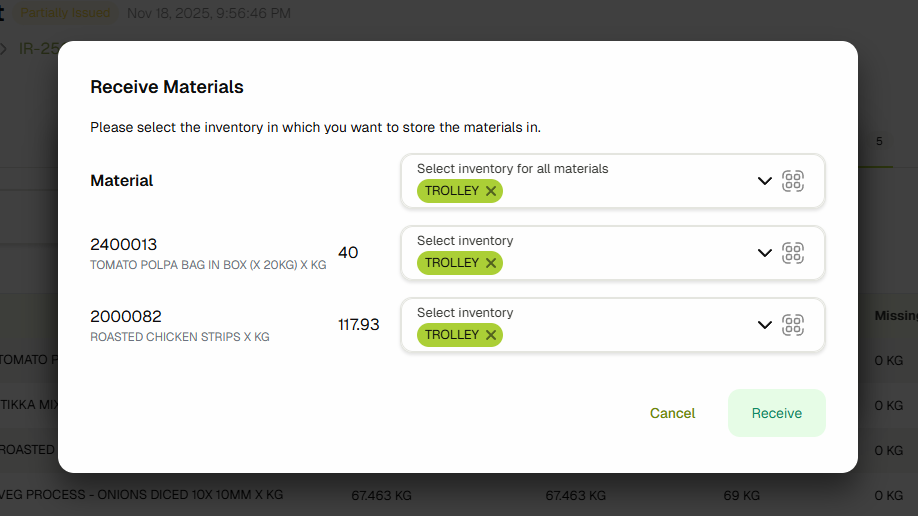
Receiving & Rejecting Materials
This operation is only available if the approval setting is enabled.
In the "Sent" tab, you can receive or reject materials individually or in bulk.

When receiving, if the destination inventory has sub-inventories, you will be prompted to choose where to transfer the materials.
Receiving with a QR Scanner
If the verification setting is enabled, you will be prompted to scan the QR of the received materials.
Integration with Production
Store Operations plays a central role in the production flow. When a Production Plan is saved, the system automatically generates Material Requisitions (issuing reports) for the supplied ingredients needed by the production executions.
How It Works
- A production plan is saved with one or more recipes.
- The system creates Material Requisitions from the Issuing Inventory to the Trolley Inventory for all materials that have the Has Suppliers flag on their product type.
- These requisitions appear in the Requisitions list under Store Operations.
- Operators follow the standard flow: set materials Ready to Pick → reserve in Picklist → Send (issue) to the trolley inventory.
- Once materials are issued to a trolley inventory, the system automatically creates Trolley Building documents.
- Materials are then staged in trolleys for the production floor.
Automatic requisition generation requires that your system has an Issuing Inventory and a Trolley Inventory configured. Contact your technical support team to set this up.
Checking for Missing Stock
When viewing material requisitions, you can filter by a date range to check for missing materials. If there are materials with insufficient stock, the system will display an alert prompting you to generate a Purchase Requisition. See Purchases for the full purchase requisition workflow.
Permissions
The following permissions control access to Store Operations features. These are managed in Settings > Users > Roles Management.
| Permission | Description |
|---|---|
| View Issuing Reports | View issuing reports and material requisitions |
| Manage Issuing Report Requisitions | Add, edit, and delete materials in requisitions; set materials ready to pick or revert them |
| Issuing Report Picklist | Reserve and unreserve stock in the picklist |
| Send Issuing Report | Issue/send materials to the destination inventory |
| Receive and Reject Issuing Report | Approve or reject received materials (when approval setting is enabled) |
| Cancel Issuing Reports | Cancel an issuing report |
| Close Issuing Reports | Close an issuing report |
| Manage Material Stock | Manage stock within inventories |
In addition to permissions, users must also have Inventory Access to the relevant inventories. A user needs access to the source inventory to pick materials and access to the destination inventory to receive or reject them. See Inventories for details on access controls.
Related Docs
- Production — Production flow overview
- Production Planning — Schedule production runs and generate requisitions
- Trolley Building — Stage materials for production
- Purchases — Purchase requisitions for missing stock
- Inventories — Manage inventories and access controls