Service Menus
🍽️ Service Menus let staff build guest-facing menus inside Properlog, manage their items and categories, control when they are available, and handle the orders that come from them.
This guide is based on the GMS-476 epic and its related stories, and matches
the current Properlog dashboard flow shown in staging.
📍 Accessing Service Menus
- Log in to Properlog with permission to manage service menus.
- Select the correct Property Location from the left sidebar.
- In the sidebar, go to Content Management and open Service Menus.
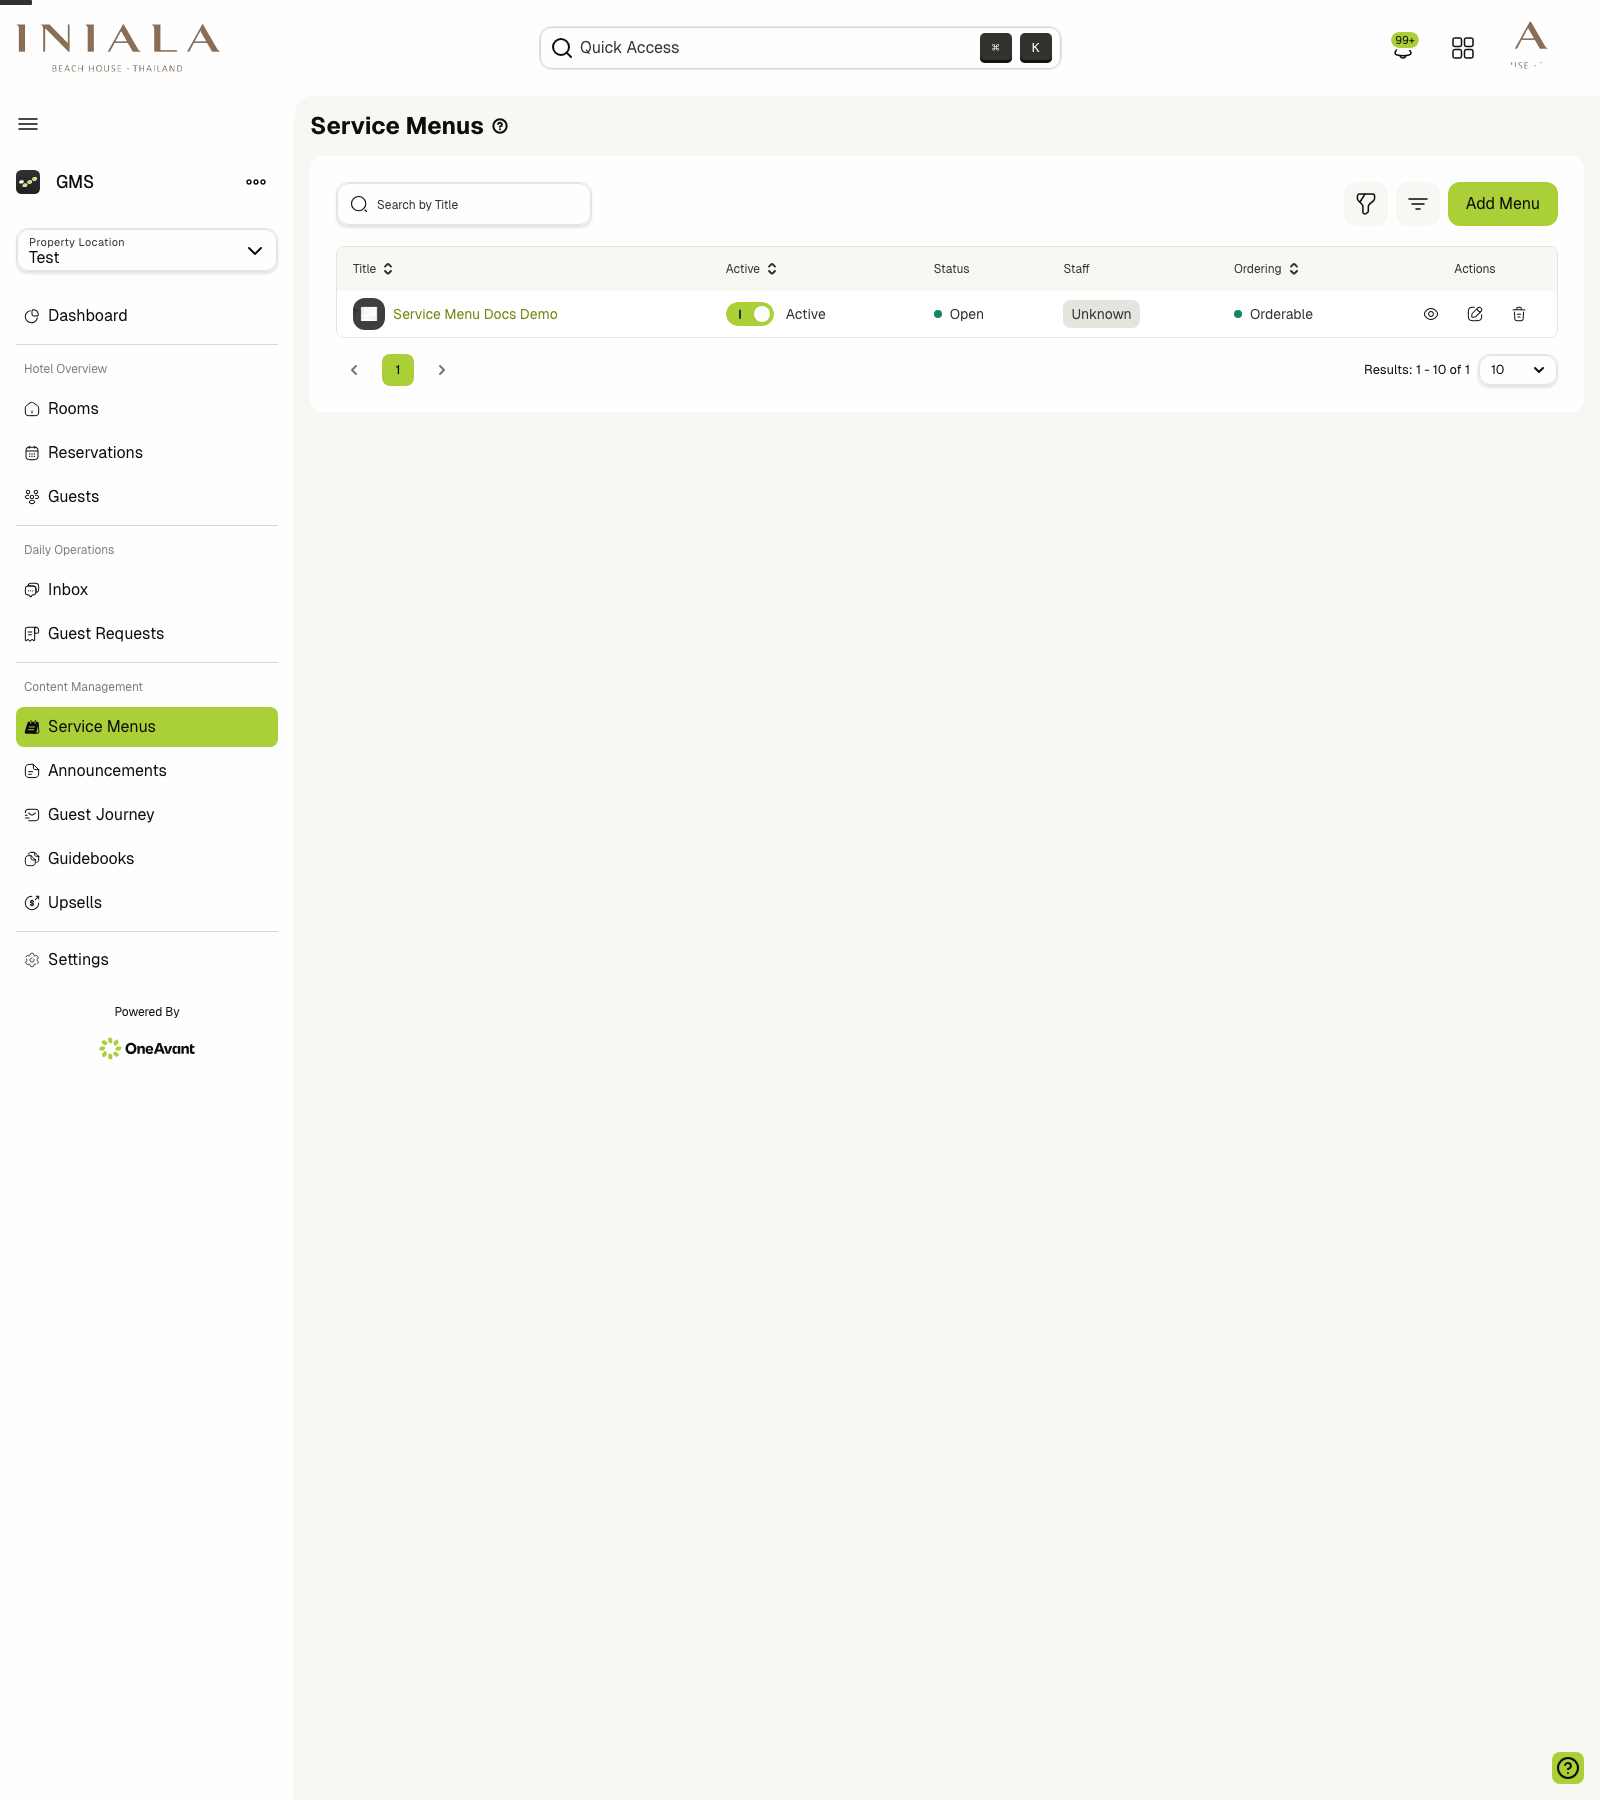
The main list shows all menus created for the selected property location.
📋 Viewing and Managing Service Menus
-
The service menus list gives staff a quick summary of each menu, including:
- Title
- Active status
- Open / Closed status
- Staff assignment summary
- Ordering mode
- Actions
-
Use the search bar to find a menu by title.
-
Use the table actions to:
- Open the menu details page
- Edit the menu
- Delete the menu
-
If no menus exist yet, Properlog shows an empty state with an Add Menu action.
Menu availability is driven automatically by the configured opening days and hours, using the property location's timezone.
➕ Creating a Service Menu
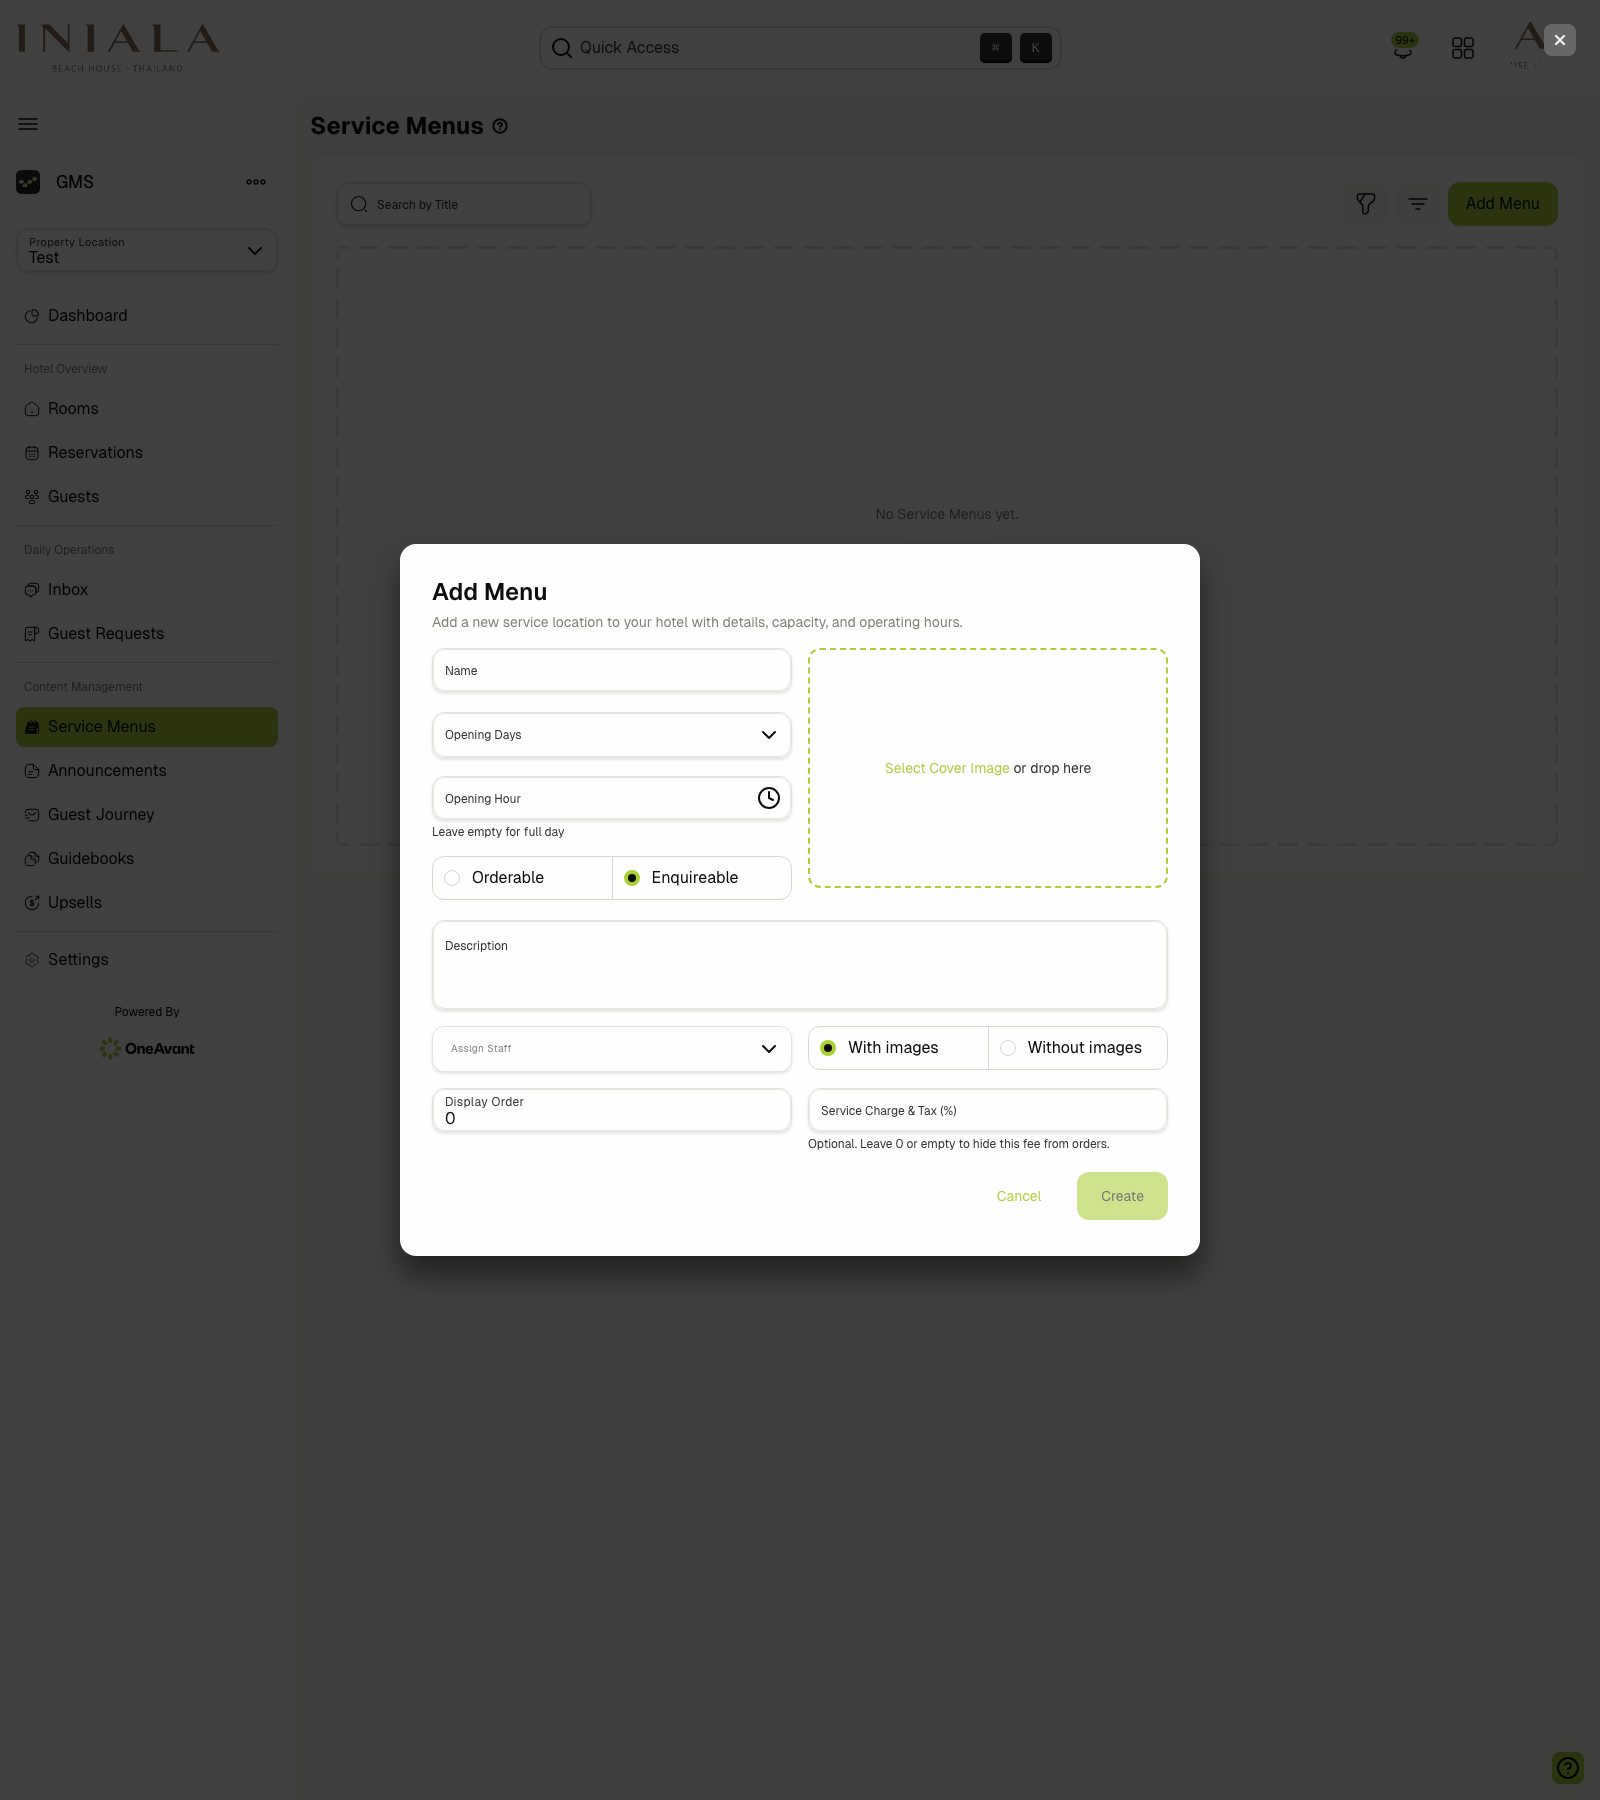
- Click Add Menu.
- Complete the menu setup fields shown in the creation dialog.
The current menu form includes:
- Name
- Opening Days
- Opening Hour
- Orderable or Enquireable
- Cover image
- Description
- Assign Staff
- With images or Without images
- Display Order
- Service Charge & Tax (%)
Leave Opening Hour empty if the menu should remain open for the full day on its selected days.
The current dashboard uses the label Enquireable for the non-standard ordering mode. In the epic stories, the non-orderable version of a menu is described as a browse-only or view-only experience.
Higher Display Order values appear before lower values in the guest experience. Negative values can also be used when a menu should be pushed lower in the order.
🧭 Working Inside a Service Menu
Opening a menu takes you into its details workspace. The available tabs are:
- Items
- Staff
- Orders
- Categories
- Modifier Groups
- Details
Each tab supports a different part of the service menu workflow.
🍽️ Managing Items
The Items tab is where staff create and manage the products shown to guests.
-
The item list can show:
- Name
- Category
- Status
- Price
- Actions
-
Items can be enabled or disabled from the dashboard.
-
Disabled items stay in the menu configuration but are hidden from the guest ordering flow.
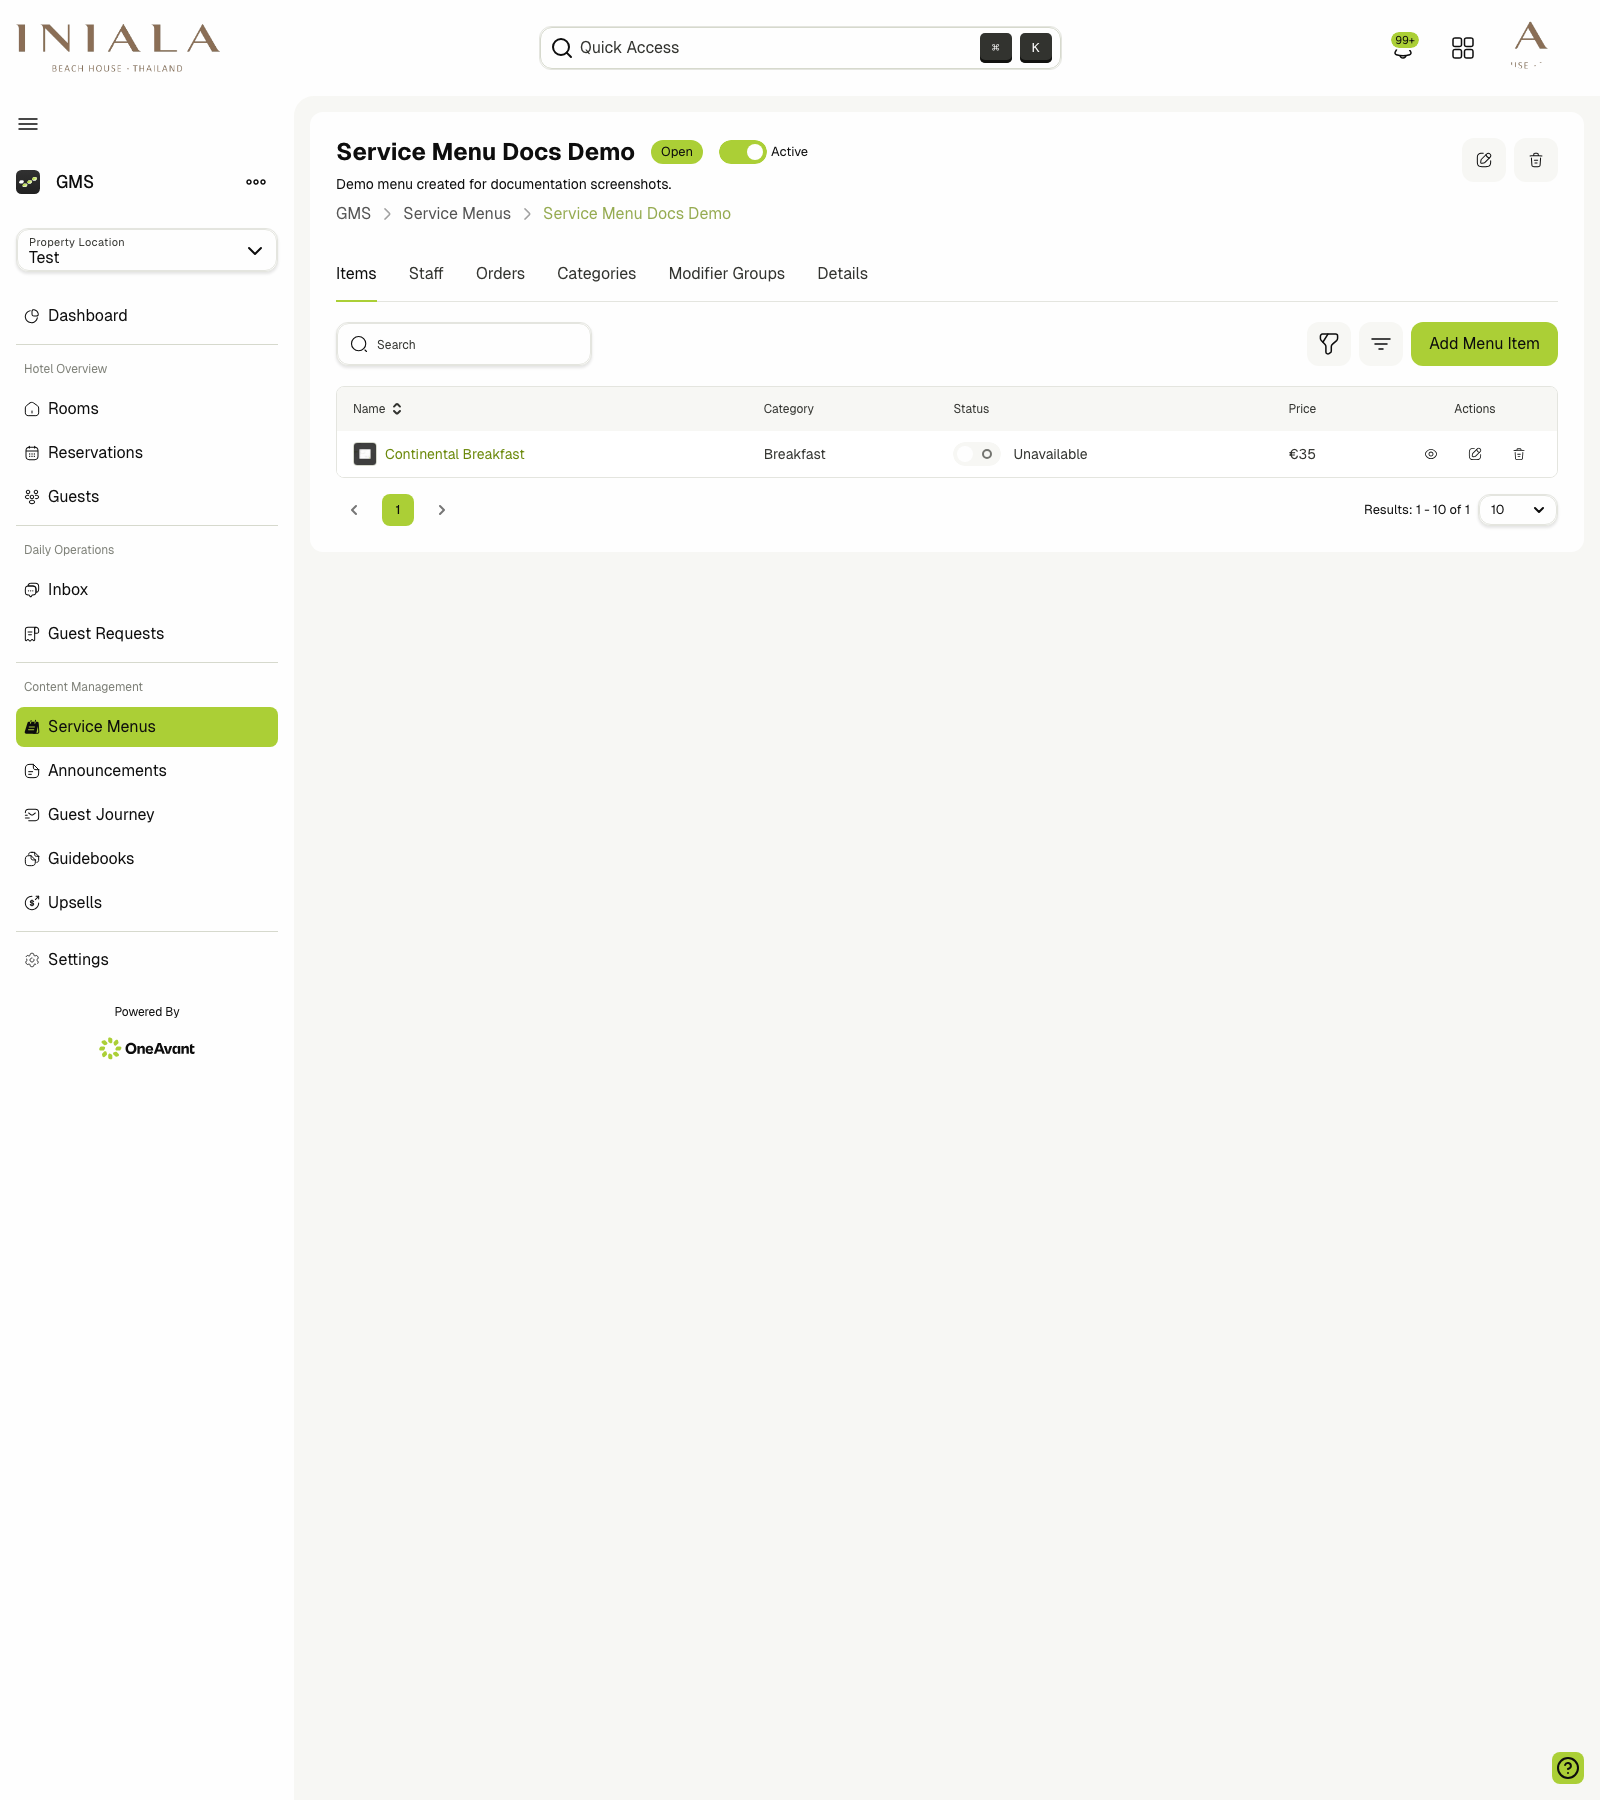
To add an item, click Add Menu Item.
The item form includes:
- Up to 5 images
- Name
- Category
- Price
- Fixed price or Starting from
- Display Order
- Description
- Modifier Groups
- Available

Menu item display order follows the same rule as menu display order: higher values appear first for guests.
🗂️ Managing Categories
Use the Categories tab to organize items into guest-facing sections.
-
Staff can:
- Create categories
- Rename categories
- Delete categories
- View how many items are currently assigned to each category
-
Categories are used to build the guest-facing tabs inside a menu.
-
Empty categories should not appear to guests if they contain no visible menu items.

🧩 Managing Modifier Groups
Use the Modifier Groups tab to create item customizations such as add-ons, choices, or quantity-based extras.
-
The modifier groups list shows:
- Group name
- Type
- # of Modifiers
- Items
- Actions
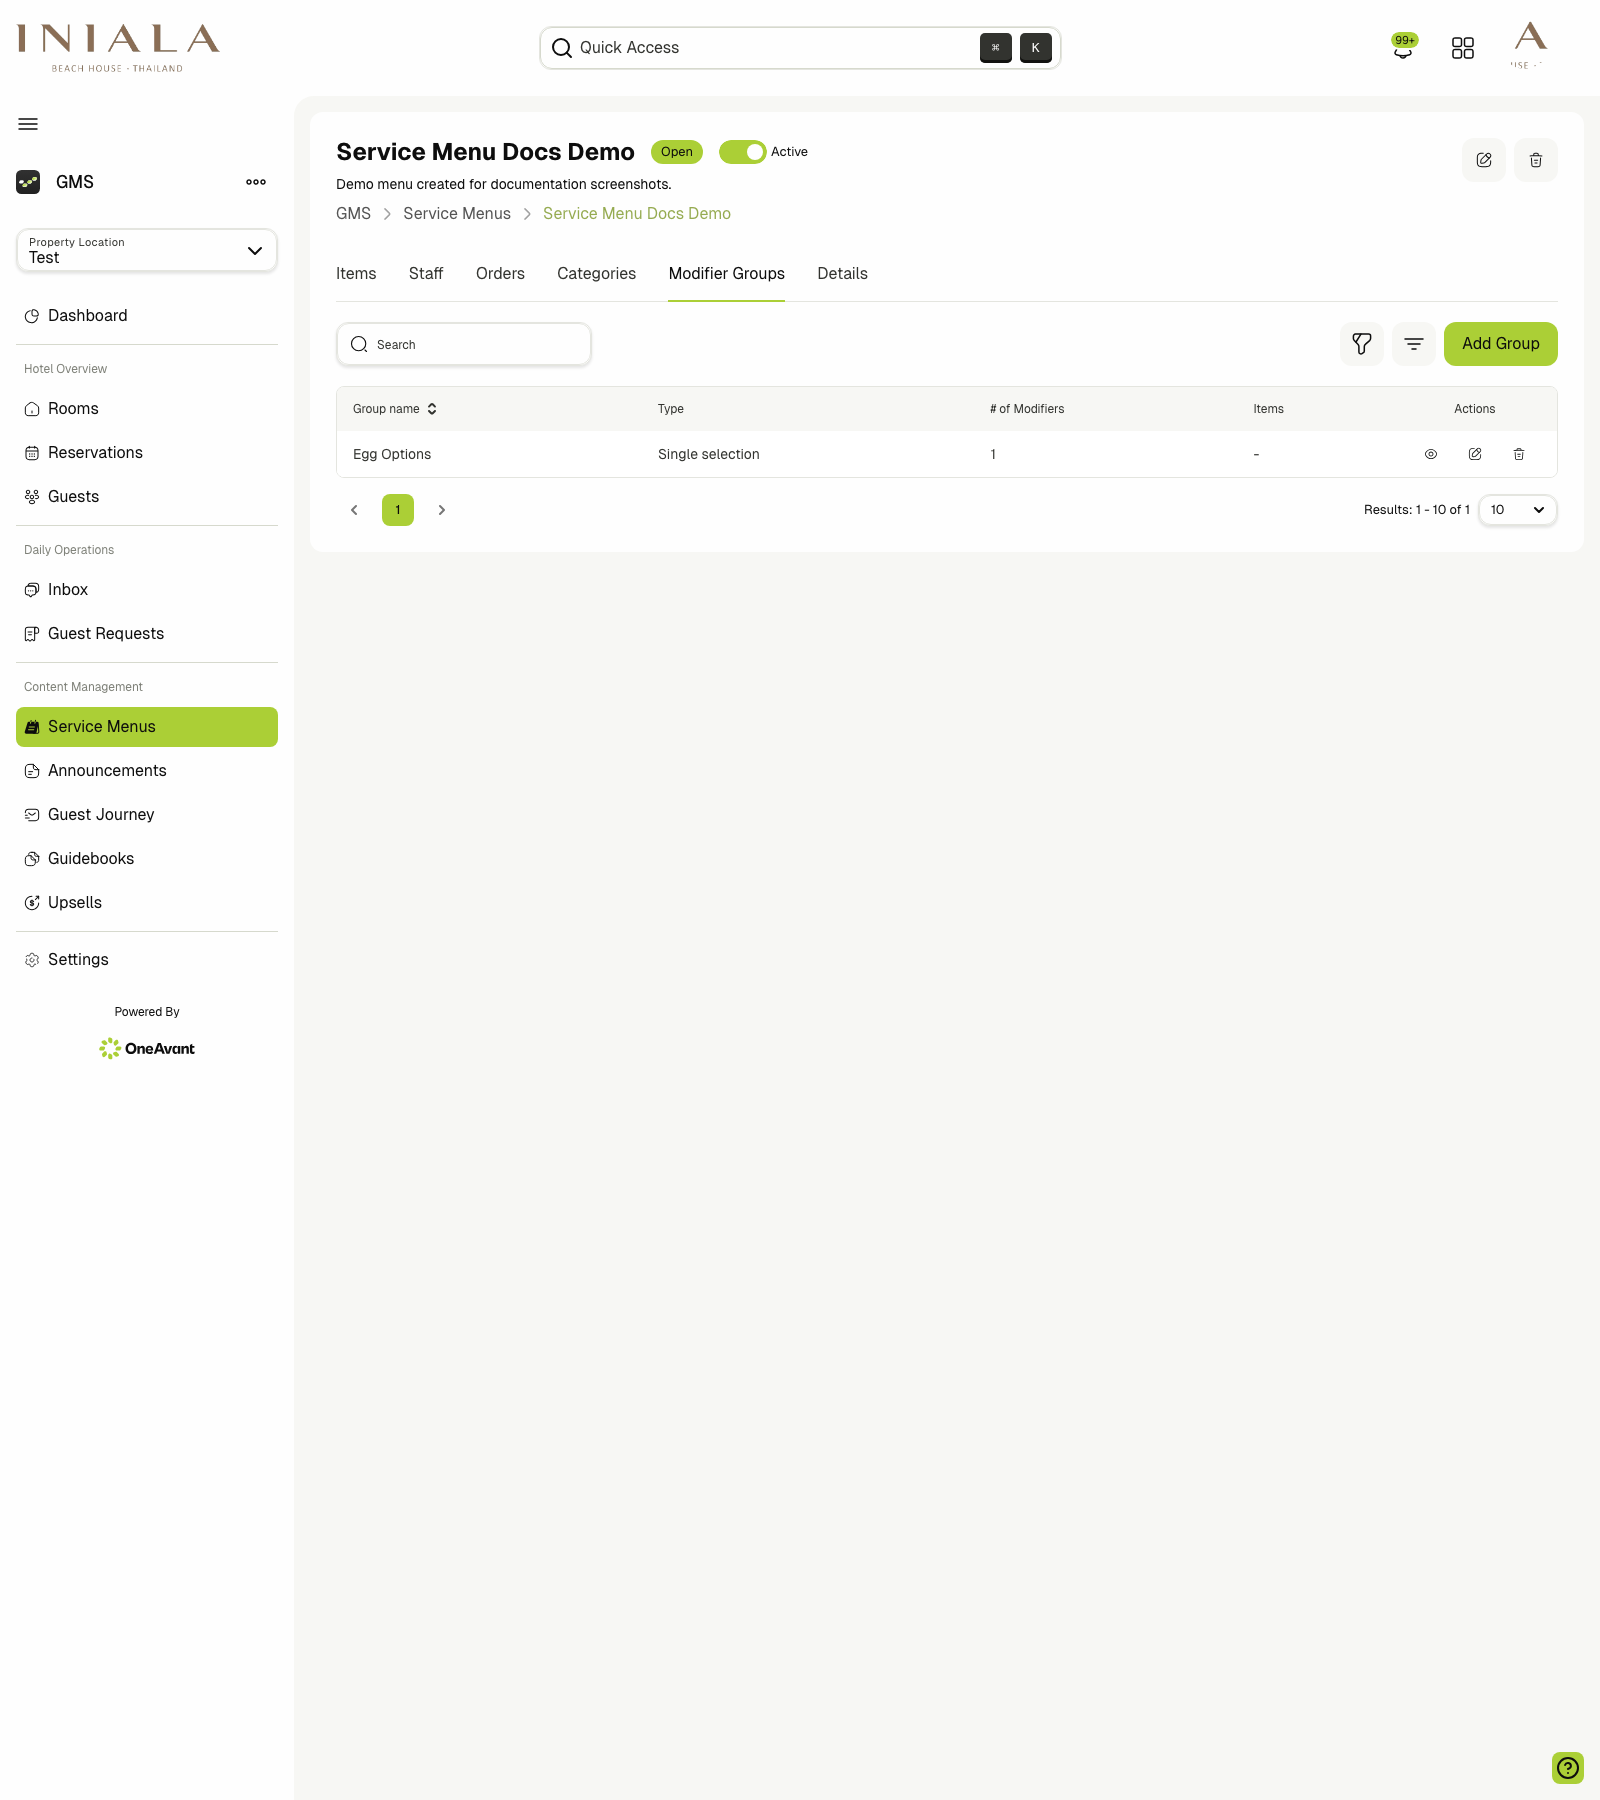
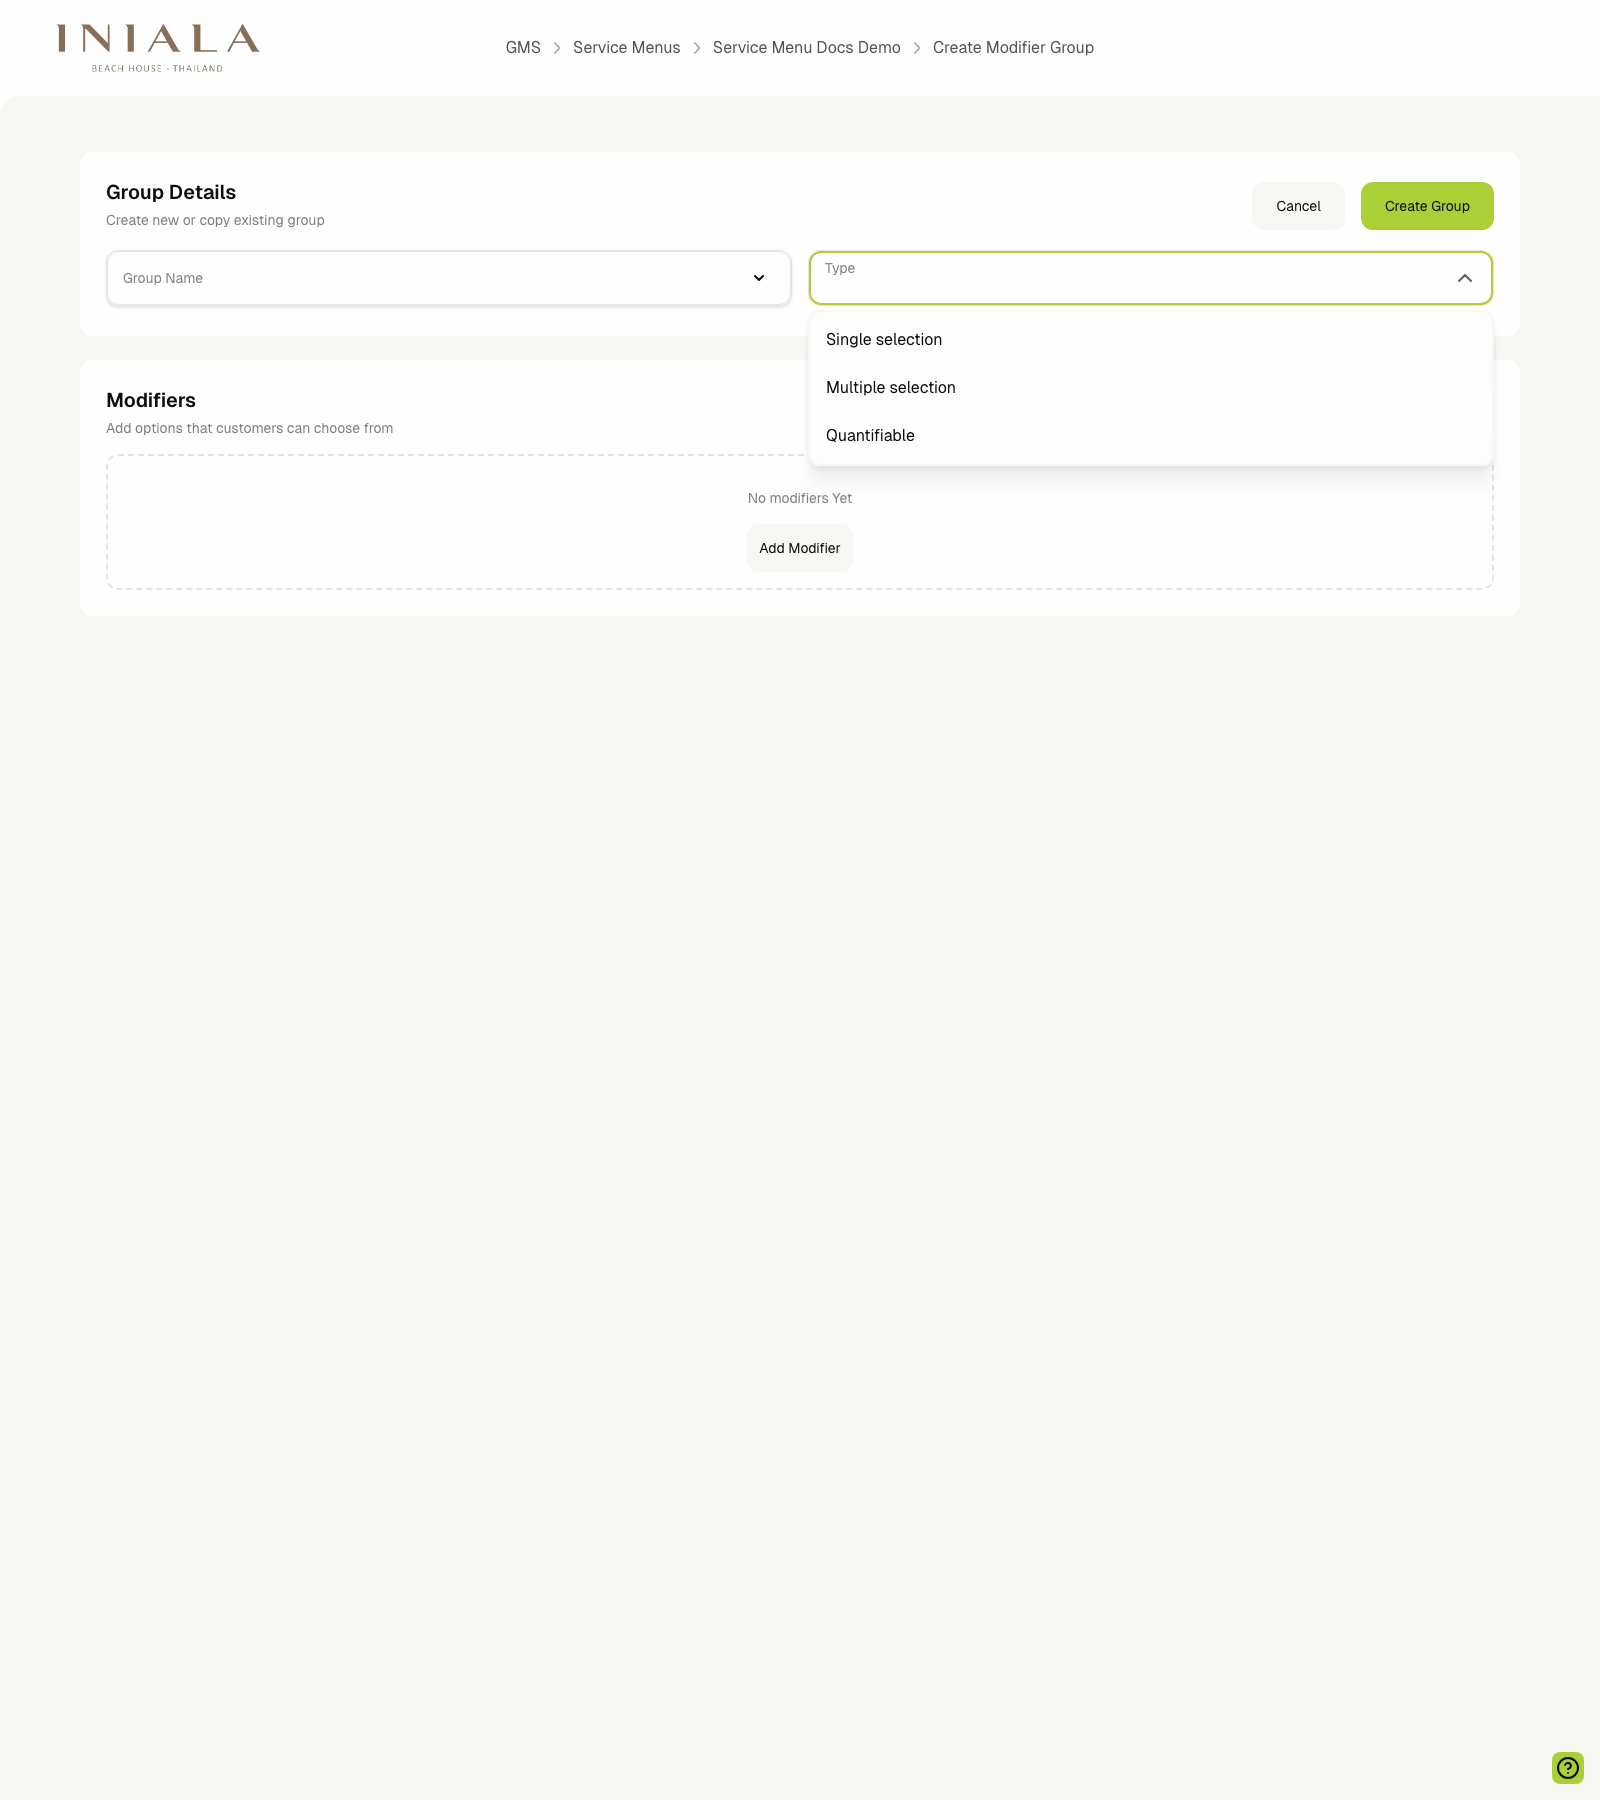
To add a group, click Add Group.
The current create-group screen includes:
- Group Name
- Type
- A Modifiers section where the actual guest-facing options are added
The current dashboard supports these group types:
- Single selection
- Multiple selection
- Quantifiable
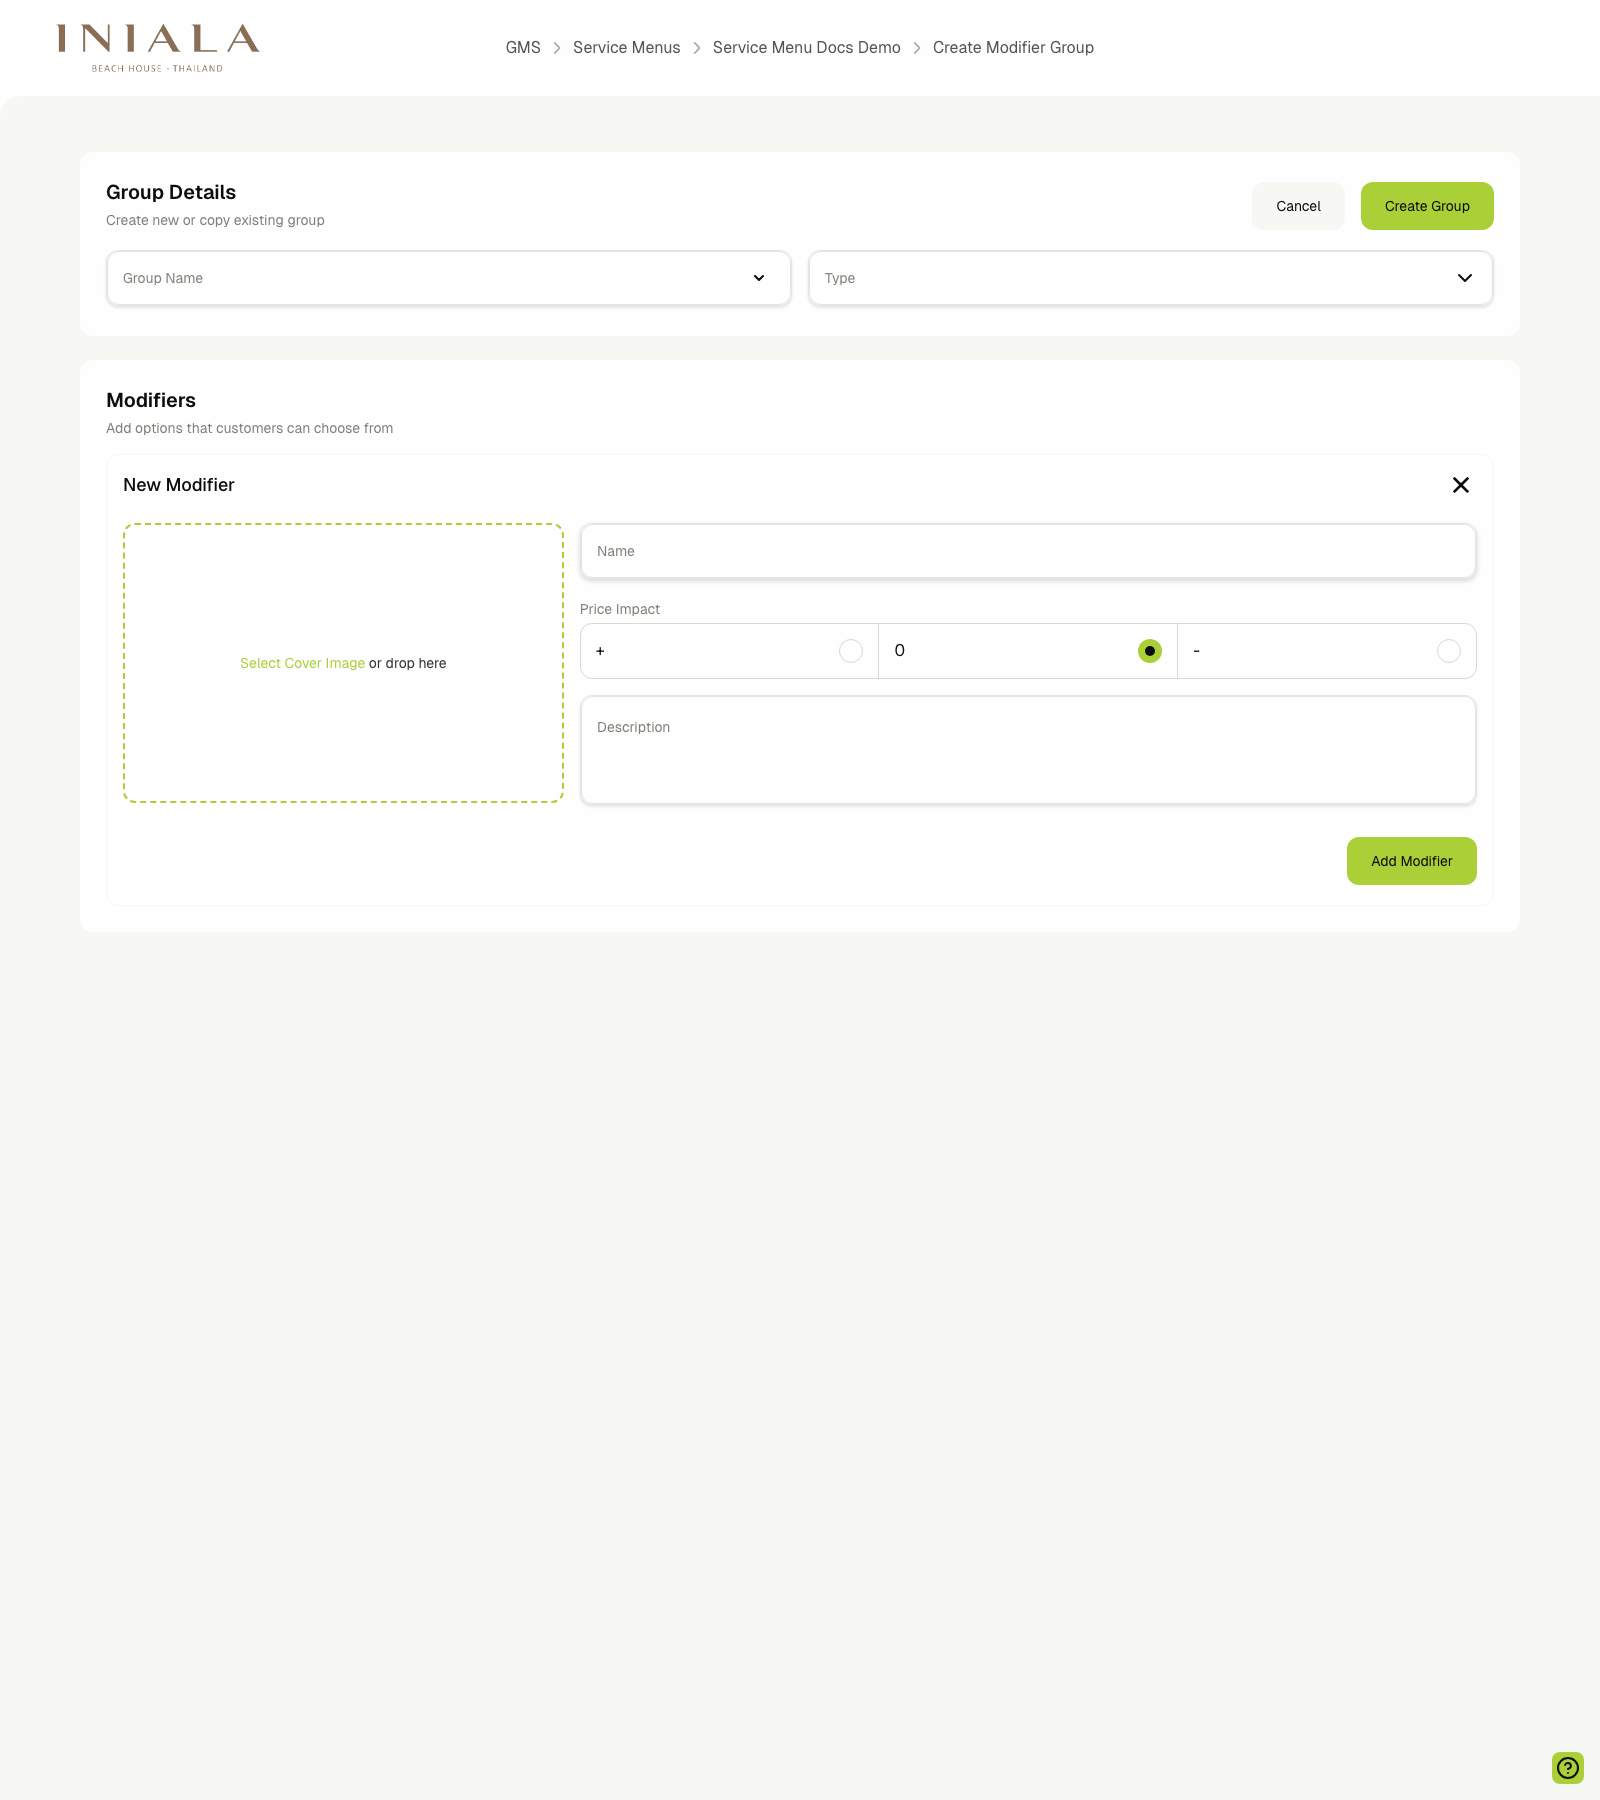
Within the same flow, use Add Modifier to define the actual choices guests will see inside the group.
Each modifier can include:
- A cover image
- A Name
- A Price Impact
- A Description
For multiple-selection and quantifiable groups, the epic stories also define minimum and maximum selection rules. After a group is saved, it can be attached to items from the Add Menu Item or Edit Menu Item flow.
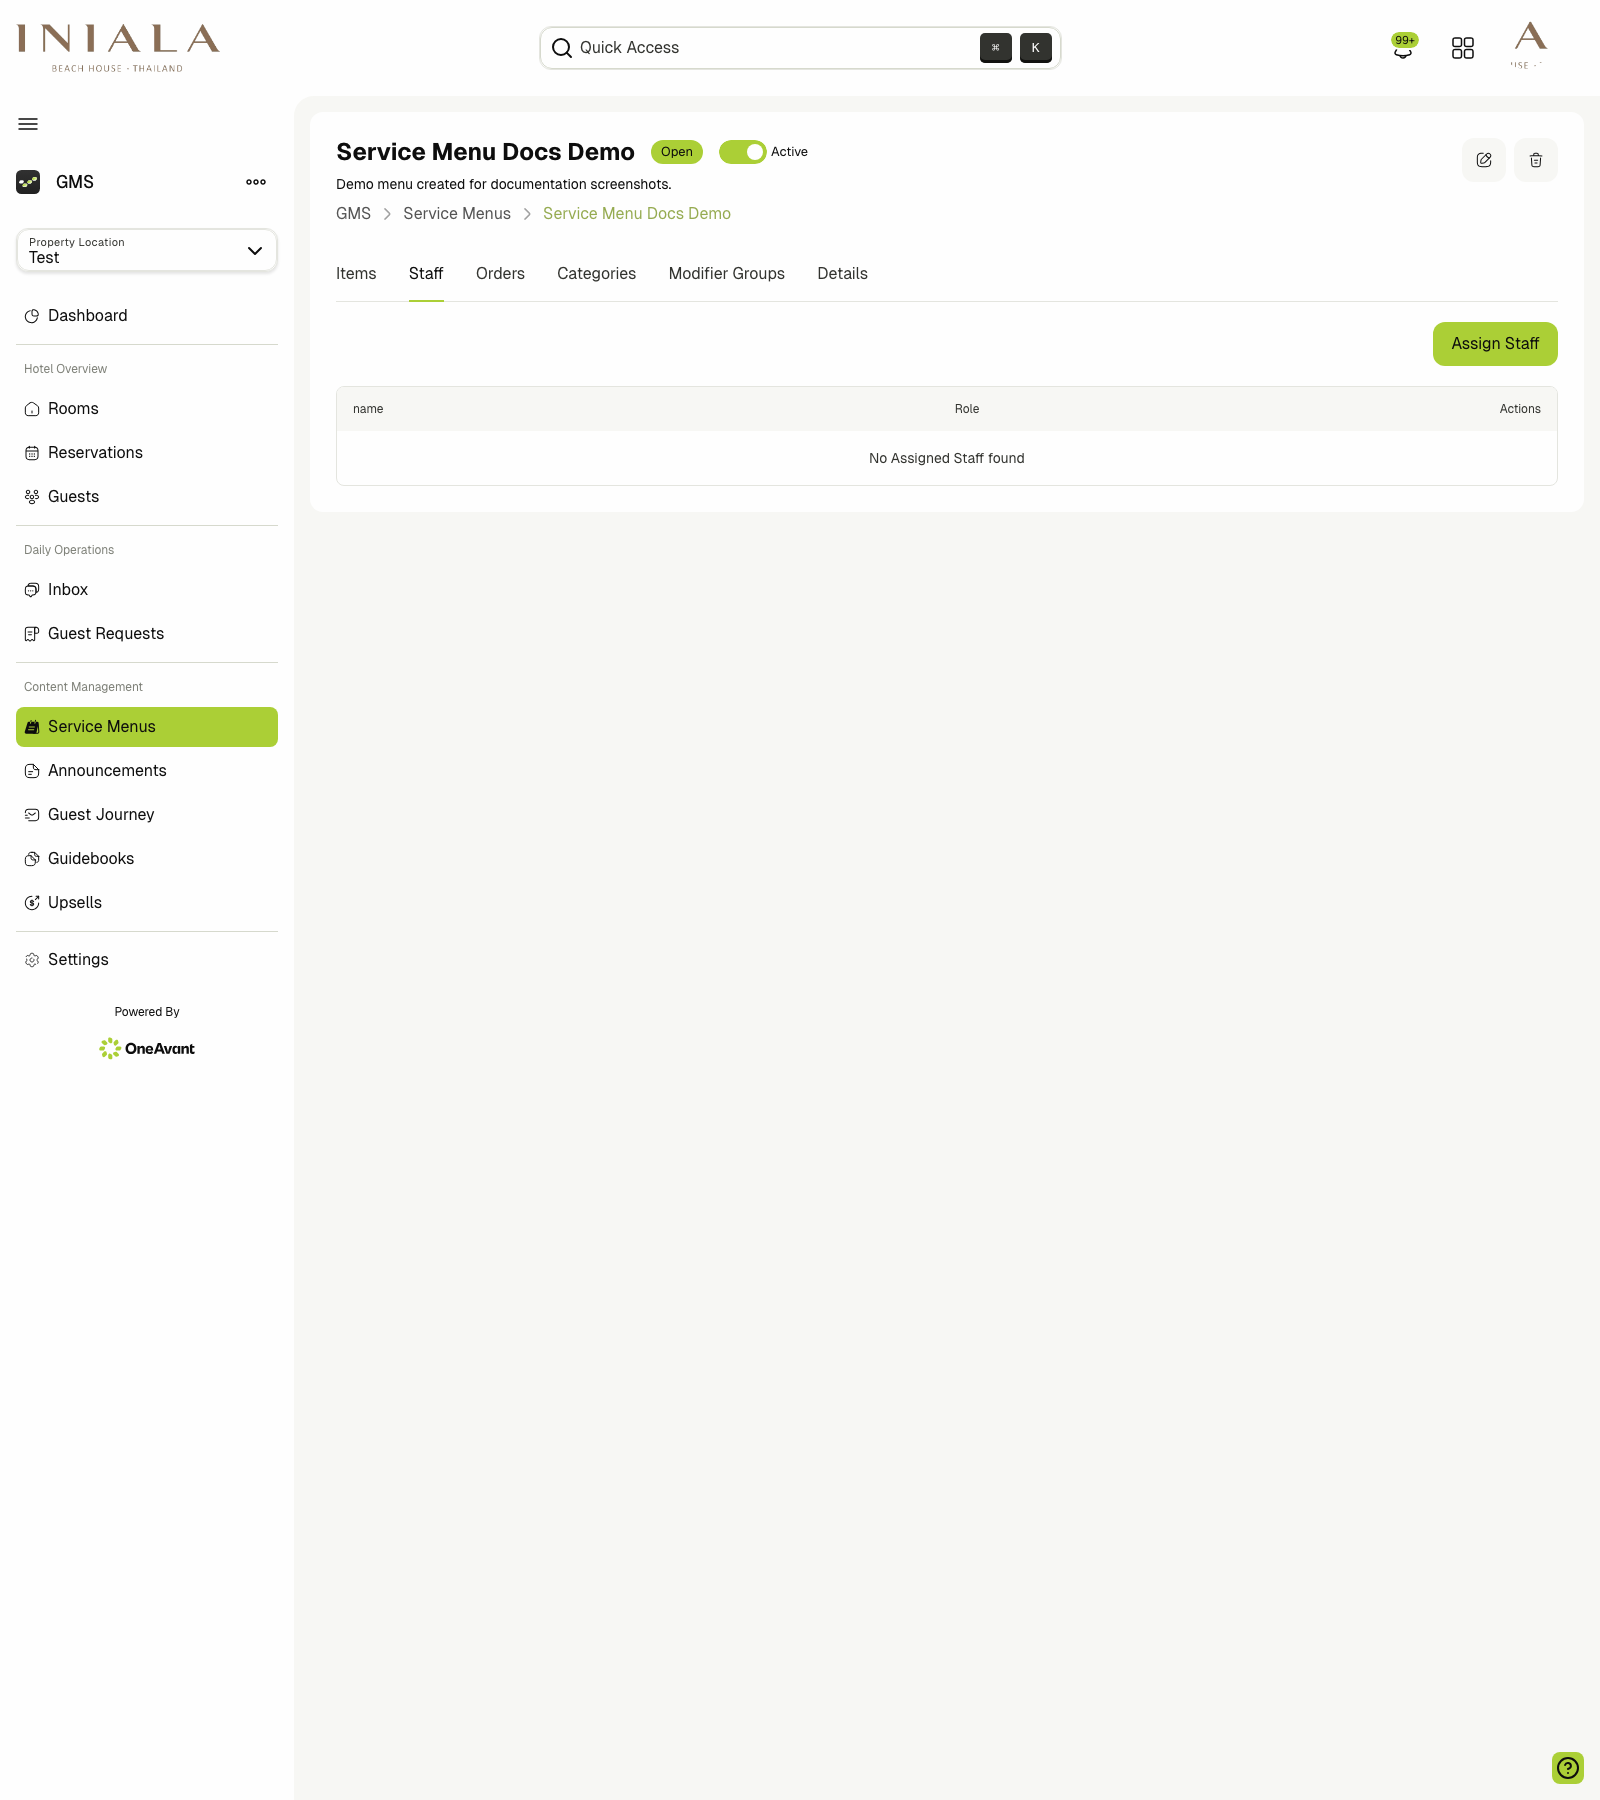
👥 Managing Staff
The Staff tab is used to control who is assigned to a menu.
- Staff can be assigned during menu creation or later from the menu details page.
- The staff table is where menu-level assignments are reviewed and removed.
- Assigned staff should come from the current property location.
- Assigned staff are the team members expected to manage the menu and respond to its orders.
Use Assign Staff to add team members from the available property-location staff list.
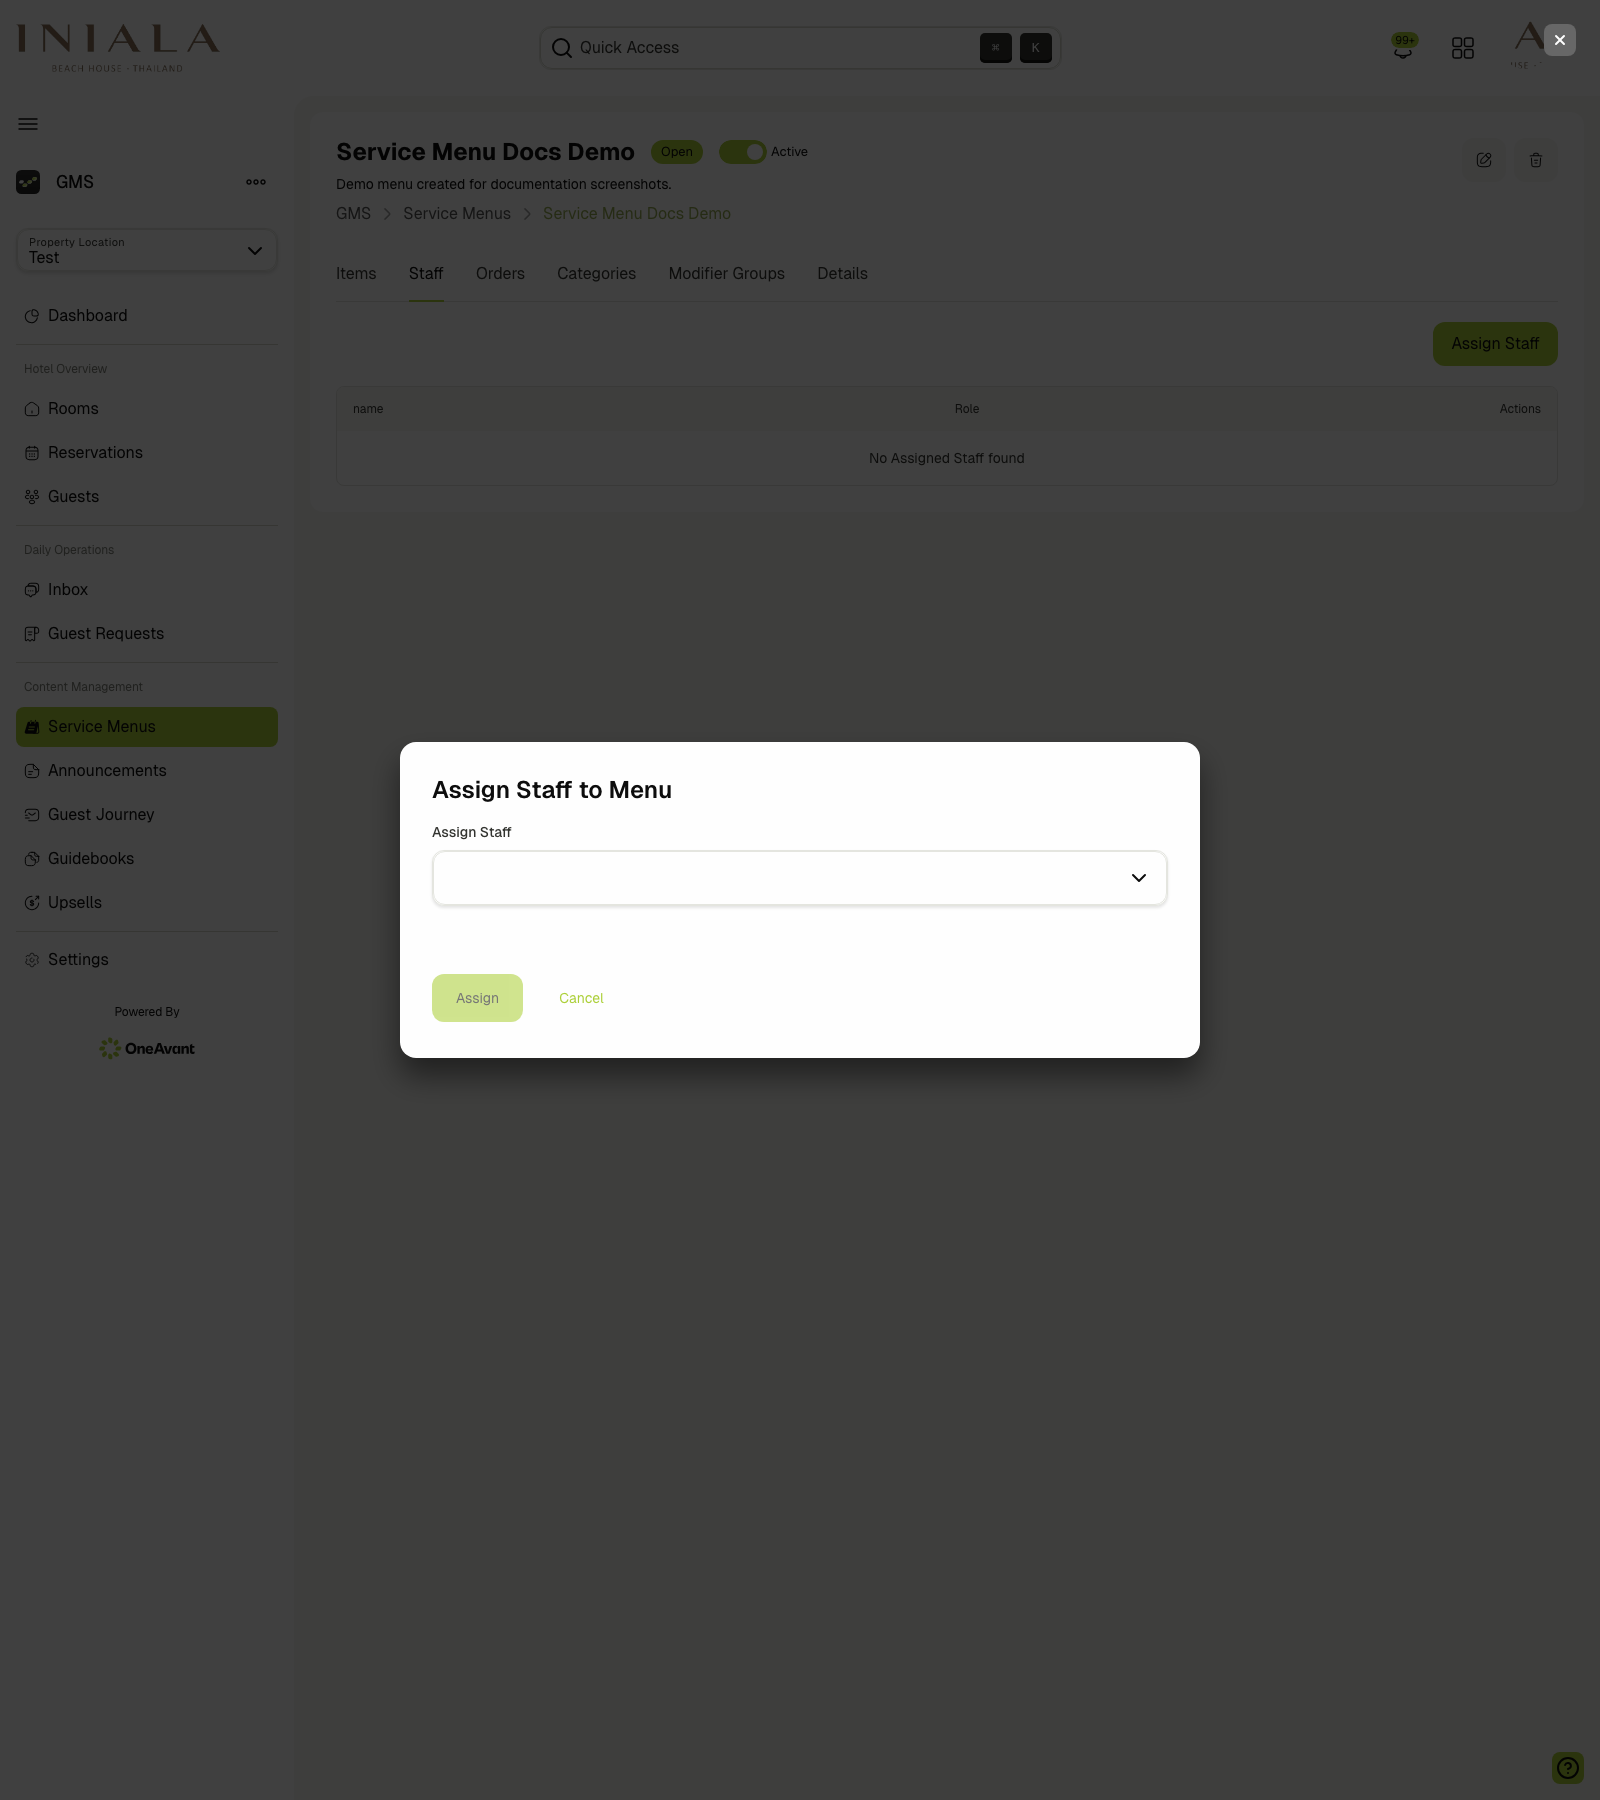
If no eligible staff are available for the selected property location, the assignment dialog can show an empty-state selector and the staff table remains empty until someone is assigned.
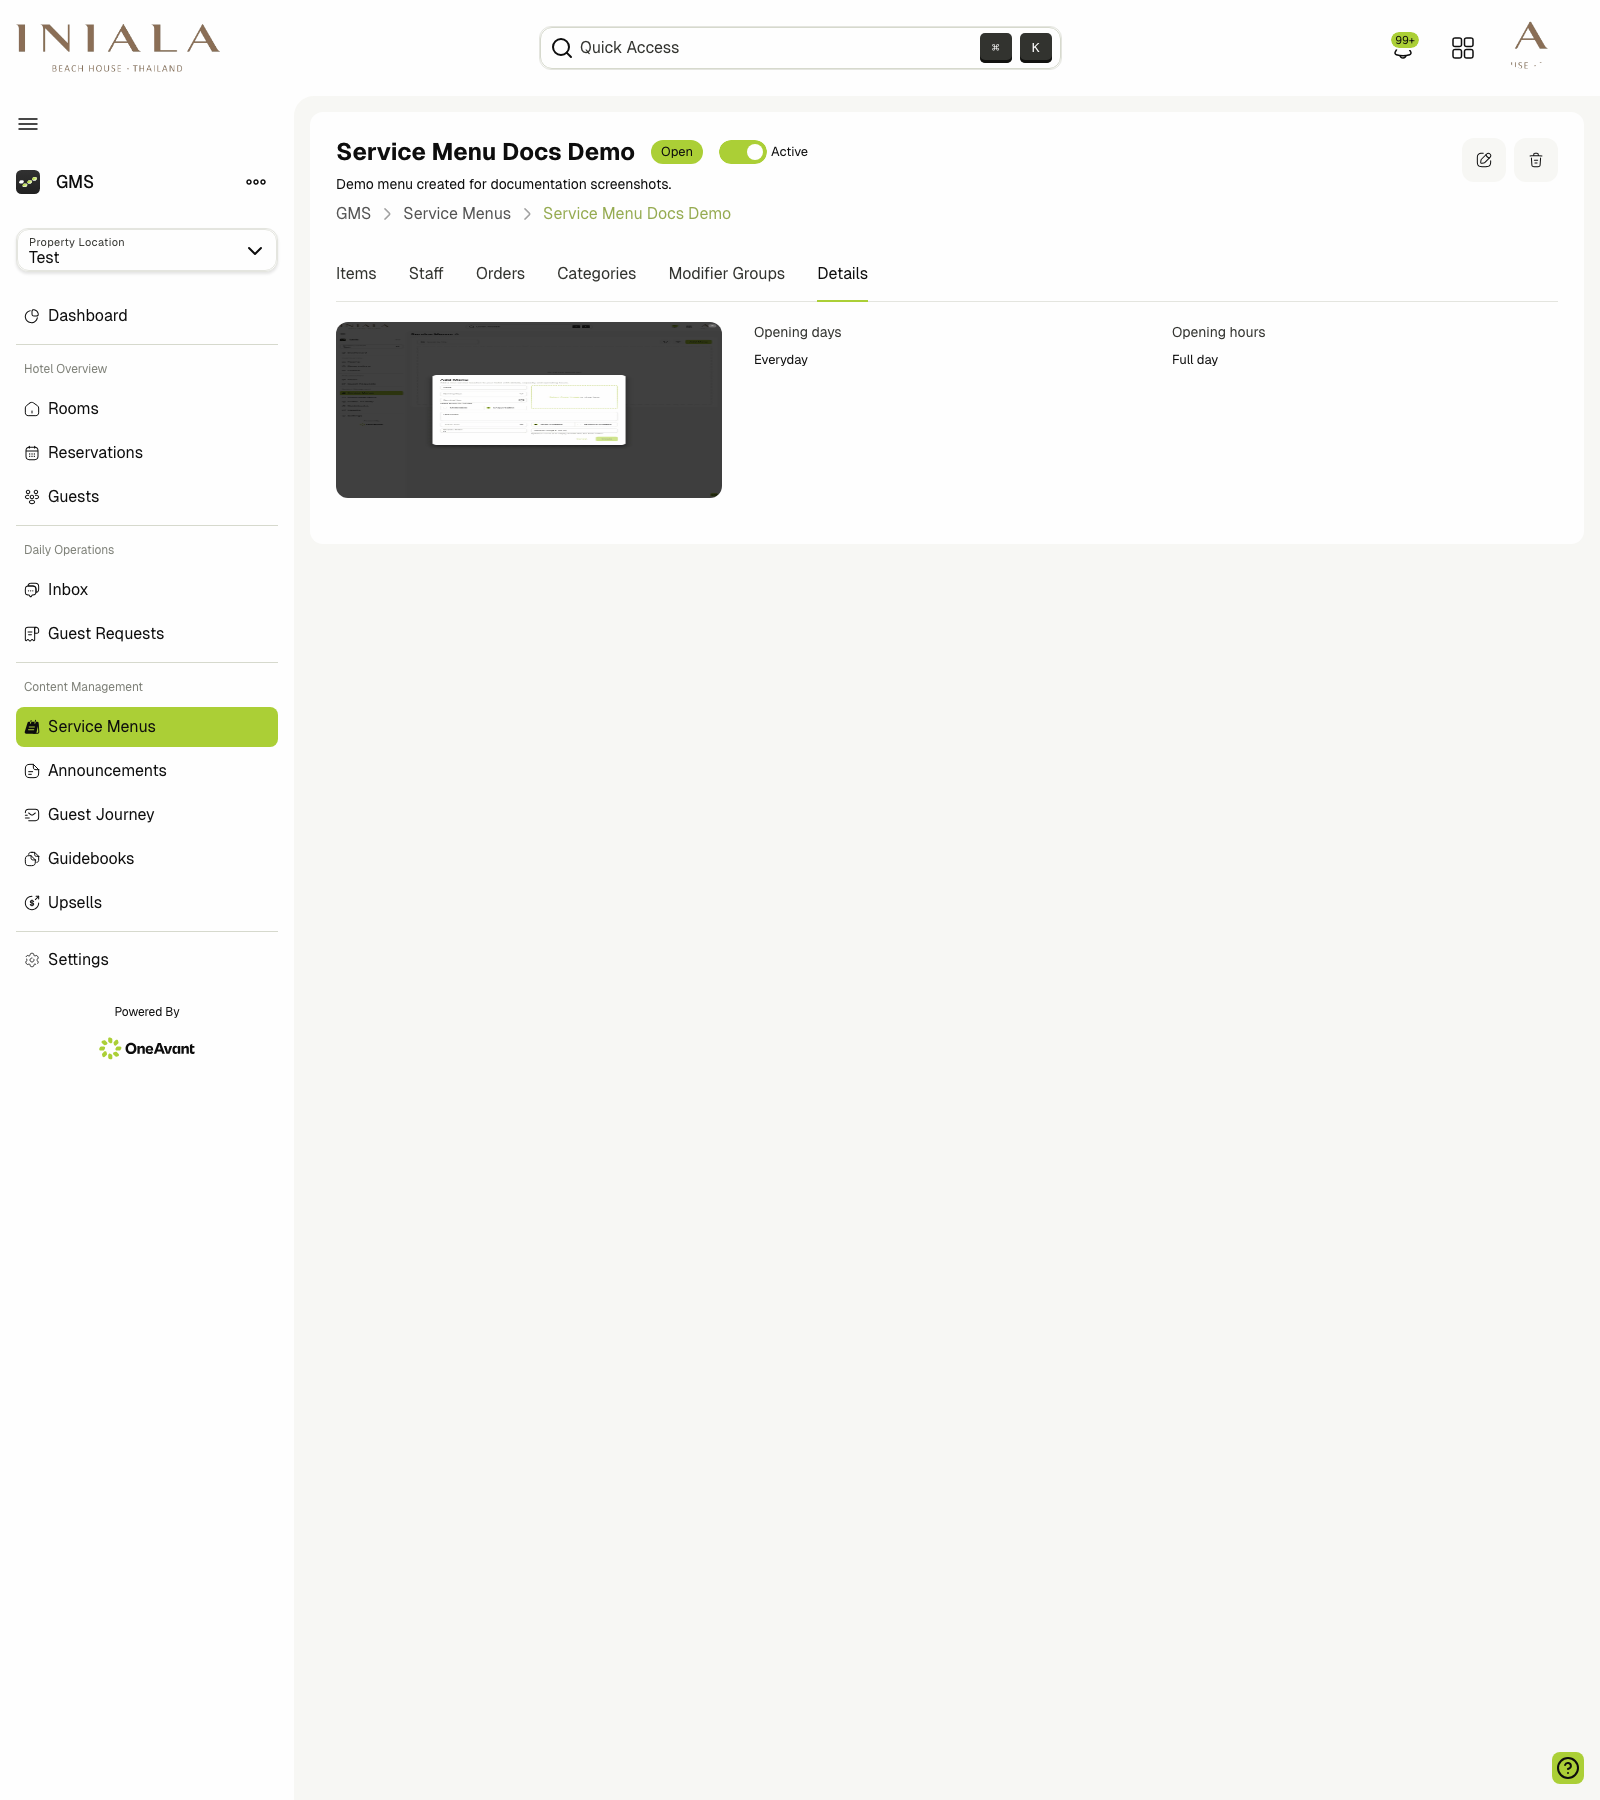
📝 Reviewing Menu Details
The Details tab gives a quick read-only summary of the menu configuration. In the current dashboard this includes the configured cover image preview, opening days, and opening-hours summary.
📱 Guest Browsing Experience
On the guest side, the GMS-476 stories describe this flow:
- Guests see the Order area only when at least one service menu is visible for their stay.
- The menu list shows the menu title, image, and current availability.
- Guests can open a menu to browse its categories and visible items.
- Only enabled items should appear inside guest-facing categories.
- Categories with no visible items should be hidden.
If a menu is currently unavailable:
- The guest can still open it and browse the contents.
- The menu should clearly indicate that it is unavailable.
- Ordering controls should not be shown while the menu is unavailable.
If a menu item is opened in the guest experience, the item details page can show:
- The item name
- Image or images
- Description
- Price with the property's currency
- Modifier groups
- Quantity selector
- Special instructions
For items with modifiers:
- Single-selection modifiers appear as radio-button choices
- Multiple-selection modifiers appear as checkbox groups
- Quantifiable modifiers appear with quantity controls
For non-orderable or browse-only menu behavior, guests can still review the menu and its modifiers without seeing the normal ordering controls.
🛒 Ordering Flow
When the menu and item are available for ordering, guests can place orders in two ways:
-
Order Now This places an immediate order for the current item.
-
Add to Basket This stores the item inside that menu's basket so the guest can continue browsing and order multiple items together.
According to the basket stories in the epic:
- Baskets are menu-specific
- Guests can review quantities, modifiers, and special instructions
- Guests can remove individual items or empty the basket
- The same item can appear multiple times in the basket if its modifiers differ
- Editing a basket item should reopen the item details flow with its previous choices prefilled
✅ Managing Orders
Service menu orders can be managed from:
- The menu's Orders tab
- The guest Inbox / Chat workflow in Properlog
Order details can include:
- The originating menu
- The time the order was placed
- Guest name and room
- Ordered items
- Quantities
- Prices
- Special instructions
The order-status stories define this lifecycle:
- Pending
- Confirmed
- Ready
- Completed
- Canceled
The related dashboard actions are:
- Accept:
Pending -> Confirmed - Ready:
Confirmed -> Ready - Complete:
Ready -> Completed - Reject: cancels the order
Status updates should stay consistent across the admin dashboard and the guest experience so both sides can track progress clearly.