Property Locations
🏢 This section walks you through setting up a property in GMS from scratch, connecting it to your PMS, and managing it afterwards — property details, branding, and staff assignments.
🔐 Before You Start
Setting up a property involves two different kinds of access:
- PMS integration permissions — Required to use the PMS integration flow, to connect a property to a PMS, and to see the PMS connection details on the property page. These permissions live in the PMS CONNECTION feature group of the GMS permissions card.
- Property permissions — Required to create and edit properties and to assign staff to them. These live in the LOCATIONS feature group.
If you don't have the PMS integration permissions, you can still add properties manually as empty properties, but the PMS integration flow is not available to you. Ask a colleague with the PMS CONNECTION permissions to connect the property to your PMS.
For details on how permissions are grouped and assigned, see Roles & Permissions.
To connect Oracle OPERA Cloud you also need the property's codes from OPERA Cloud and someone who can approve integration requests in your OHIP portal. See Details You Need From OPERA Cloud.
🚀 Setting Up Your First Property
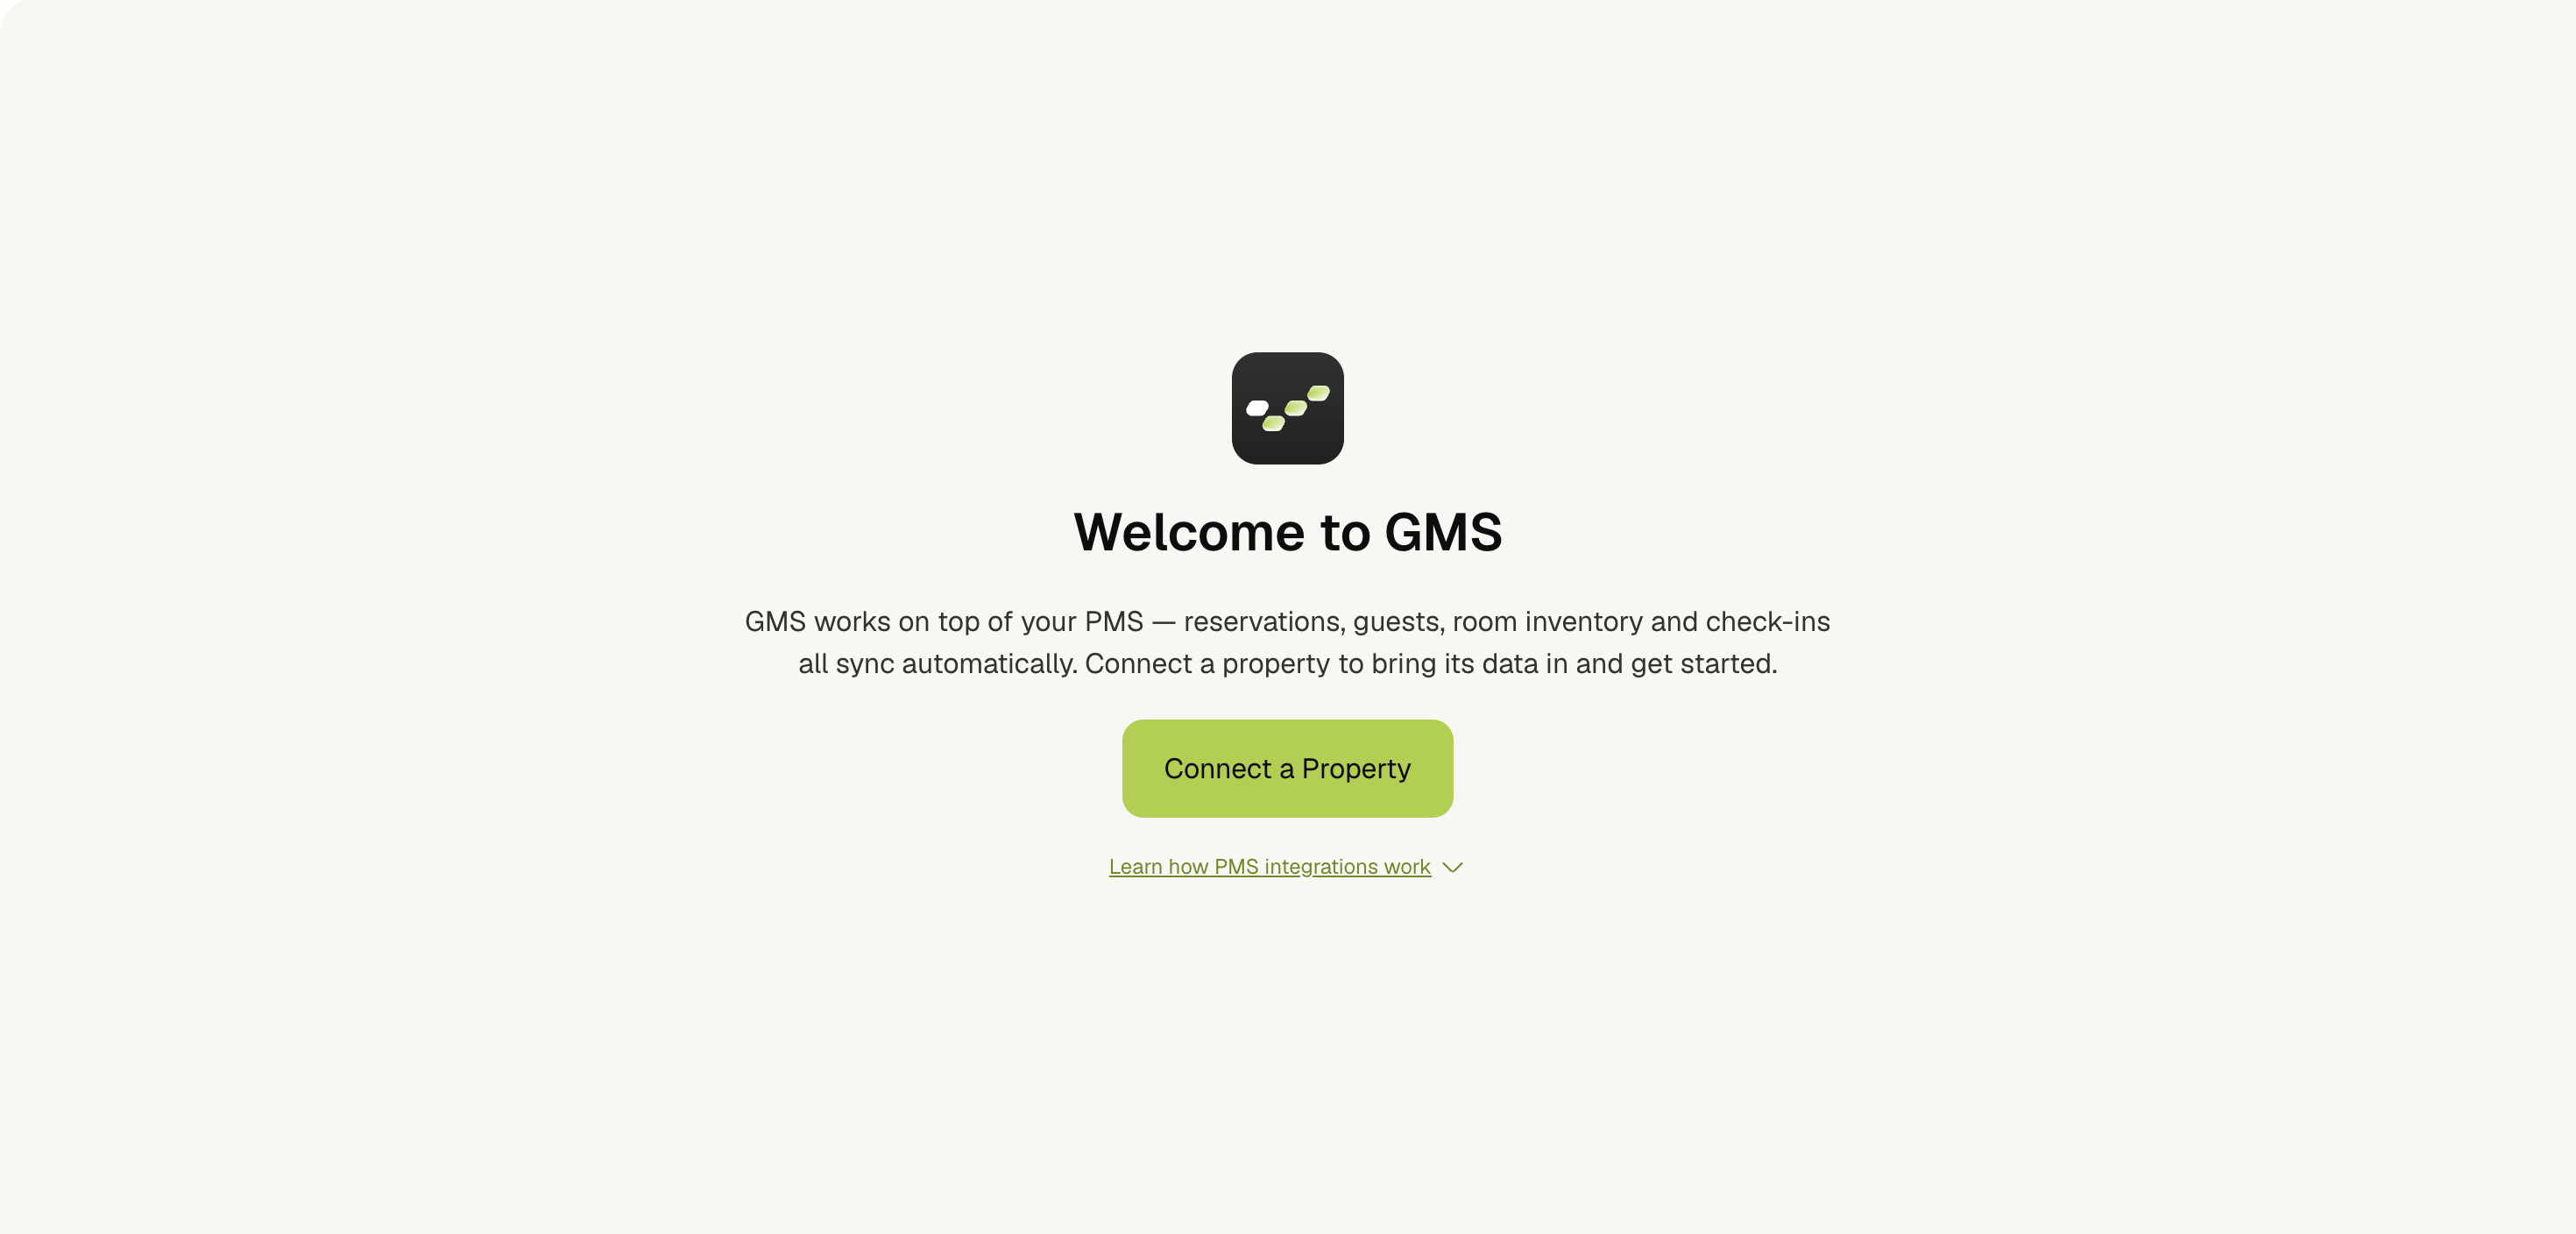
When you open GMS and your tenant has no properties yet, you land on the Welcome to GMS page instead of the dashboard. GMS works on top of your PMS — reservations, guests, room inventory, and check-ins all sync automatically — so the first thing to do is connect a property and bring its data in.
-
Click Connect a Property to start setting up your first property.
-
Expand Learn how PMS integrations work if you want a refresher on the integration before you begin.
➕ Adding Another Property
If you already have at least one property and want to add another one:
-
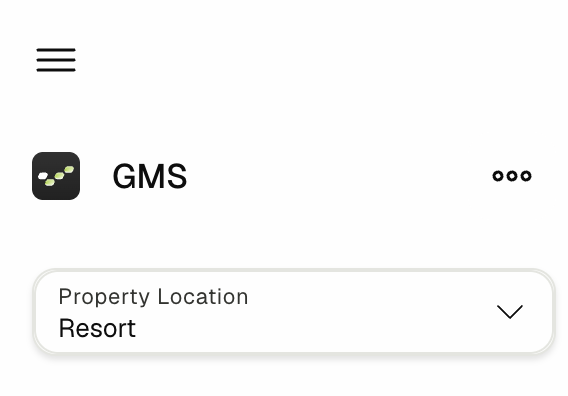
Click the Property Location selector in the sidebar to open the property switcher. It shows the property you are currently working in.
-
Select Add property.
Both entry points open the same Connect a Property wizard. The progress bar at the top tracks the four steps — Choose PMS, Authenticate, Property Info, and Theme & Branding — and each step has Continue to move forward and Back to return to the previous one. Use Cancel, or the ✕ in the top-right corner, to leave the wizard.
🔌 Step 1 — Choose Your PMS
GMS imports reservations, guests, and rooms from your Property Management System, so the first step is picking the one this property runs on.
-
Select the Oracle OPERA Cloud card. A green tick appears in its corner once it is selected.
-
Click Continue.
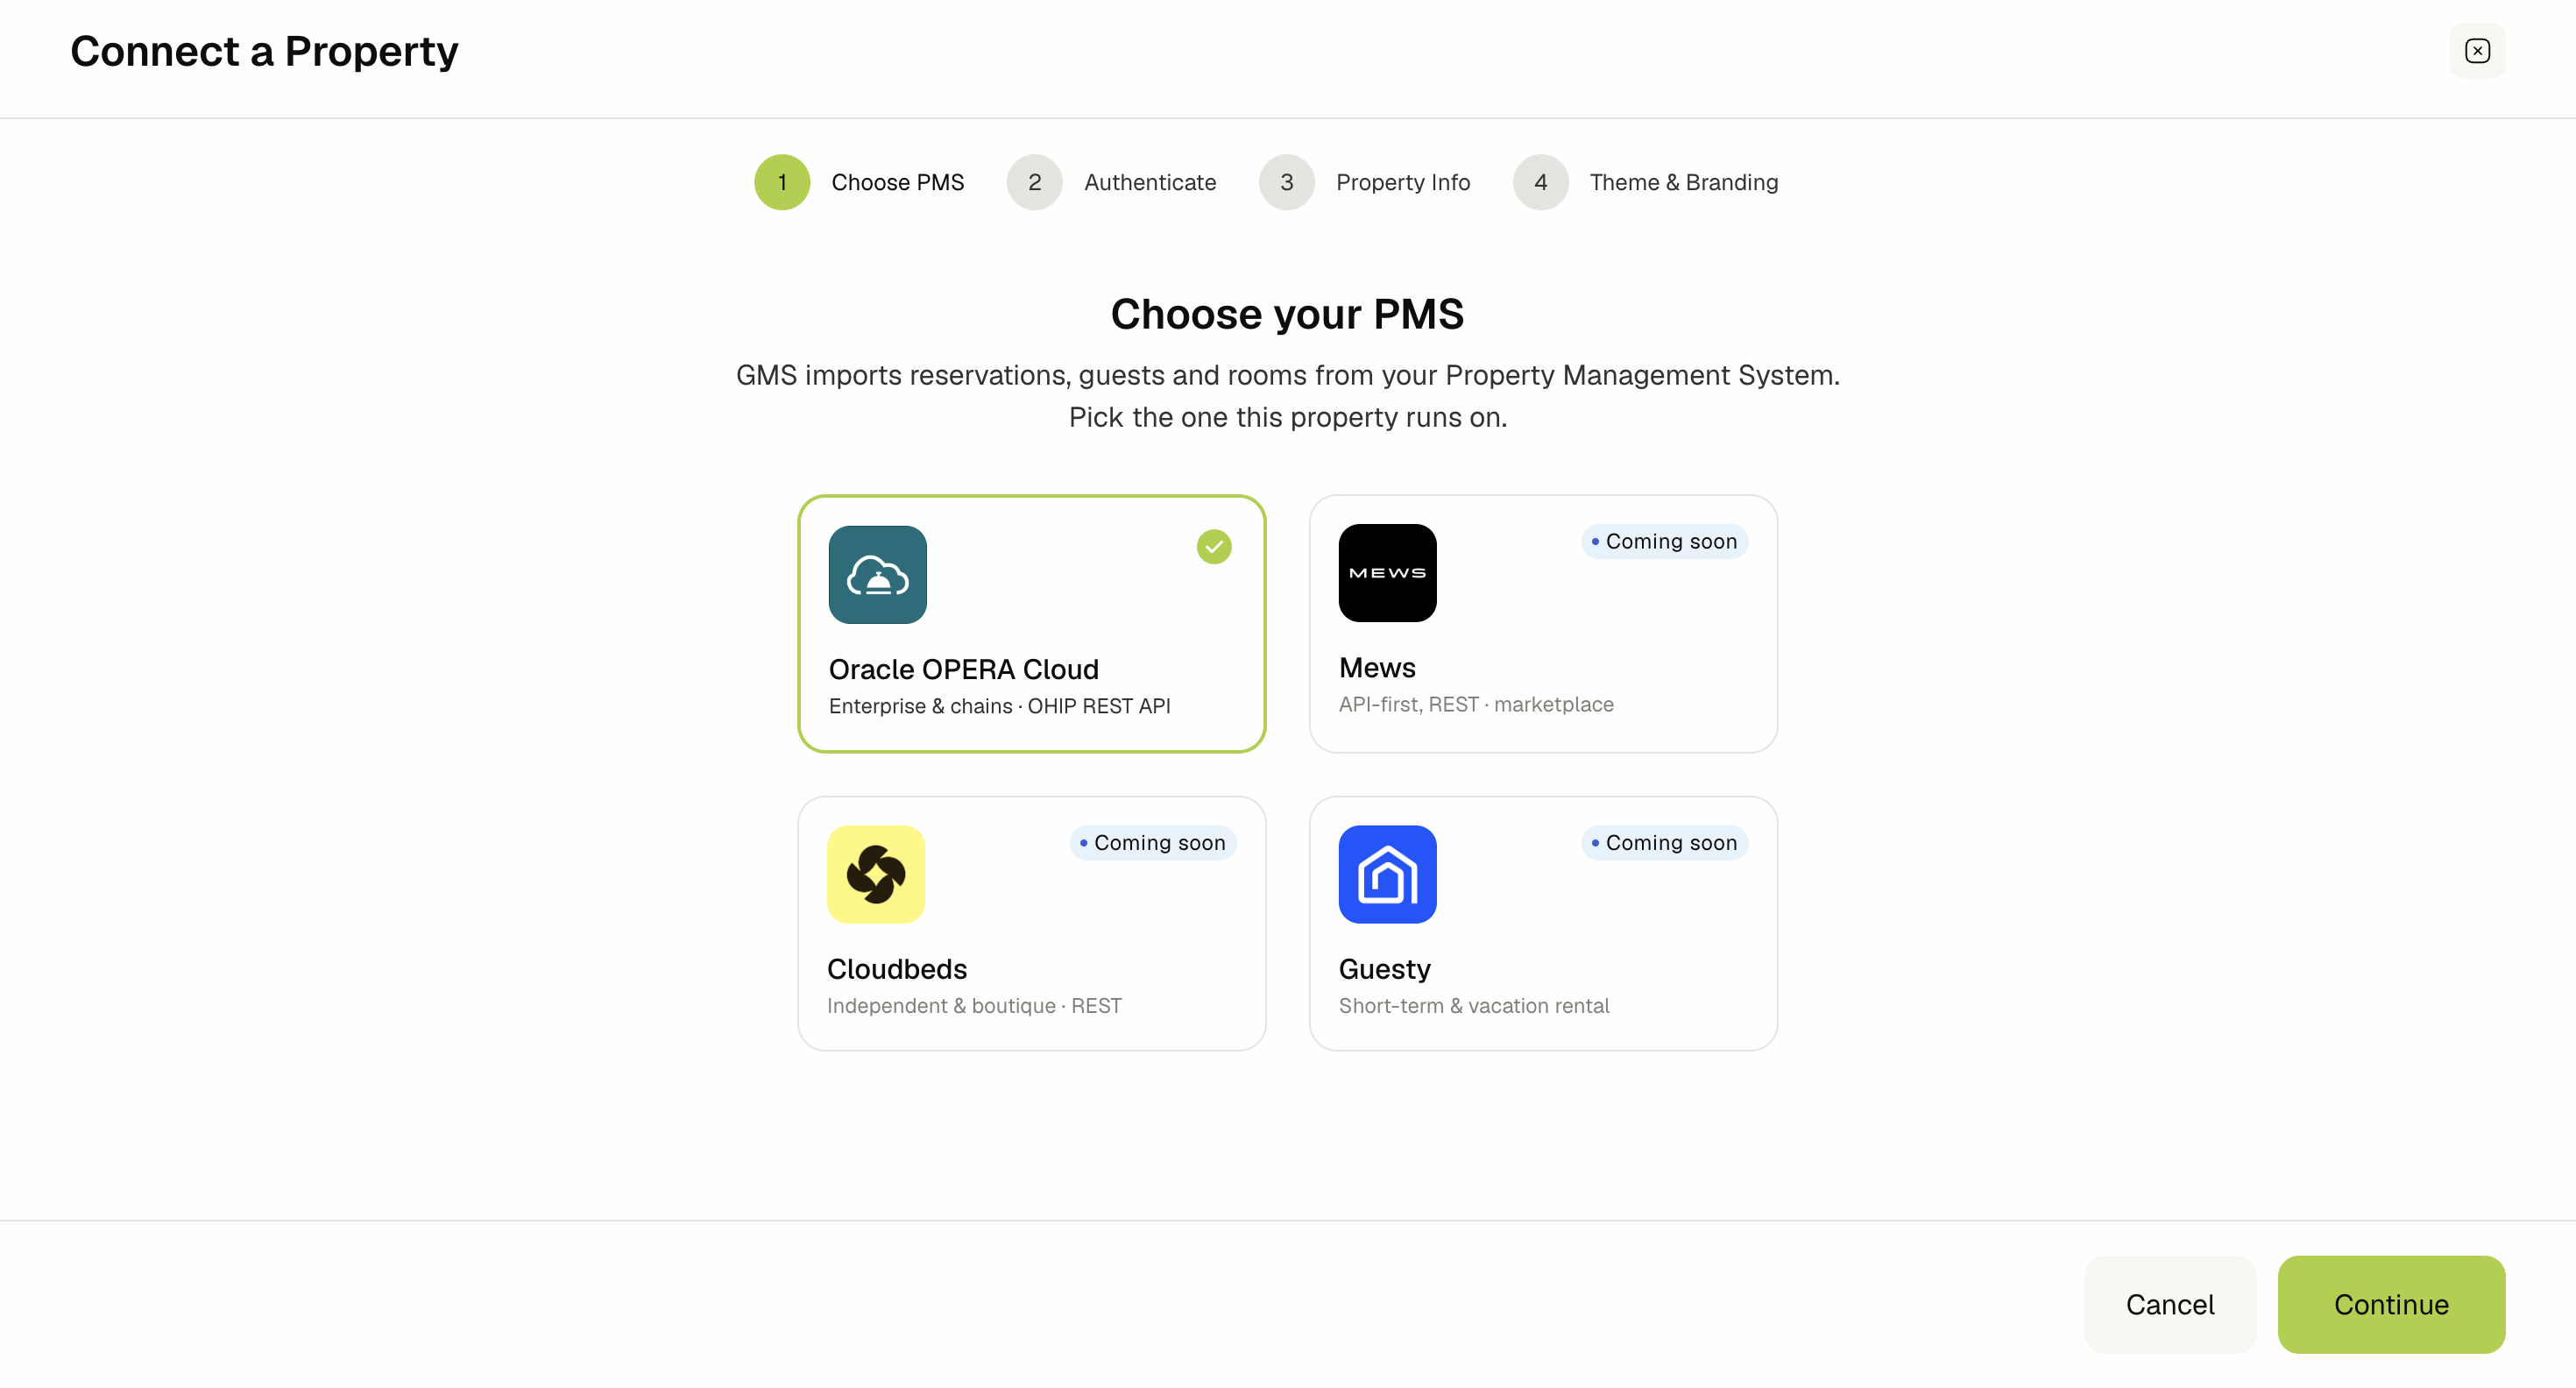
Oracle OPERA Cloud (Enterprise & chains · OHIP REST API) is the PMS you can connect today. Mews, Cloudbeds, and Guesty are shown with a Coming soon badge and cannot be selected yet.
🔑 Step 2 — Authenticate
On the Connect to Oracle OPERA Cloud step you tell GMS where your OPERA Cloud lives. You don't enter any API keys or passwords: OneAvant provides the credentials for the connection.
Fill in the fields:
-
Environment: Live (Production) for your live hotel, or Test (UAT) for a test or training environment.
-
Region: The region your OPERA Cloud is hosted in, for example
Frankfurt. -
Chain ID: Your OPERA Cloud chain code.
-
Hotel ID: This property's hotel code in OPERA Cloud.
-
Enterprise ID: Your enterprise ID, shown in the environment details of your OHIP portal.
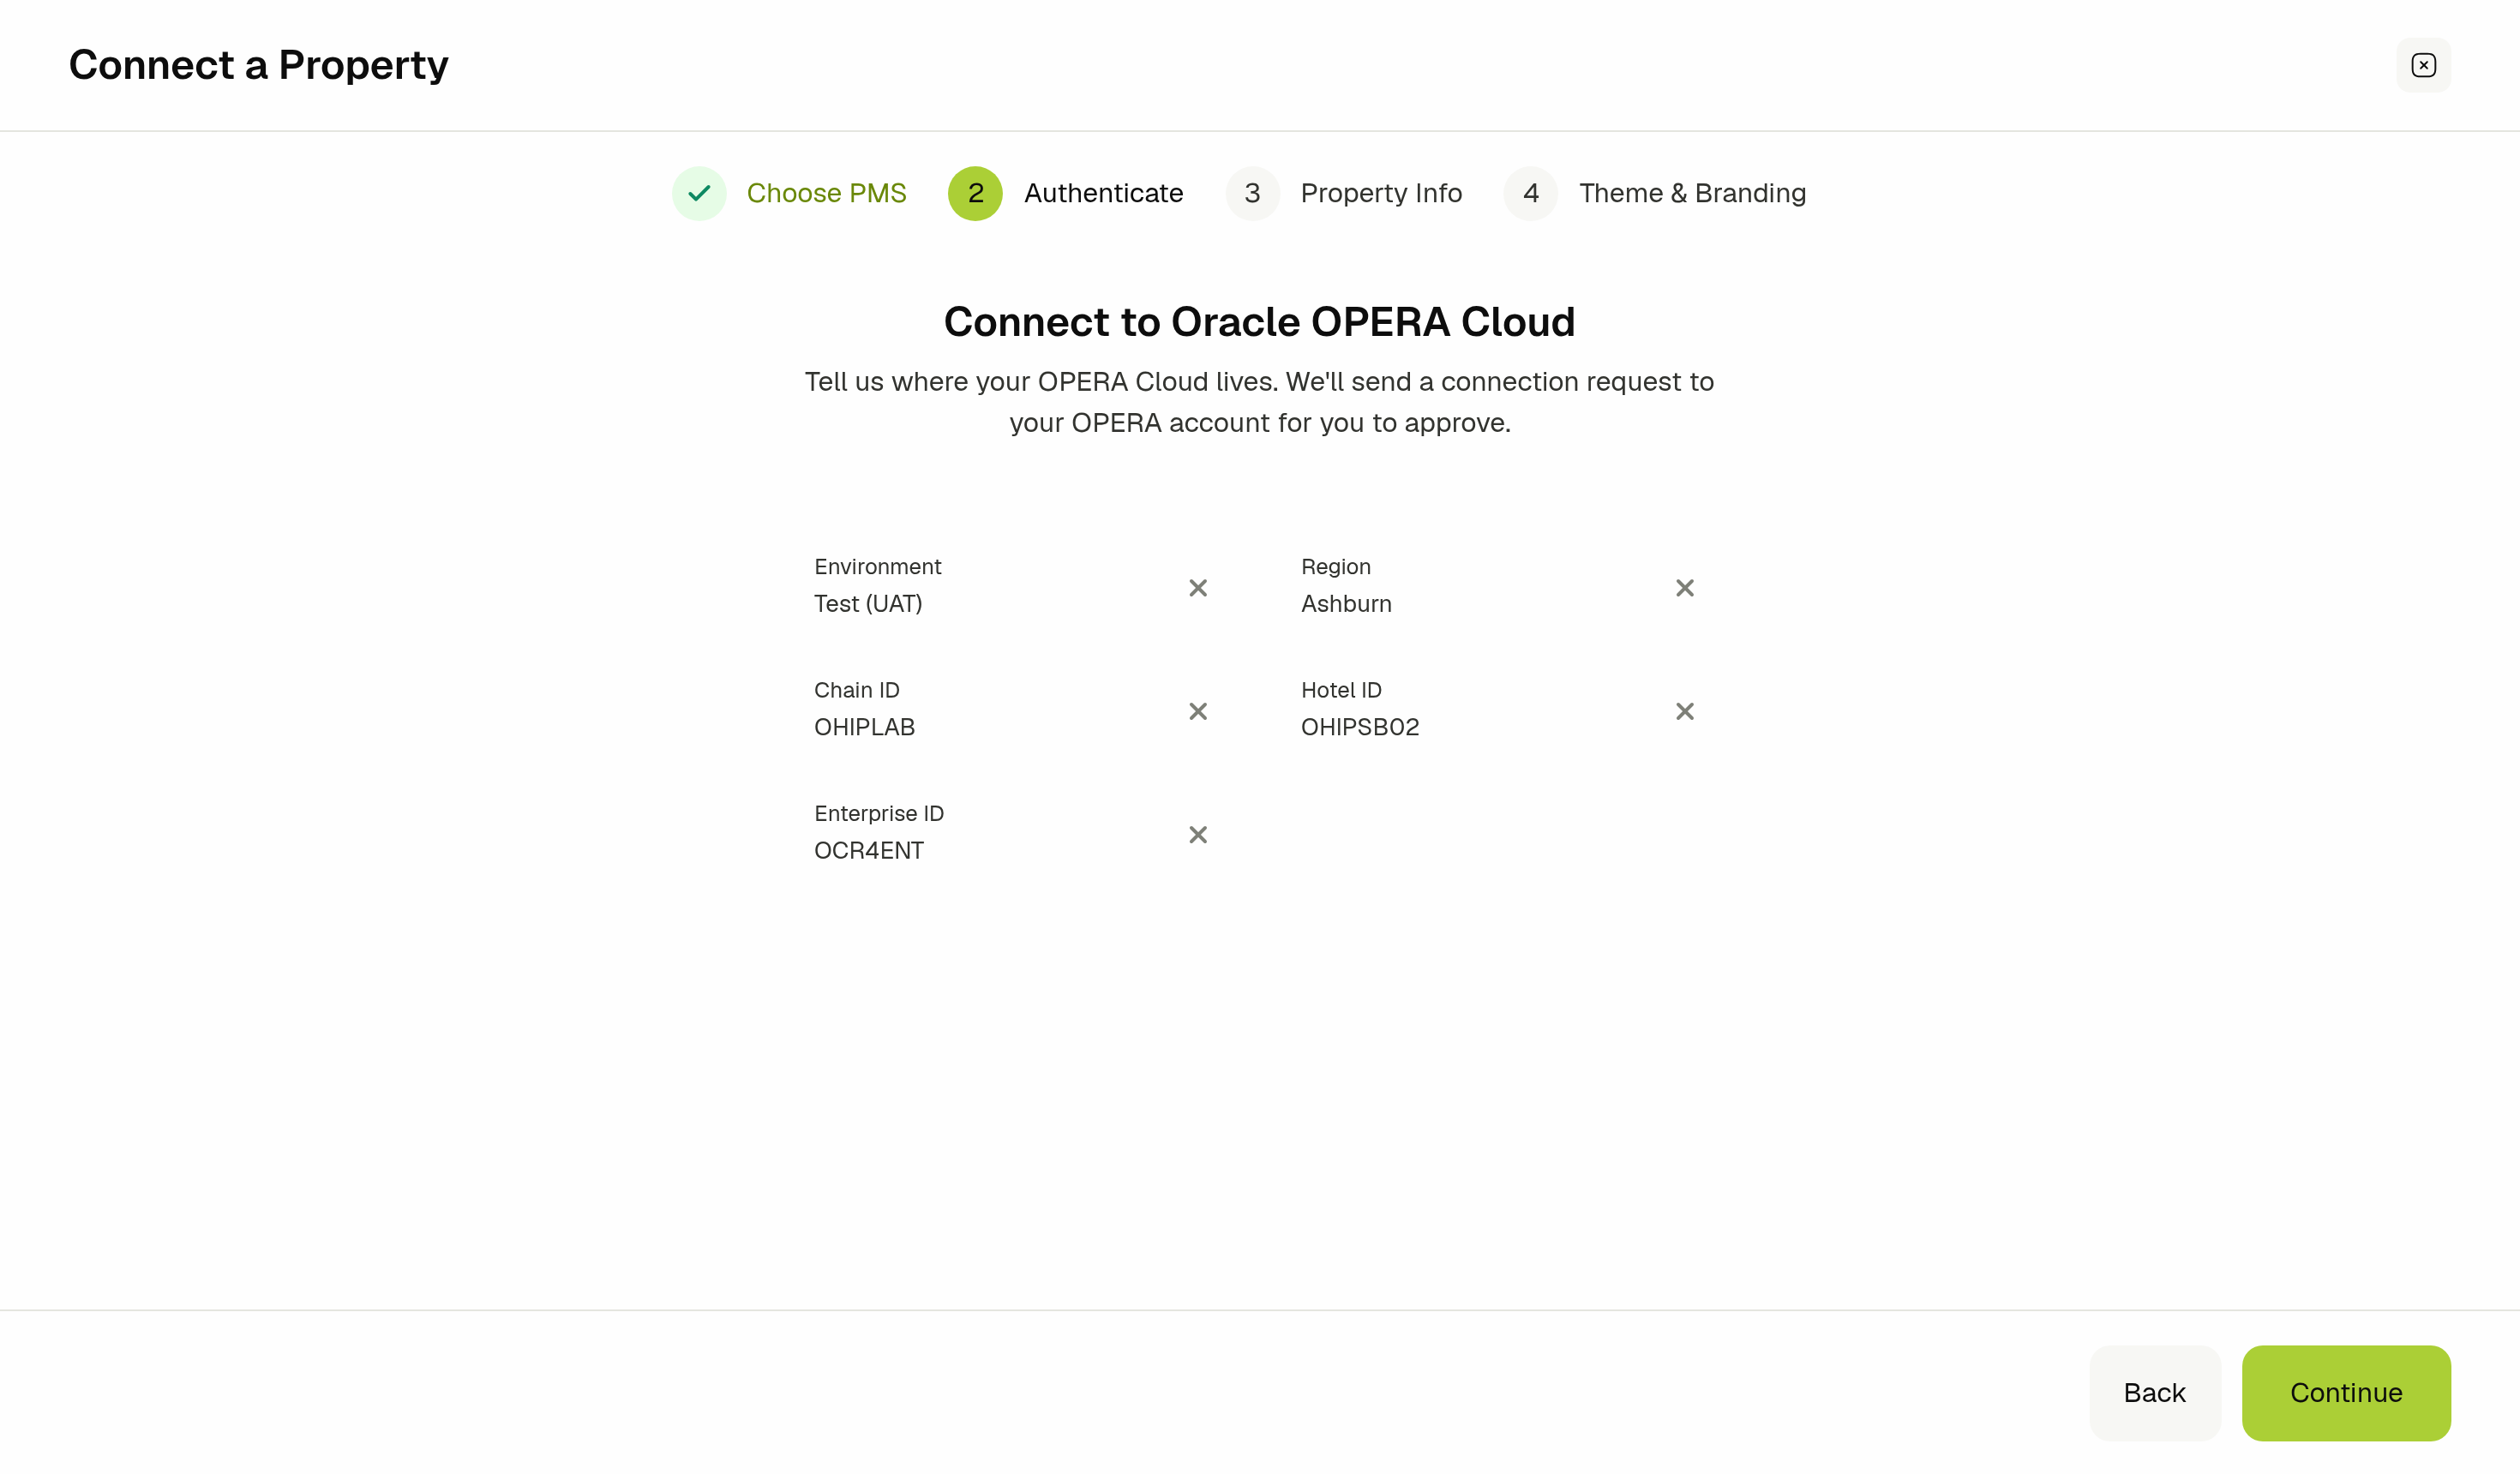
Click Continue to send your details to OneAvant. The wizard then waits while you approve two requests from OneAvant in OPERA Cloud:
- We’re Processing Your Request: Approve the OneAvant connection request in your OHIP portal, then click Check Connection.
- Accept Live Events Request: Accept the OneAvant live events request, then click Check Connection again. Live events are how OPERA Cloud sends GMS each change as it happens.
You can close the wizard while you wait. It reopens on the same step the next time you start it. See Connecting Oracle OPERA Cloud for each step and what the check messages mean.
If Continue stays greyed out, one of the fields is still empty.
🏨 Step 3 — Confirm Property Details
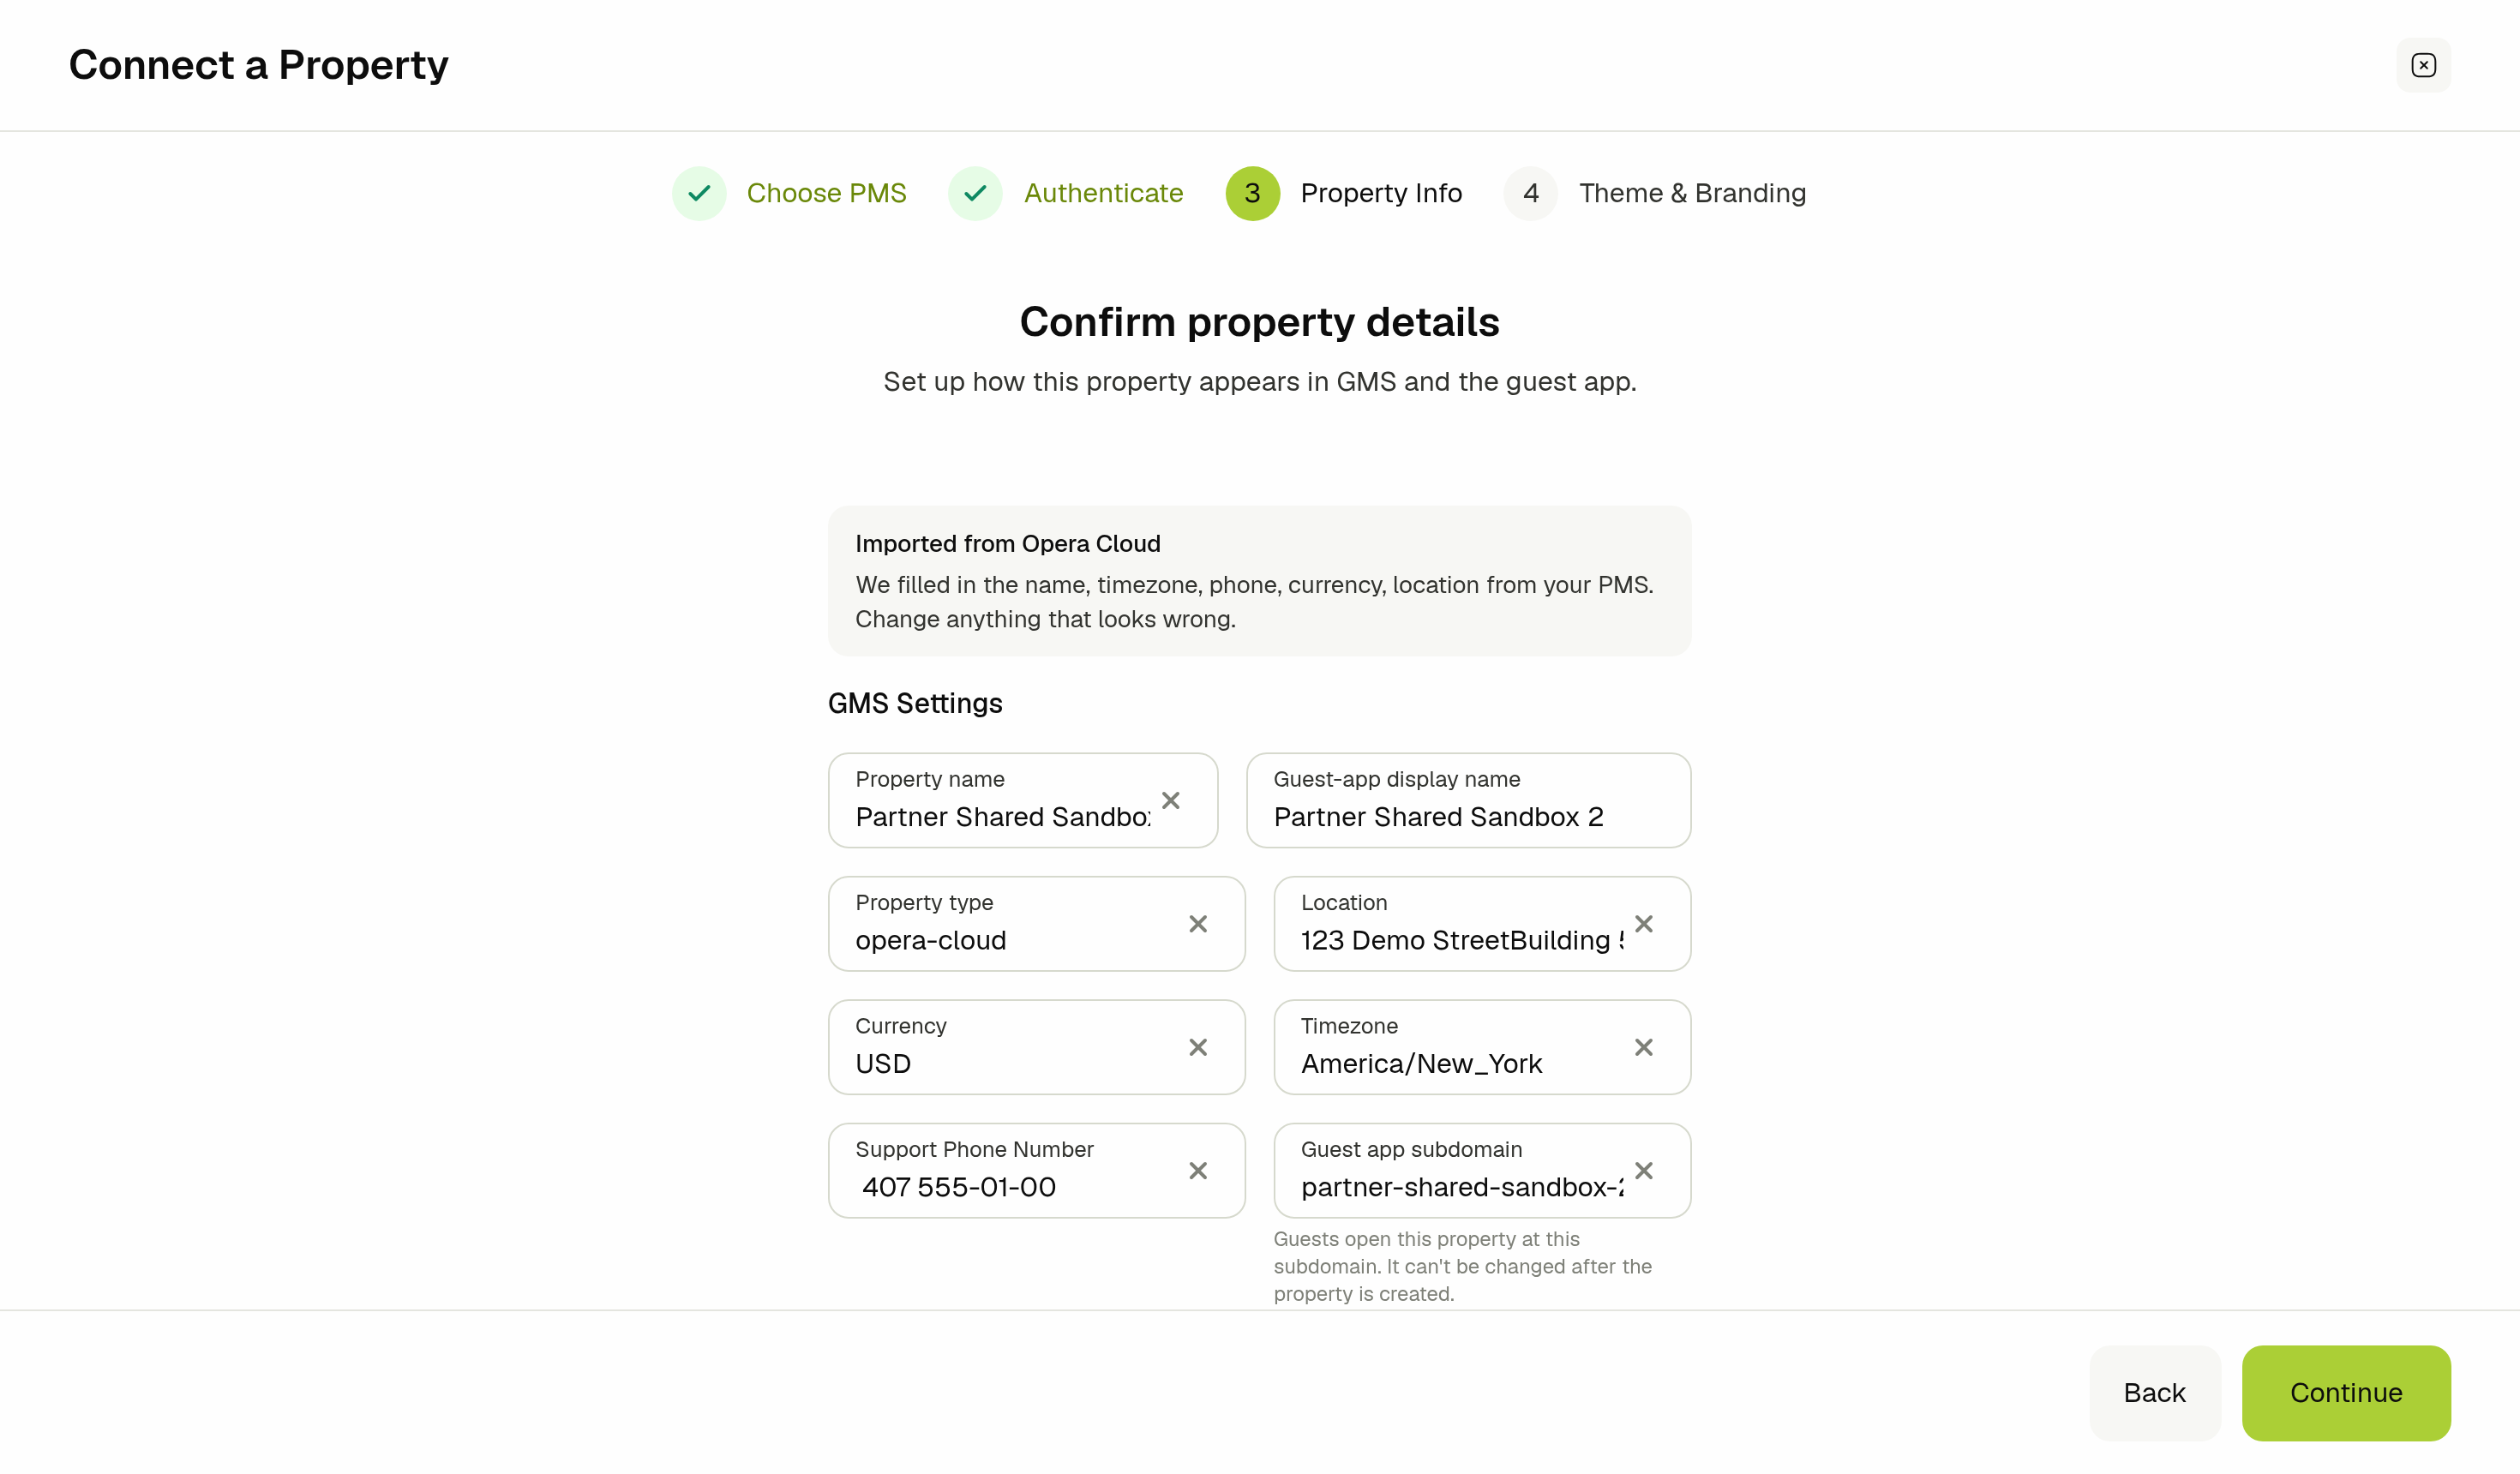
This step sets up how the property appears in GMS and in the guest app. When the property is connected to OPERA Cloud, GMS fills in what it can from OPERA Cloud and says so in an Imported from Opera Cloud panel. Check the GMS Settings fields and change anything that looks wrong:
- Property name: The name your team sees in GMS.
- Guest-app display name: The name guests see in the guest app.
- Property type
- Location
- Currency
- Timezone
- Support Phone Number
- Guest app subdomain: The address guests open the guest app at. It can't be changed after the property is created.
Then click Continue.
🎨 Step 4 — Theme & Branding
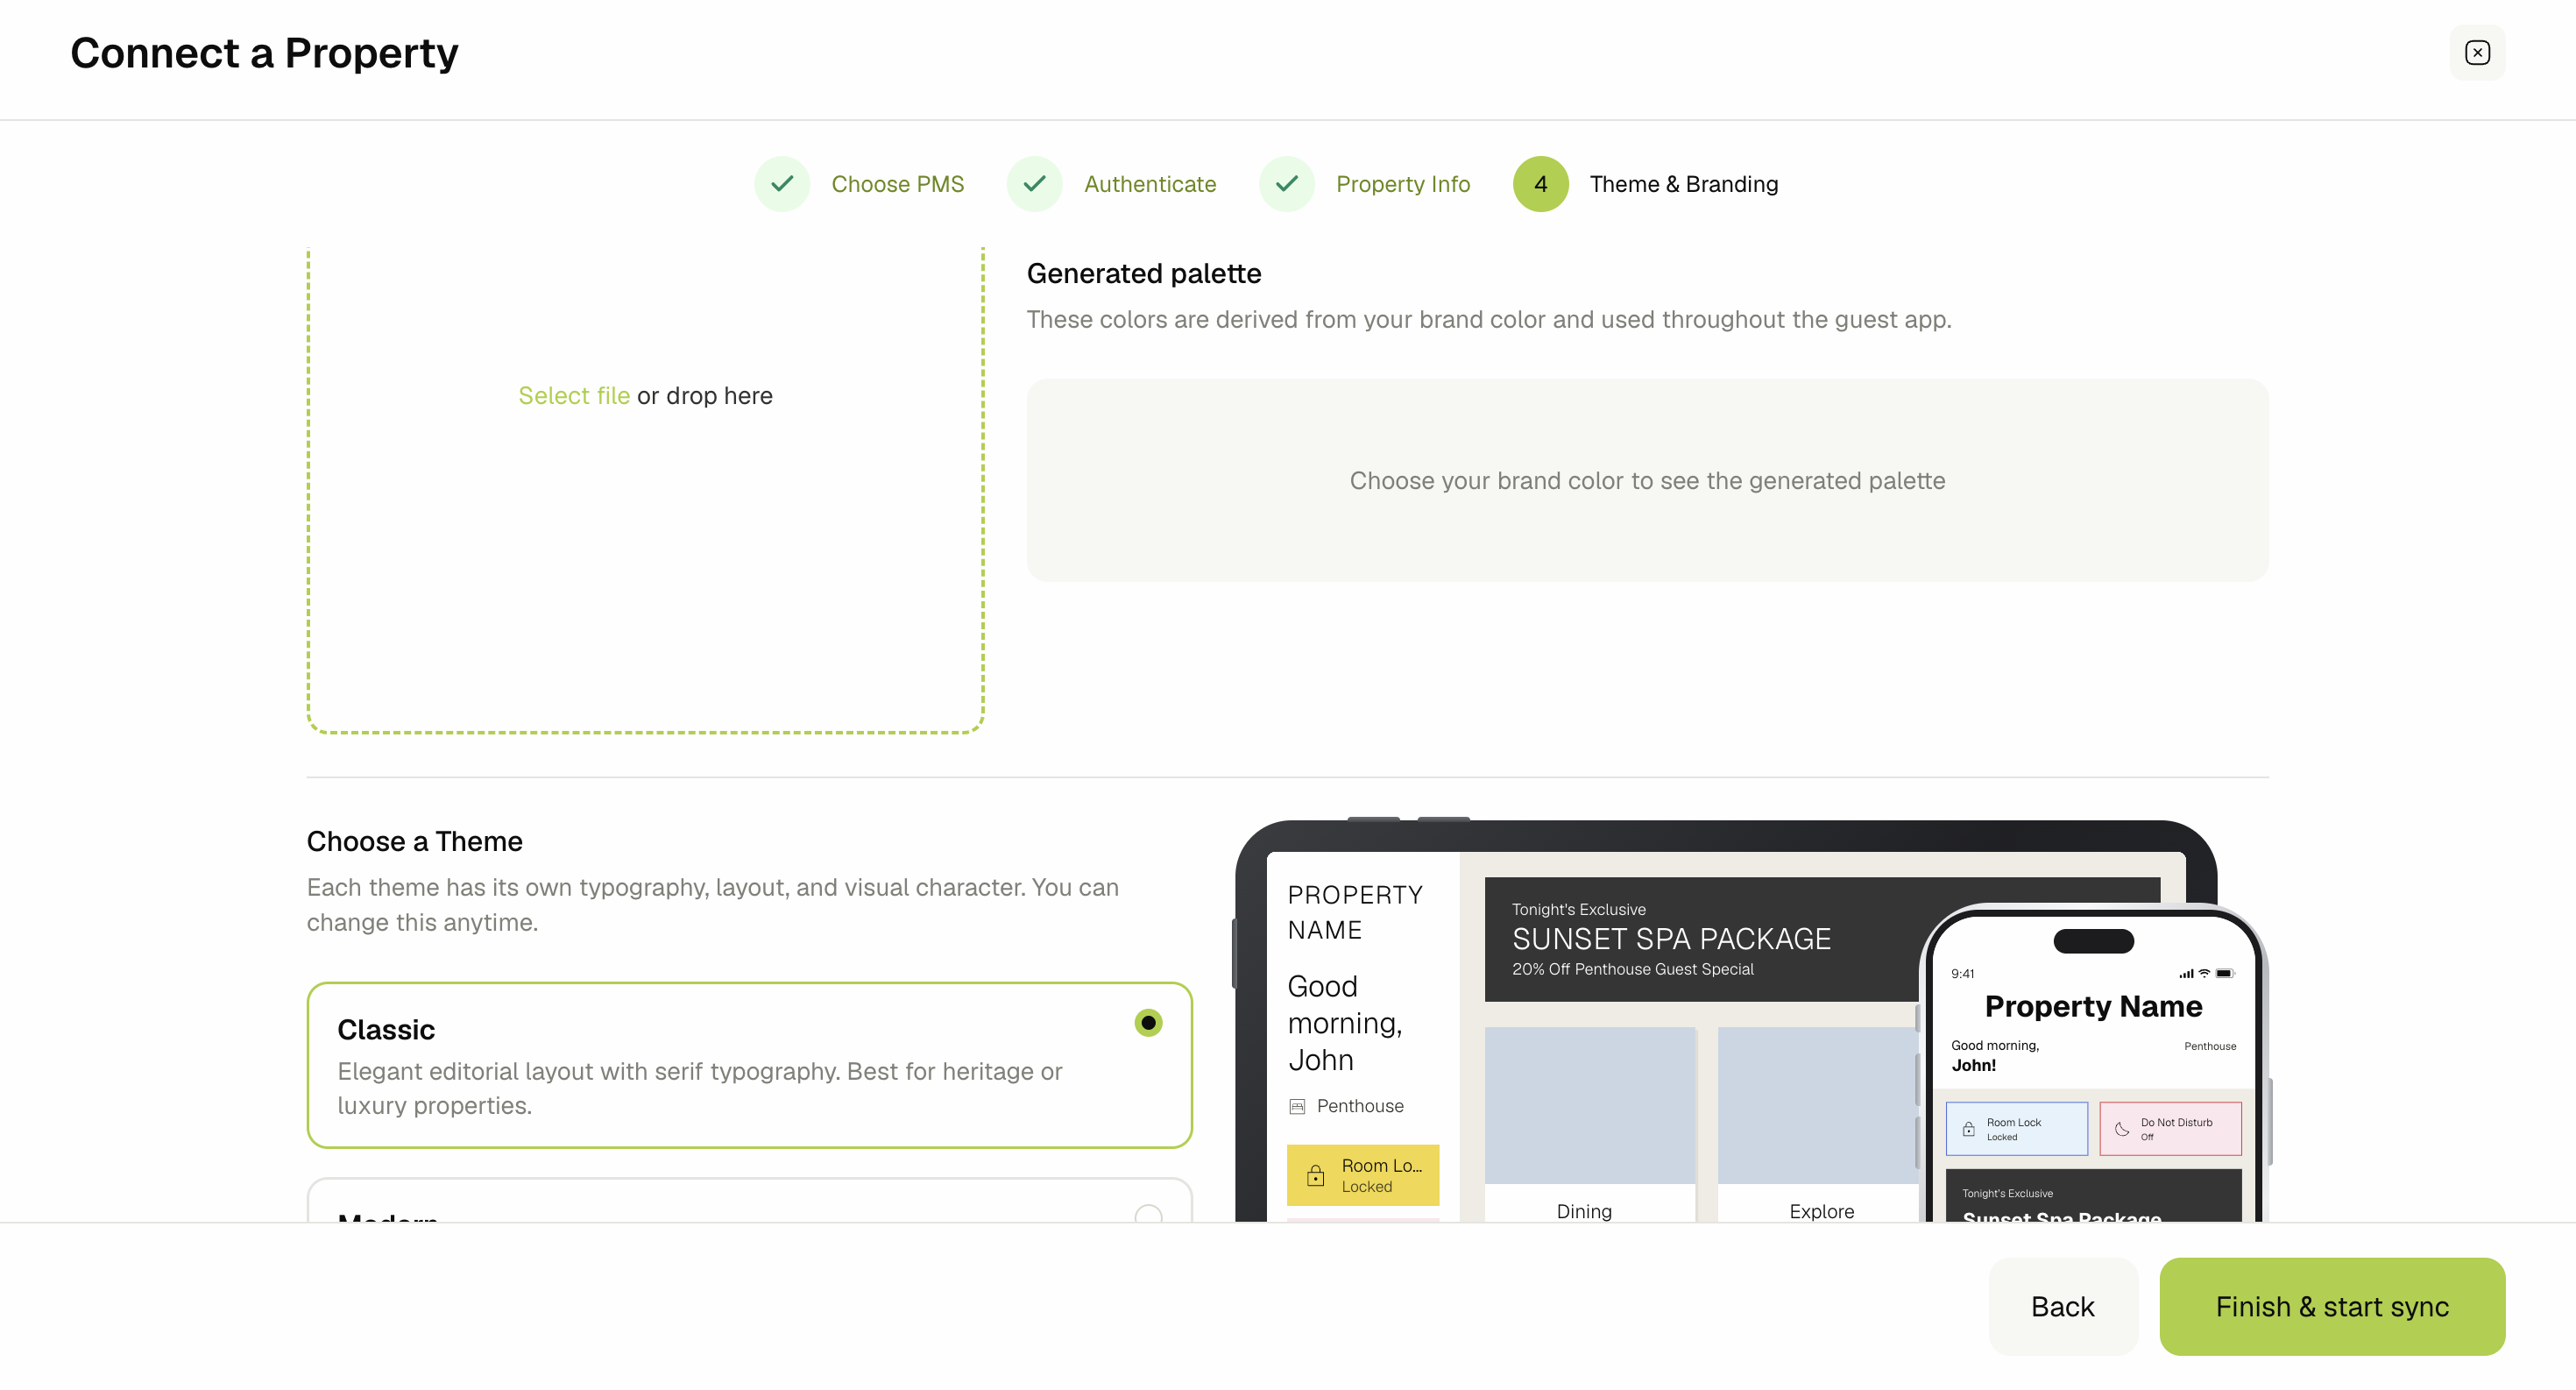
On the last step of the wizard you decide how the property looks to guests. A live preview on the right shows your choices on a tablet and a phone as you make them.
-
Logo — Click Select file, or drop the file onto the upload area.
-
Brand color — Pick the property's brand color. GMS derives a Generated palette from it and uses those colors throughout the guest app. Until you choose one, the palette area reads Choose your brand color to see the generated palette.
-
Choose a Theme — Each theme has its own typography, layout, and visual character. Classic, for example, is an elegant editorial layout with serif typography, best for heritage or luxury properties. You can change the theme at any time later.
-
Branding images — Scroll down to upload the images shown on the guest login screen and the home page cards in the mobile and tablet applications: Hero Image (Login Screen), Services Card, Explore Card, and Home Screen Dining Card. Click Upload image, or drop a file onto each area.
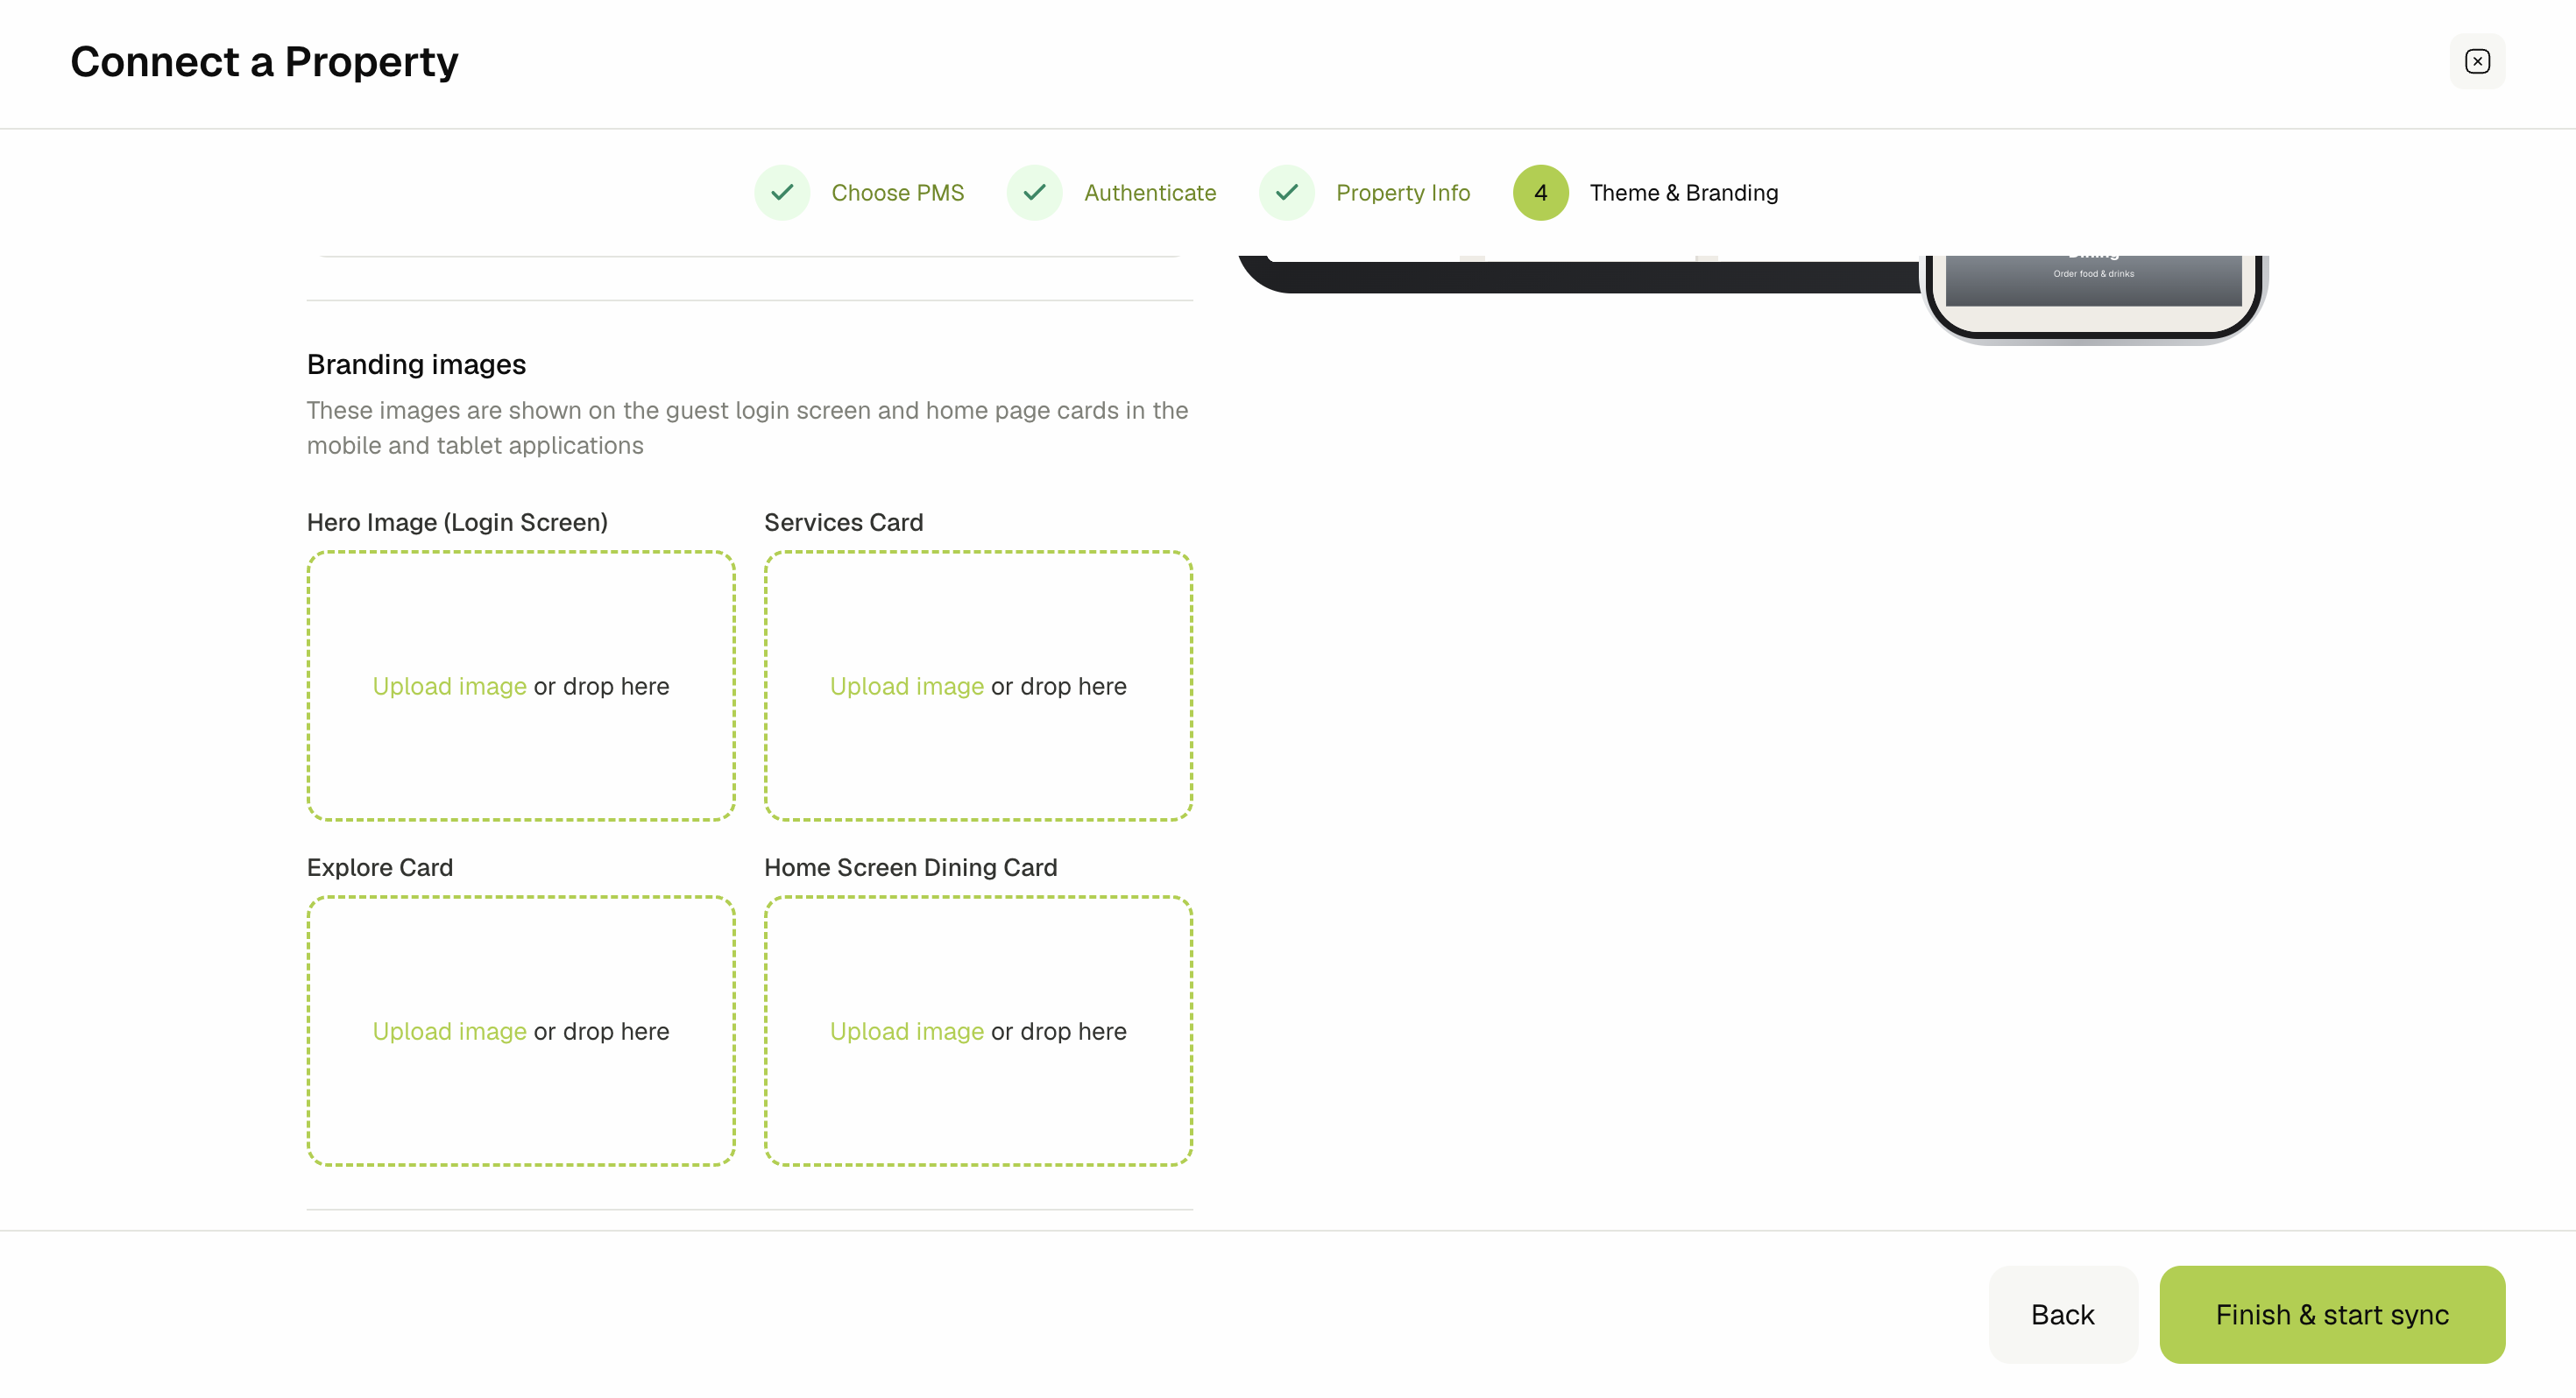
When you are happy with the branding, click Finish & start sync.
⏳ Step 5 — Property Imports
Finish & start sync completes the wizard and starts the first sync. The Property connected screen confirms the property is linked to Oracle OPERA Cloud and shows the Initial sync in progress.
Each part of the import has its own progress bar and status, so you can see how far along GMS is:
- Room classes
- Room types
- Rooms / Units
- Room occupancy
- Reservations
- Guest profiles
- Finishing up
A part is Queued while it waits, Importing while it runs, and Done when it finishes. You don't have to wait for the whole sync — you can start using GMS as each part arrives.
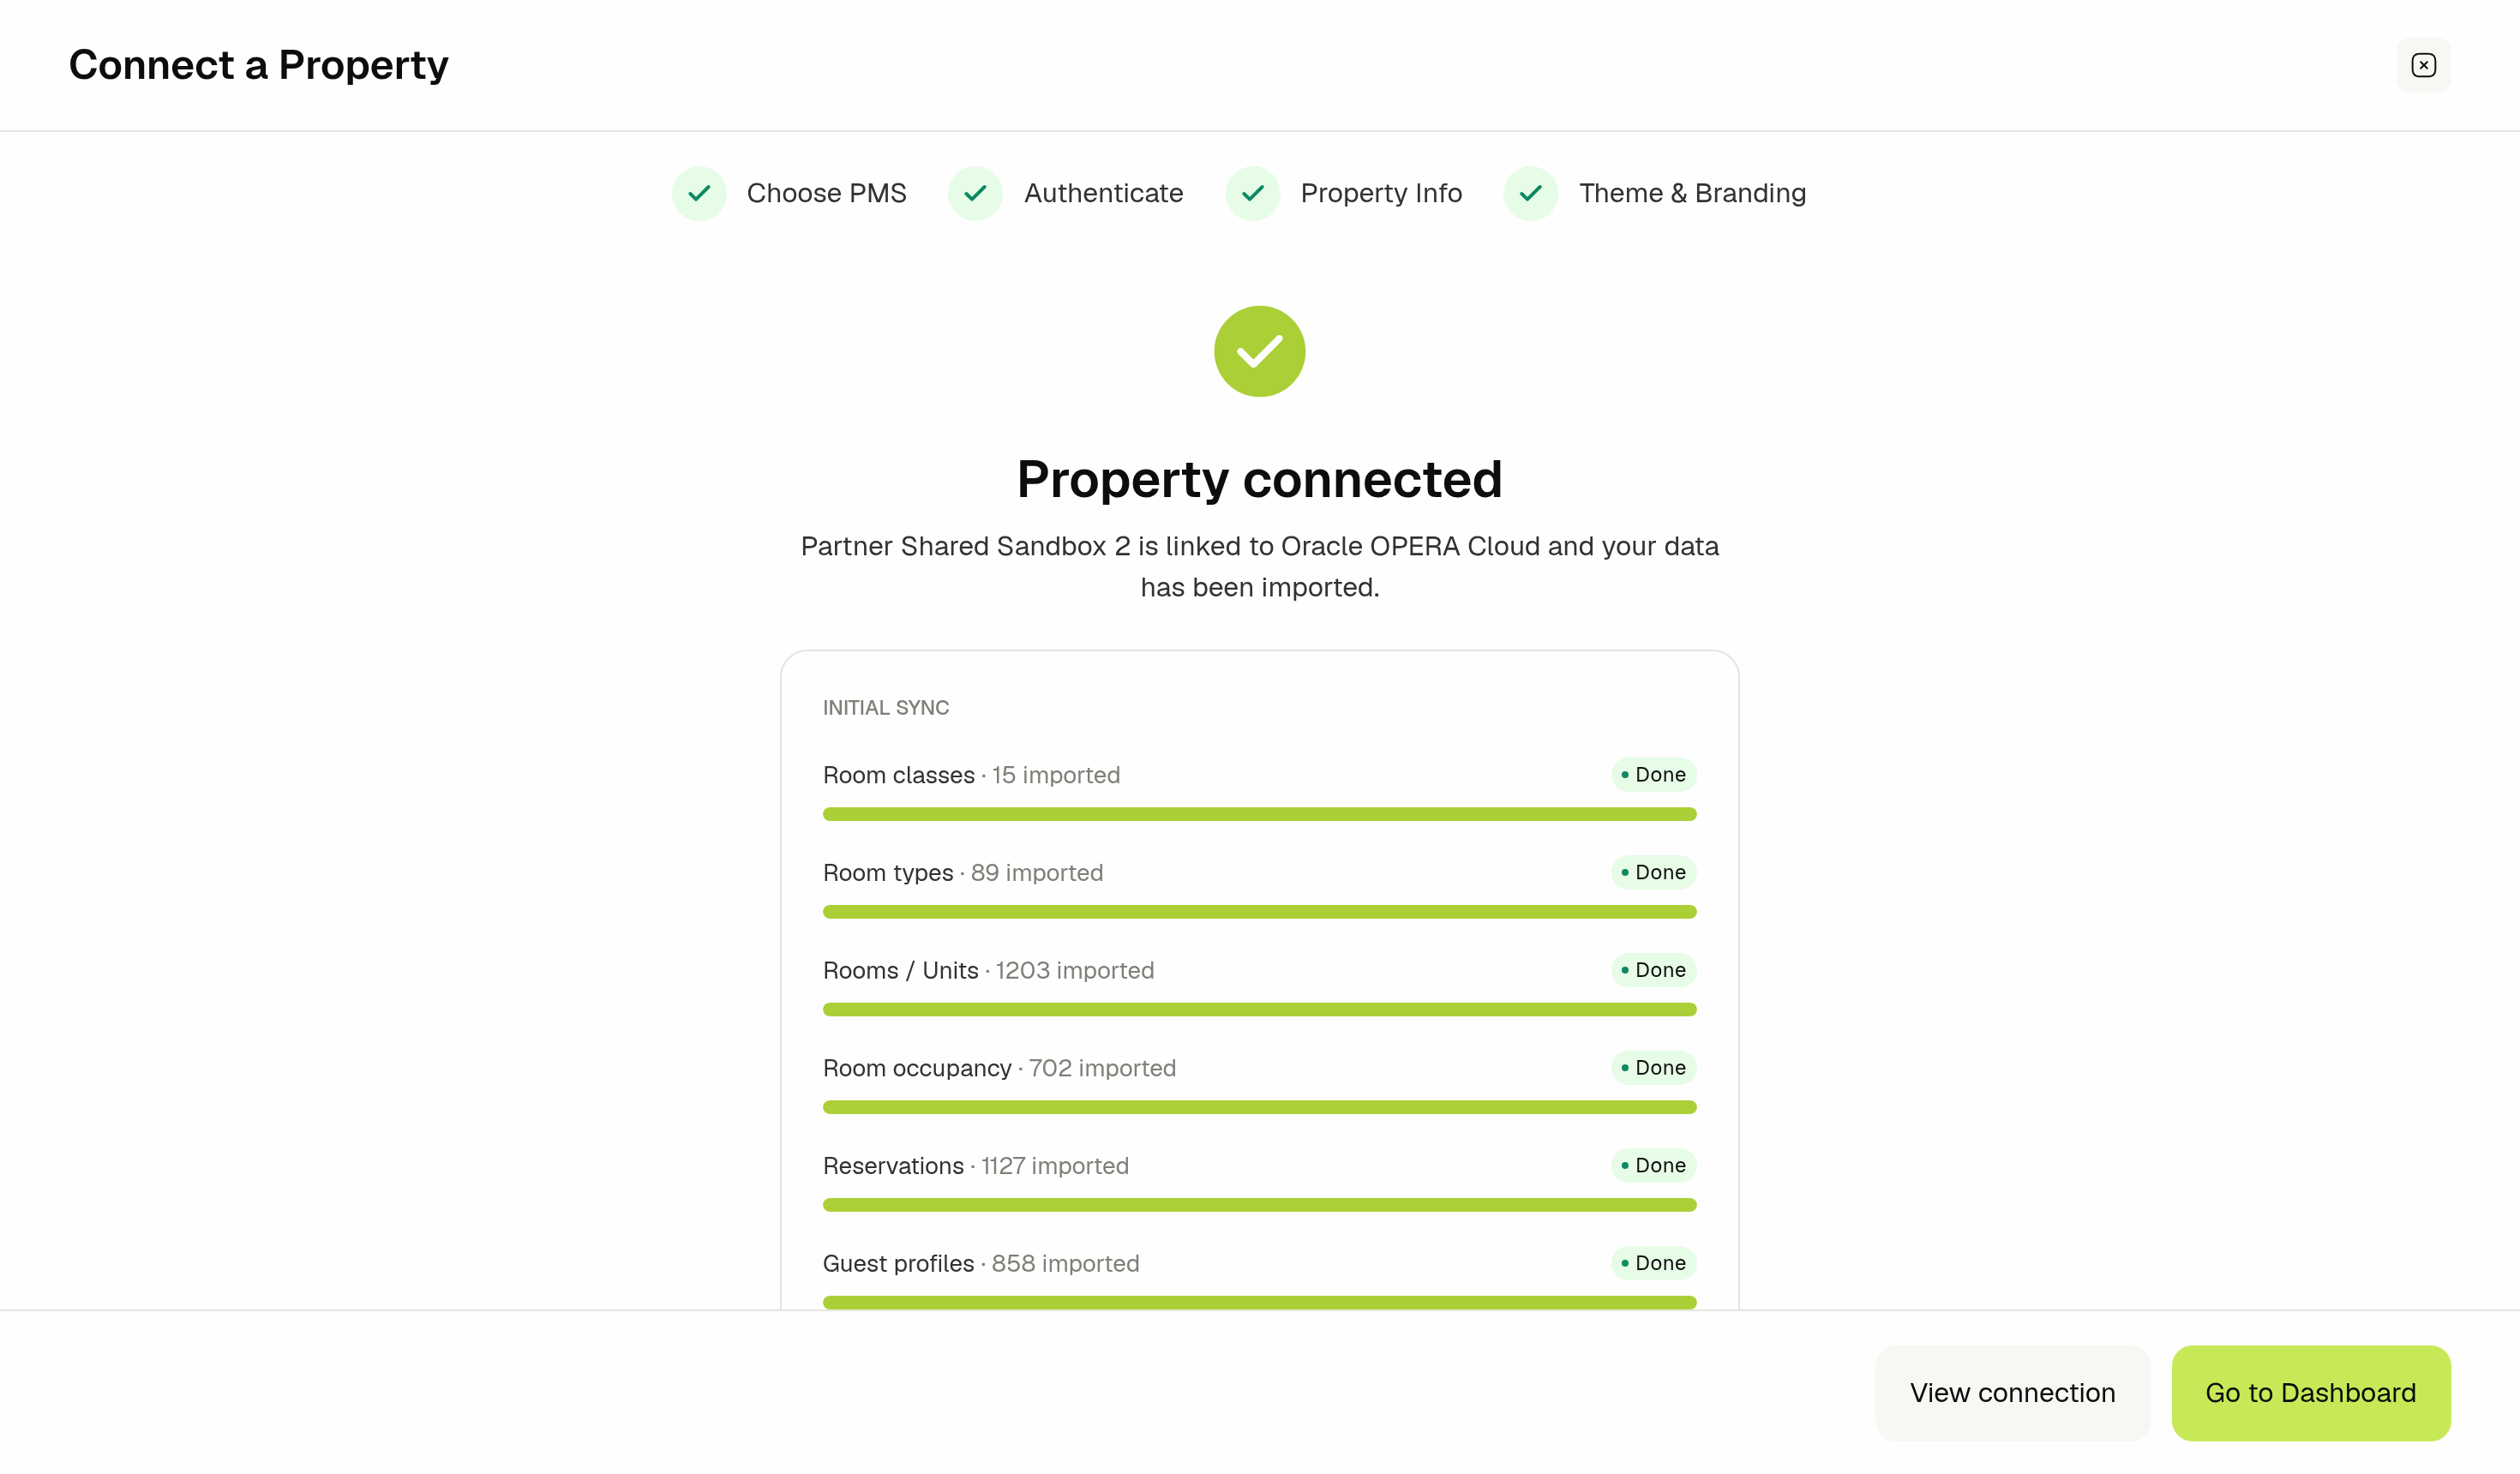
From here you can click View connection to open the property's PMS connection details, or Go to Dashboard to start working in GMS. If WhatsApp is available on your account, the button reads Continue and takes you on to Step 6.
The initial sync imports reservations from 7 days ago to 21 days ahead. See Connecting Oracle OPERA Cloud for what each part covers.
💬 Step 6 — Connect WhatsApp Business
Connect the property's Meta WhatsApp Business account so you can message guests, send templates, and receive their replies in the inbox.
You have two ways to connect:
-
Continue with Meta — Authorize with Meta and GMS pulls your WhatsApp Business Account, phone numbers, and approved templates automatically. This is the quickest route.
-
Connect manually — Use this if you already have the credentials to hand.
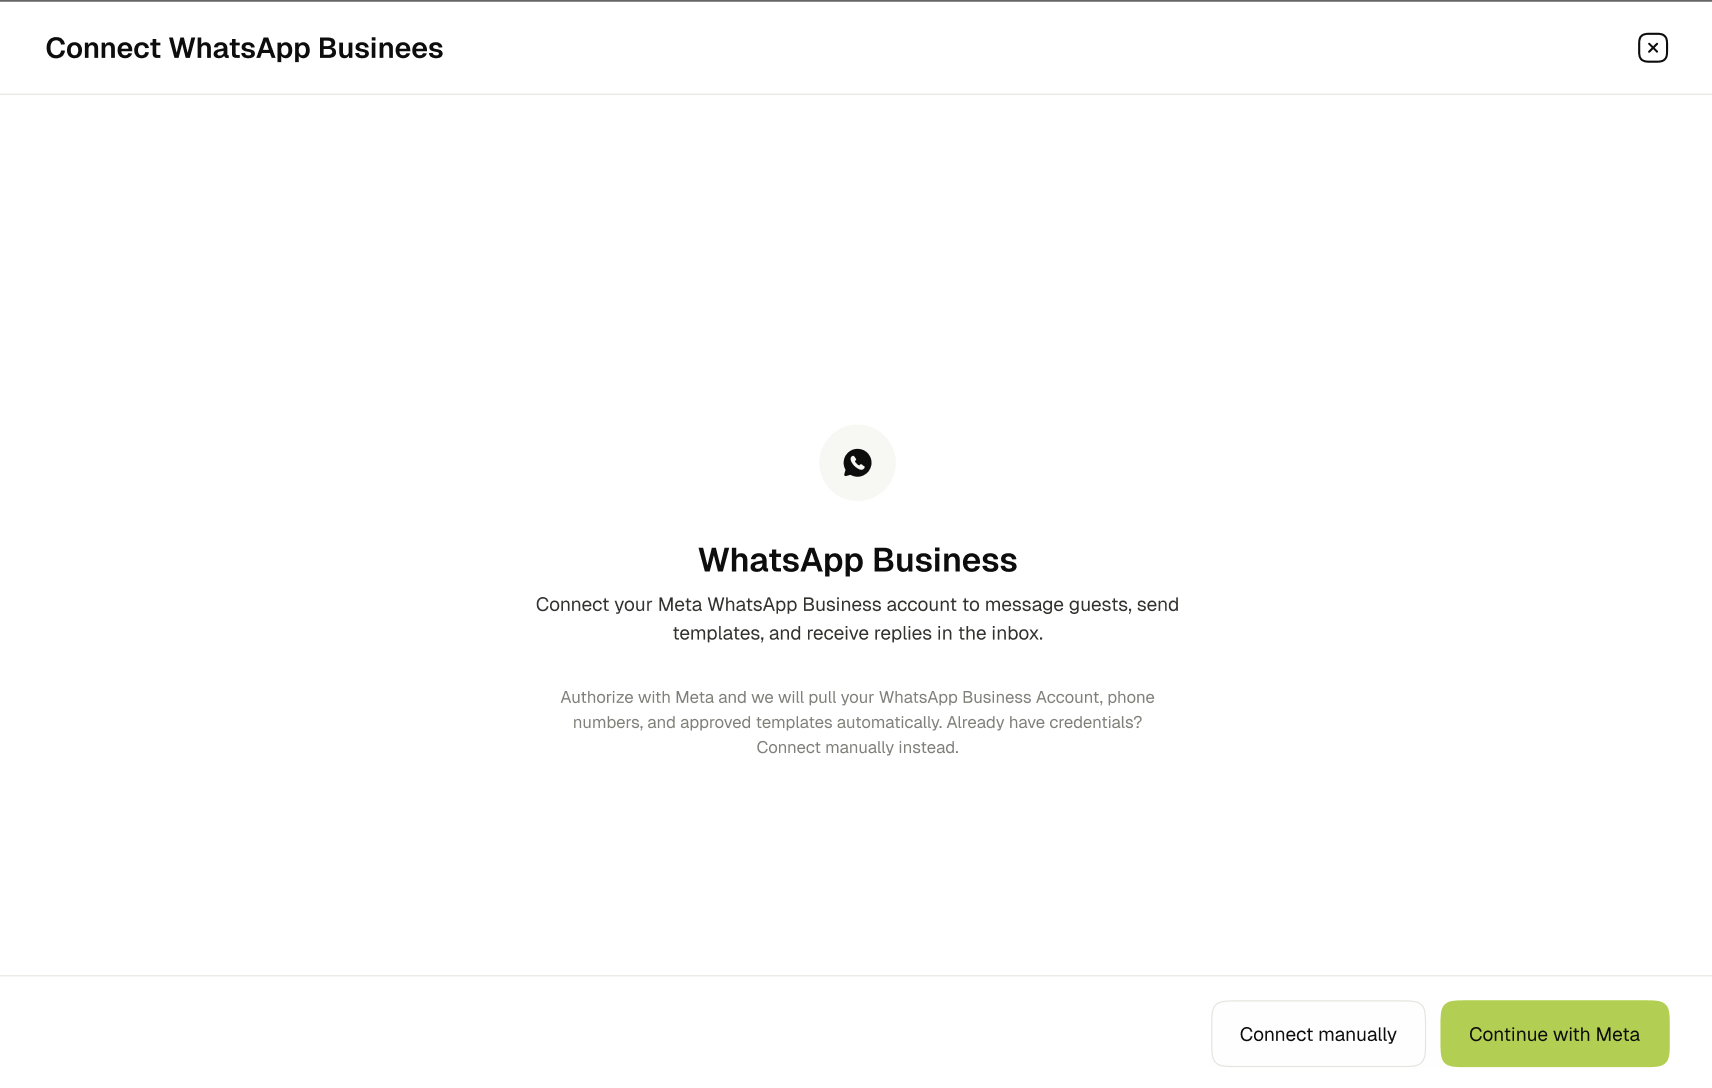
If you choose Connect manually, fill in the credentials:
- WhatsApp Business Account ID
- System User access token — Use the eye icon to show or hide the value.
- Graph API version (optional)
- App secret (optional)
- App ID (optional) — Required only to create templates with an image header. It is the Meta App ID that issued the access token above.
Then click Connect.
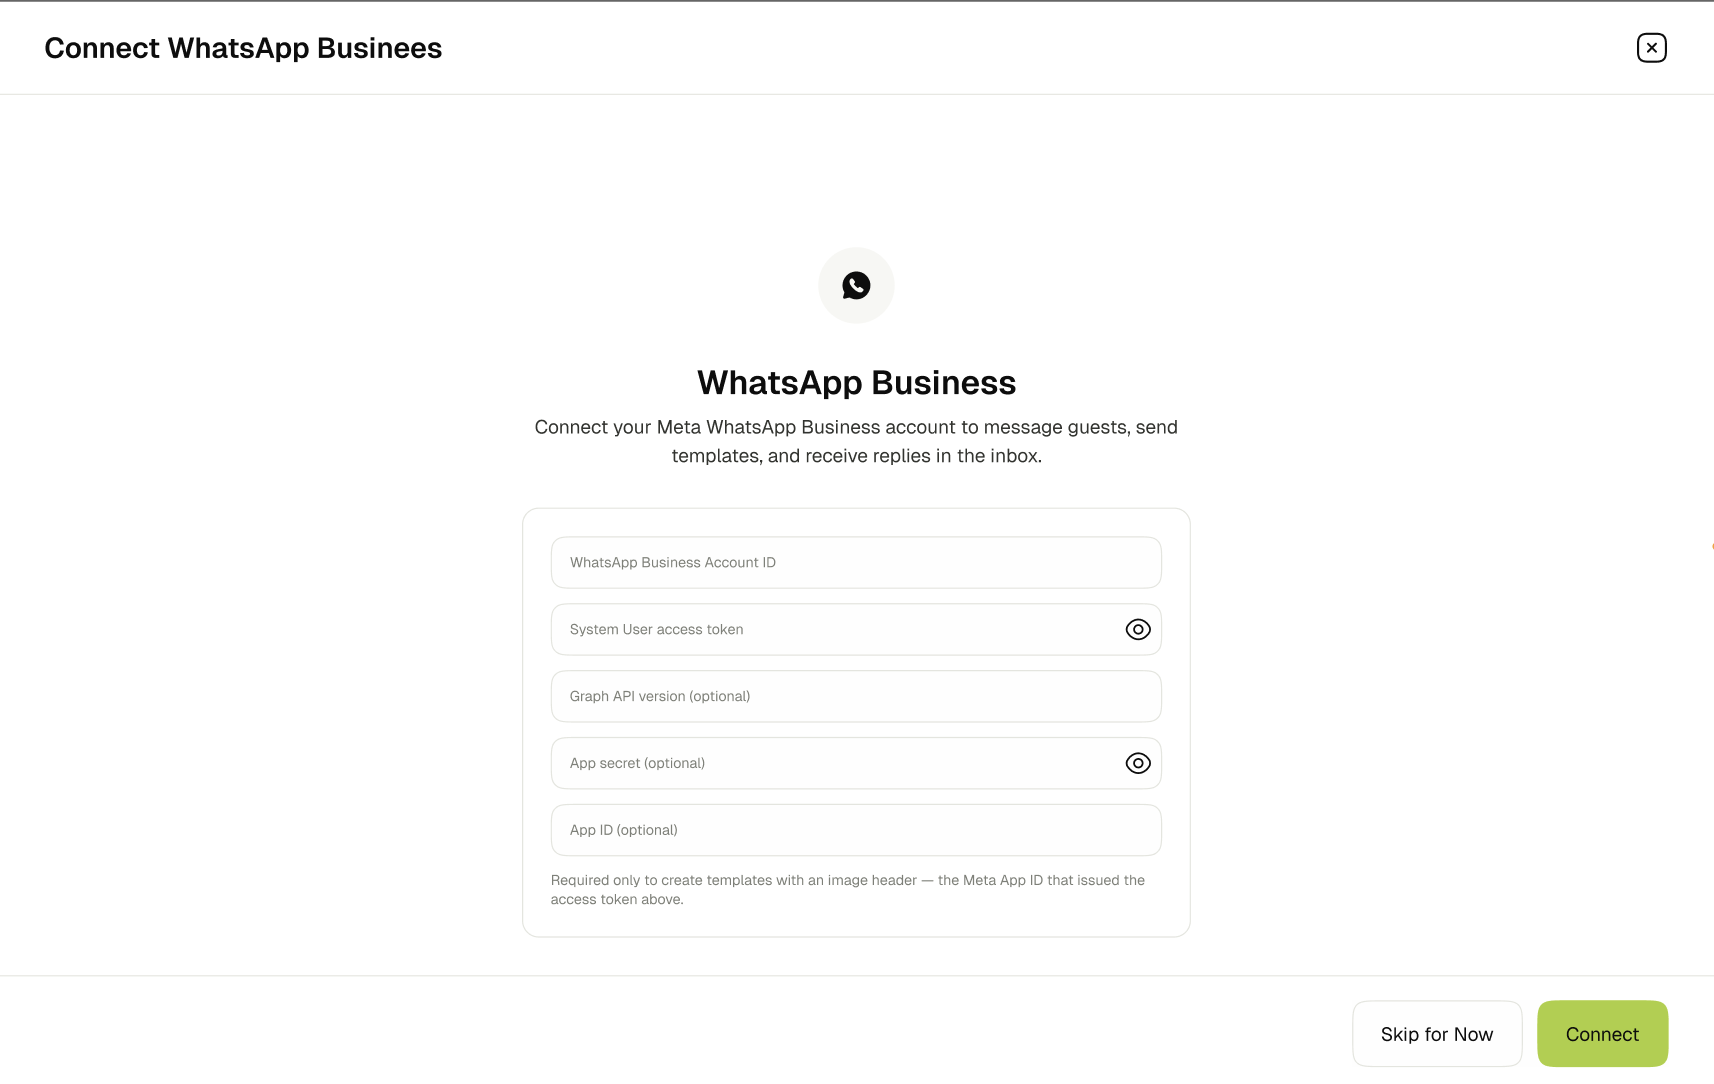
This step is optional. Click Skip for Now to finish the setup without WhatsApp, or close the screen with the ✕ in the top-right corner.
Skipping does not block the setup. You can connect WhatsApp Business later from GMS Settings → WhatsApp. See WhatsApp for the full guide.
📋 Viewing the Property Page
When the setup is complete, open GMS Settings and click Property in the settings menu on the left to see everything GMS holds about the property. View connection on the Property connected screen takes you to the same page.
The page is titled with the property's name and is made up of one card per area:
- Connection Status: The property's PMS connection. See PMS Connection Details below.
- Property Information: Display name, GE App domain, Support contact, and Timezone.
- Data Backfill: The backfills that have run for this property. See Data Backfill below.
- Assigned Staff: The staff members who work at this property.
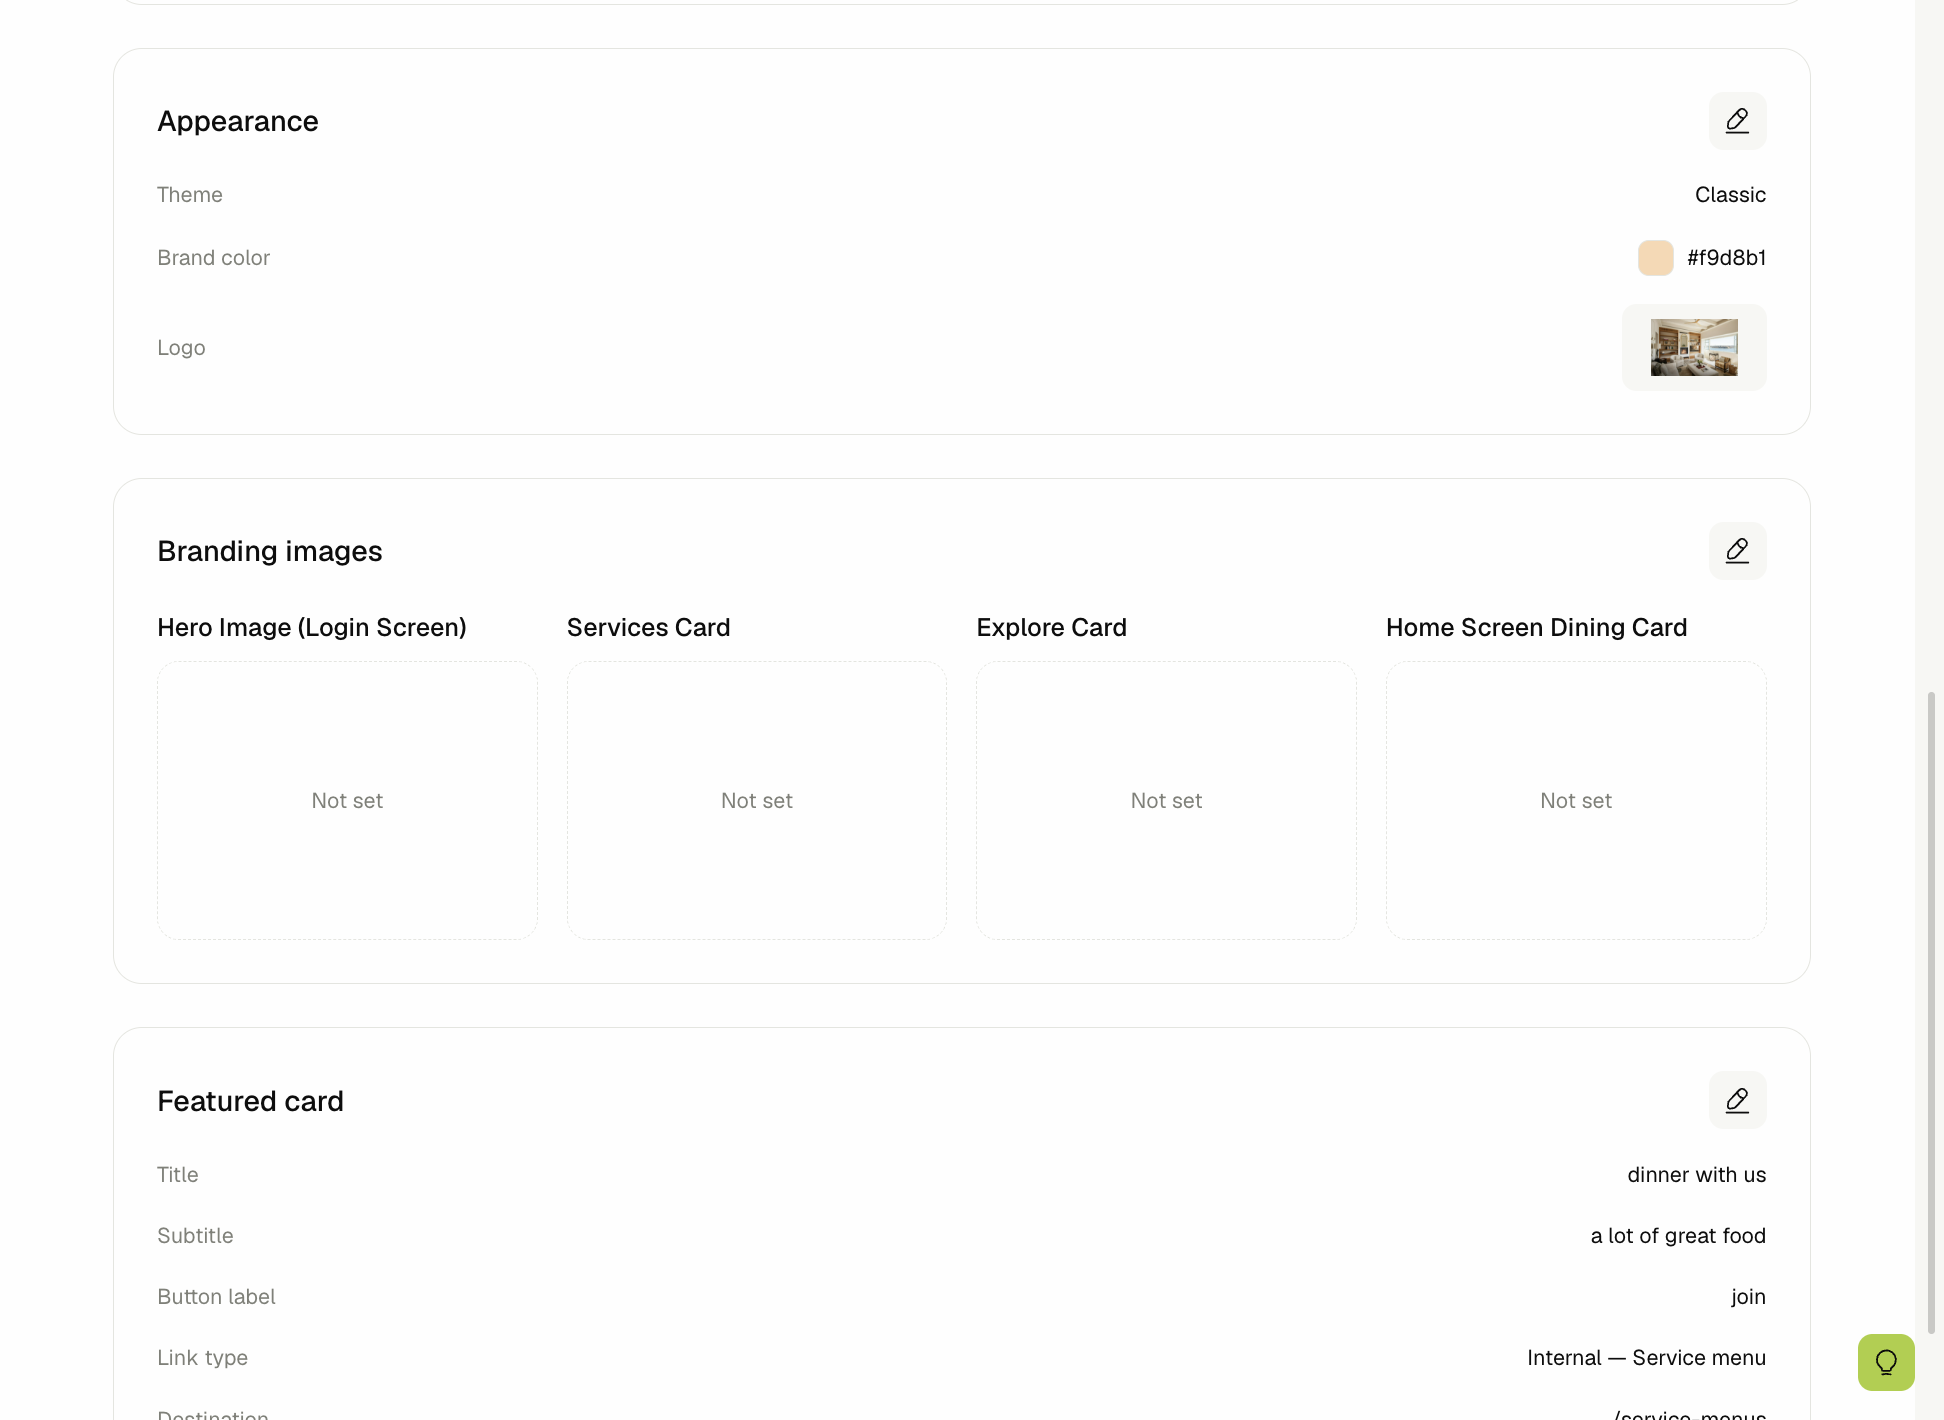
- Appearance: The Theme, Brand color, and Logo you chose during setup.
- Branding images: The Hero Image (Login Screen), Services Card, Explore Card, and Home Screen Dining Card. An image you haven't uploaded yet shows as Not set.
- Featured card: The Title, Subtitle, Button label, Link type, and Destination of the featured card shown to guests.
Scroll down the page to reach the appearance and content cards.
🔗 PMS Connection Details
If you have the PMS integration permissions, the property page also shows the Connection Status card for the property. It shows the PMS the property is connected to, Oracle OPERA Cloud, along with its status badge, the Hotel ID, the Chain ID, and when the property was Last synced.
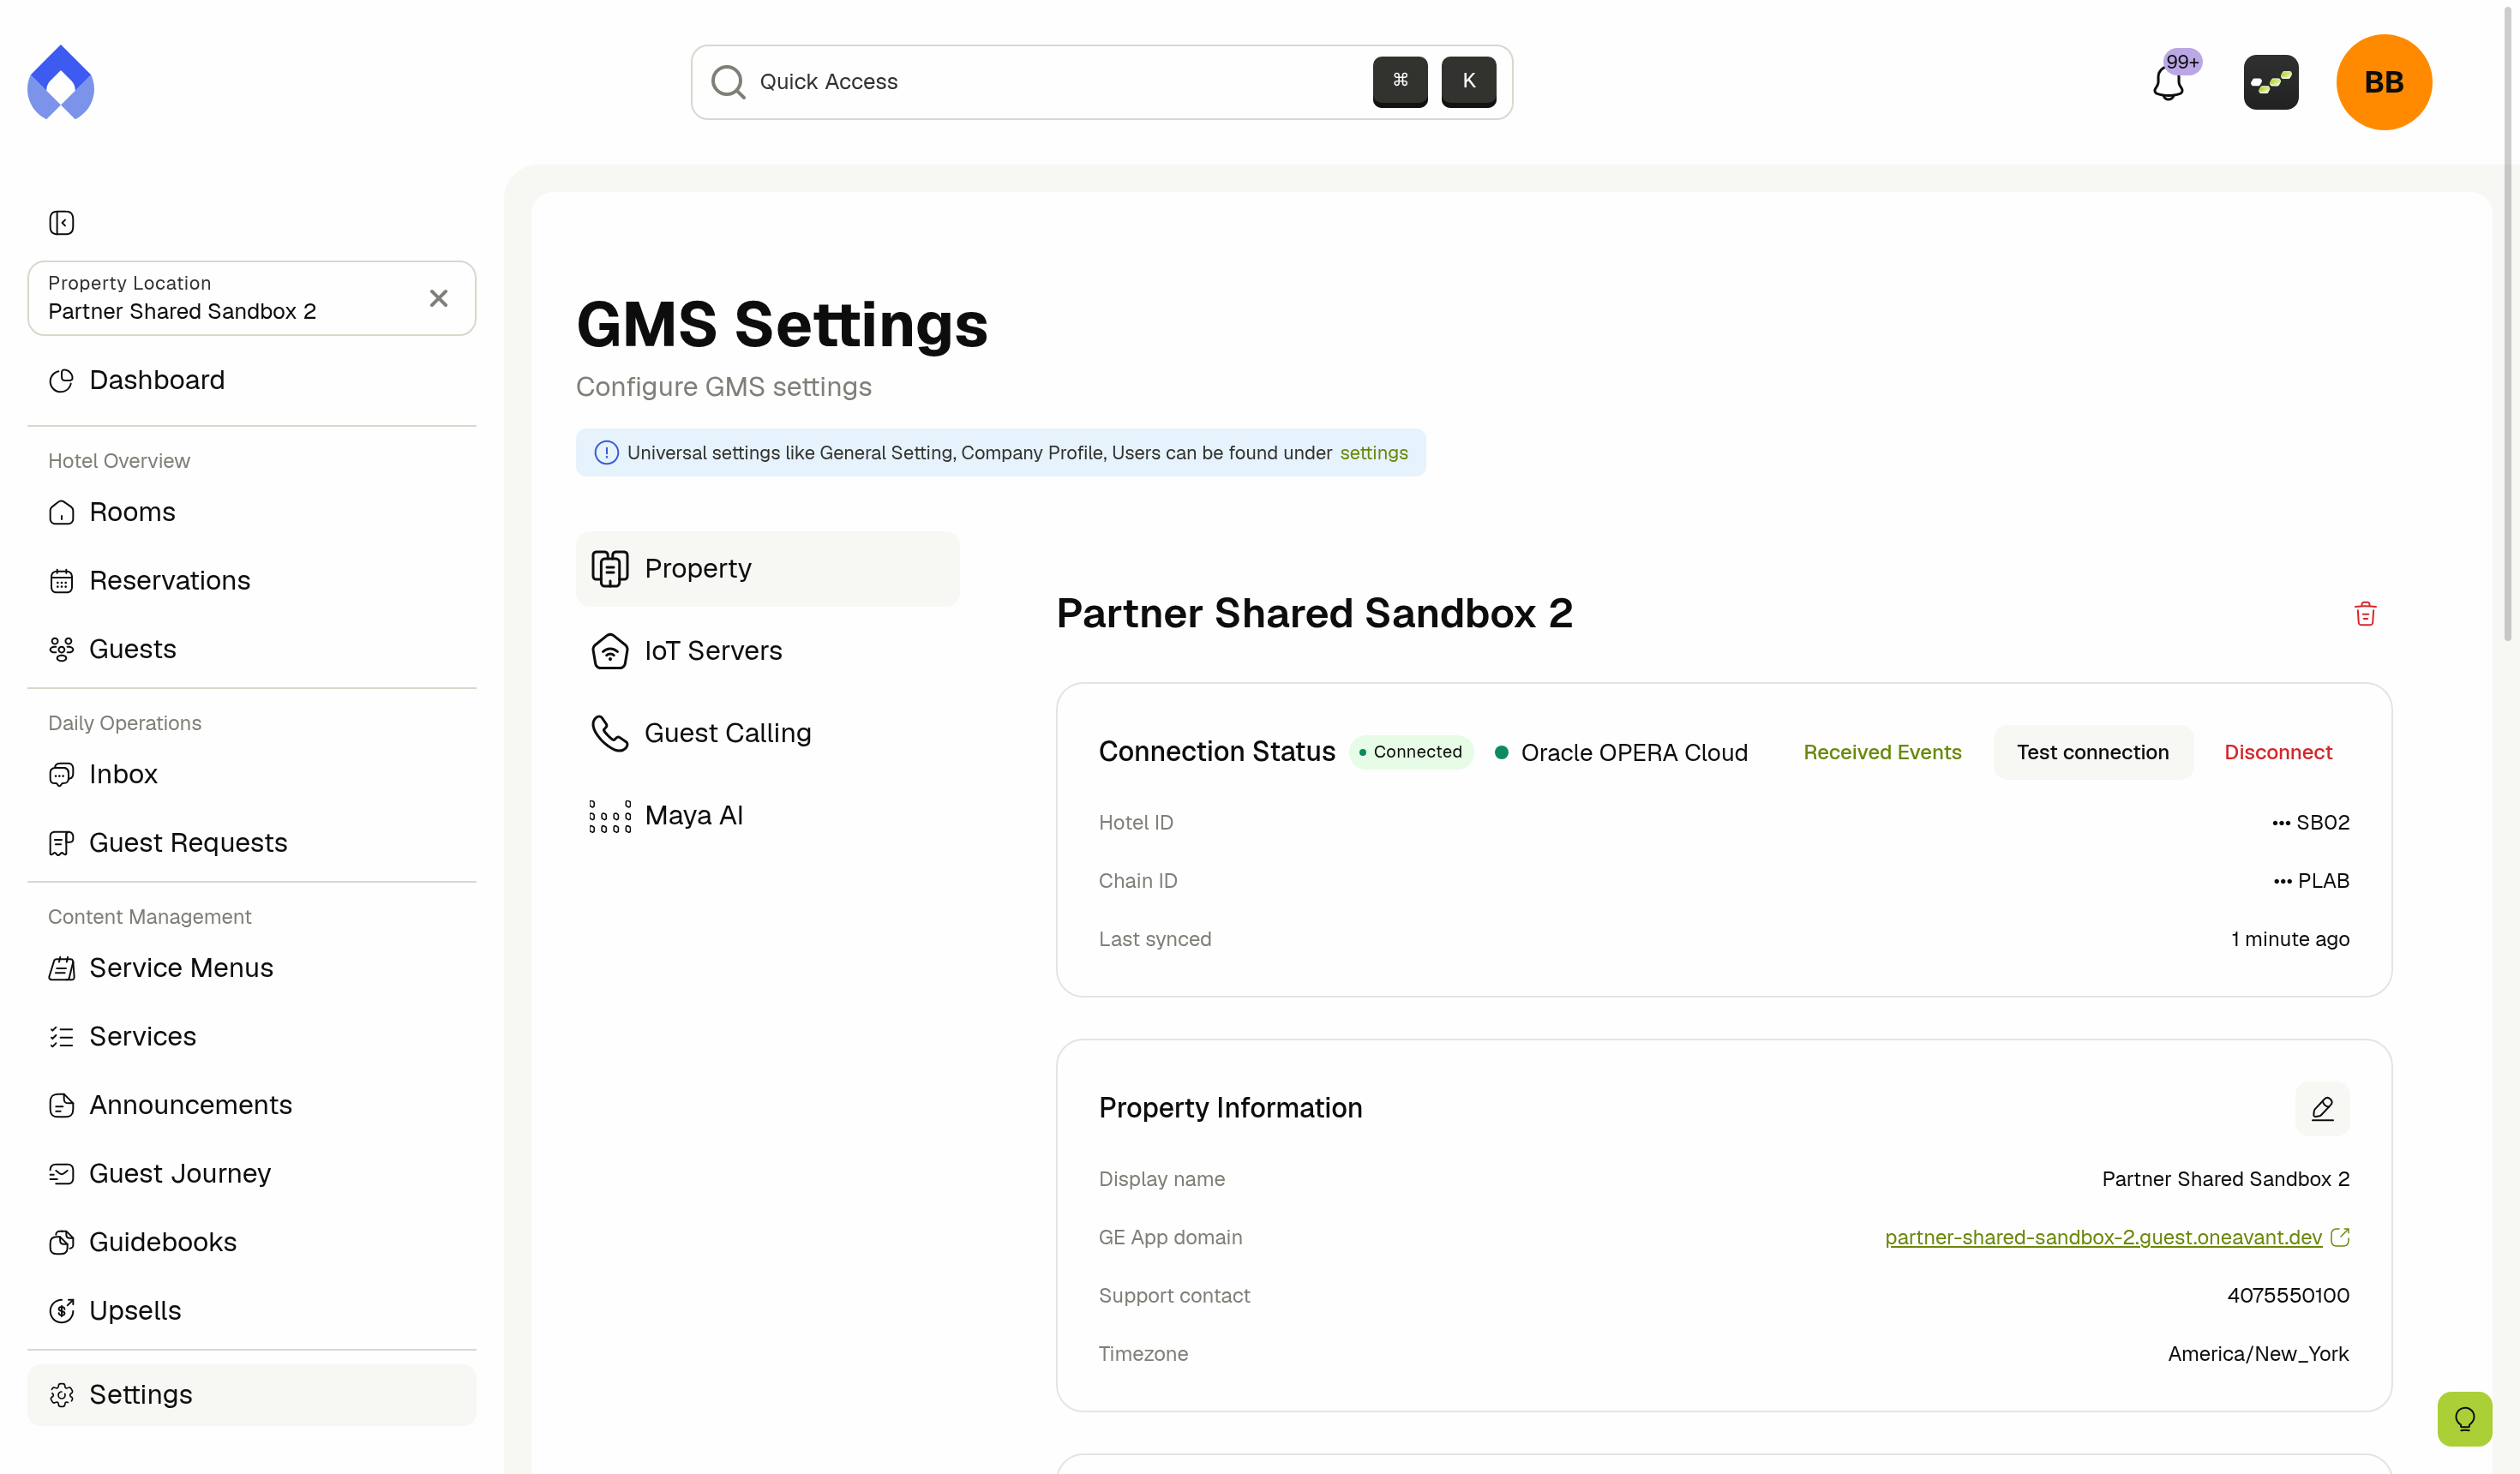
From the card you can:
- Received Events: See the events GMS has received from the PMS for this property, so you can confirm data is flowing.
- Test connection: Check that GMS can still reach the PMS.
- Disconnect: Stop the integration for this property.
- Reconnect: Turn the integration back on after the property was disconnected.
See Managing Your OPERA Cloud Connection for each of these, the connection statuses, and what syncs.
Disconnecting the PMS stops new data from reaching the property. Reservations, rooms, and guest records already imported stay in GMS, but they will no longer be kept up to date until you connect the PMS again.
🔄 Data Backfill
The Data Backfill card lists the backfills that have run for this property. A backfill asks the PMS for a period of data that GMS does not have yet — useful right after connecting a property, or after a disconnection left a gap. The badge next to the title shows whether the property is Ready To Sync.
Each row in the table covers one backfill, including the initial sync:
- From and To: The period the backfill covered.
- Status: Pending, Running, Success, Partial, or Failed.
- Changes: How many records the backfill brought in or updated.
- Failures: How many records failed.
- Started: When the backfill ran.
- Actions: Click the eye icon to see that backfill's details.
To pull in data you are missing, click New Backfill at the top-right of the card, choose the period in the Reservation Date Window field, and click Create Backfill. See Data Backfill for what a backfill imports.
✏️ Editing a Property
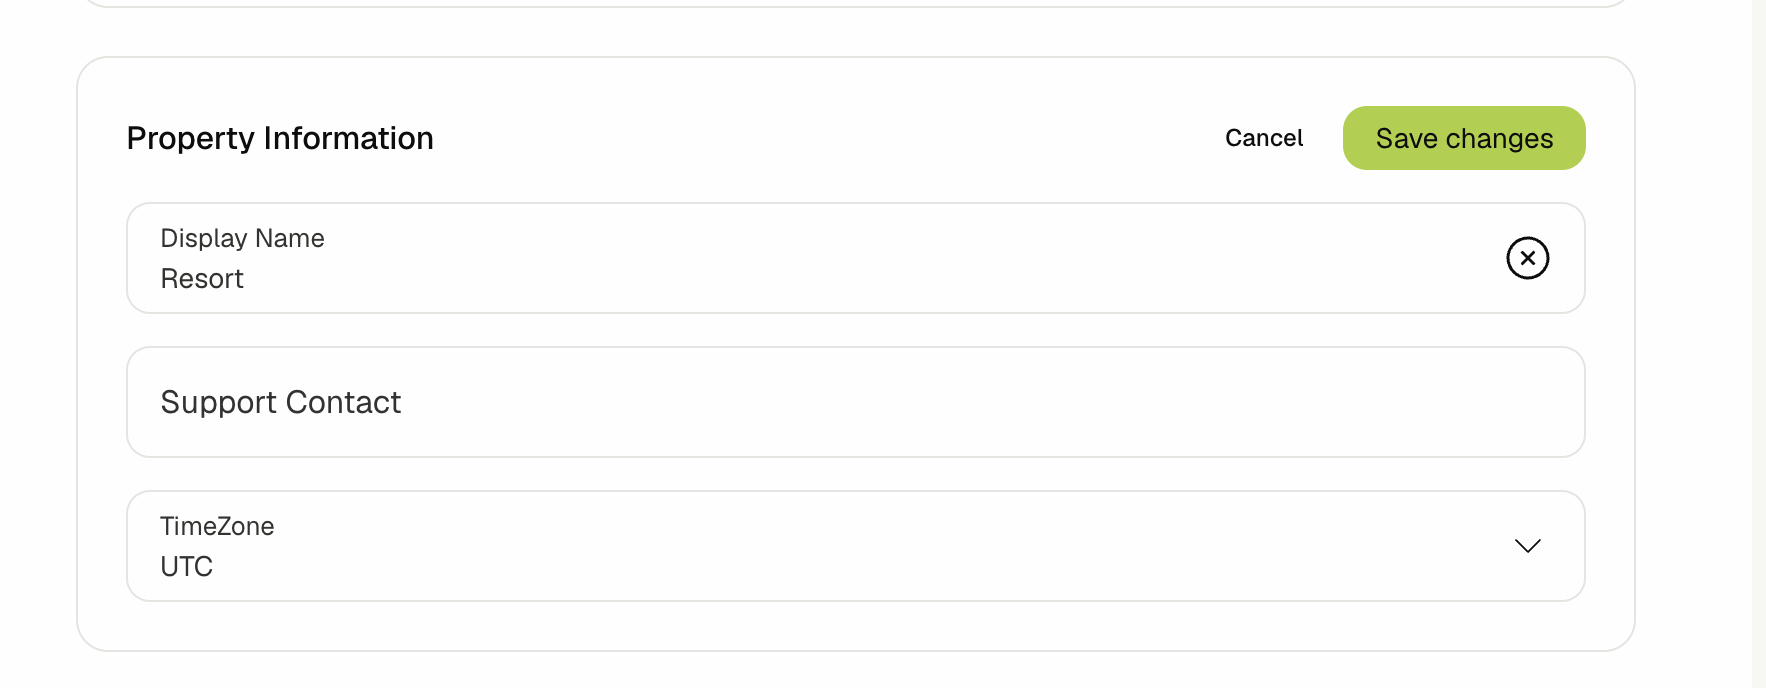
You edit the property card by card. Click the pencil icon at the top-right of a card and it turns into a form, with Cancel and Save changes in place of the icon.
-
Property Information — Update the Display Name, Support Contact, and TimeZone. Use the ✕ in a field to clear it.
-
Appearance — Change the property's Theme, Brand color, and Logo.
-
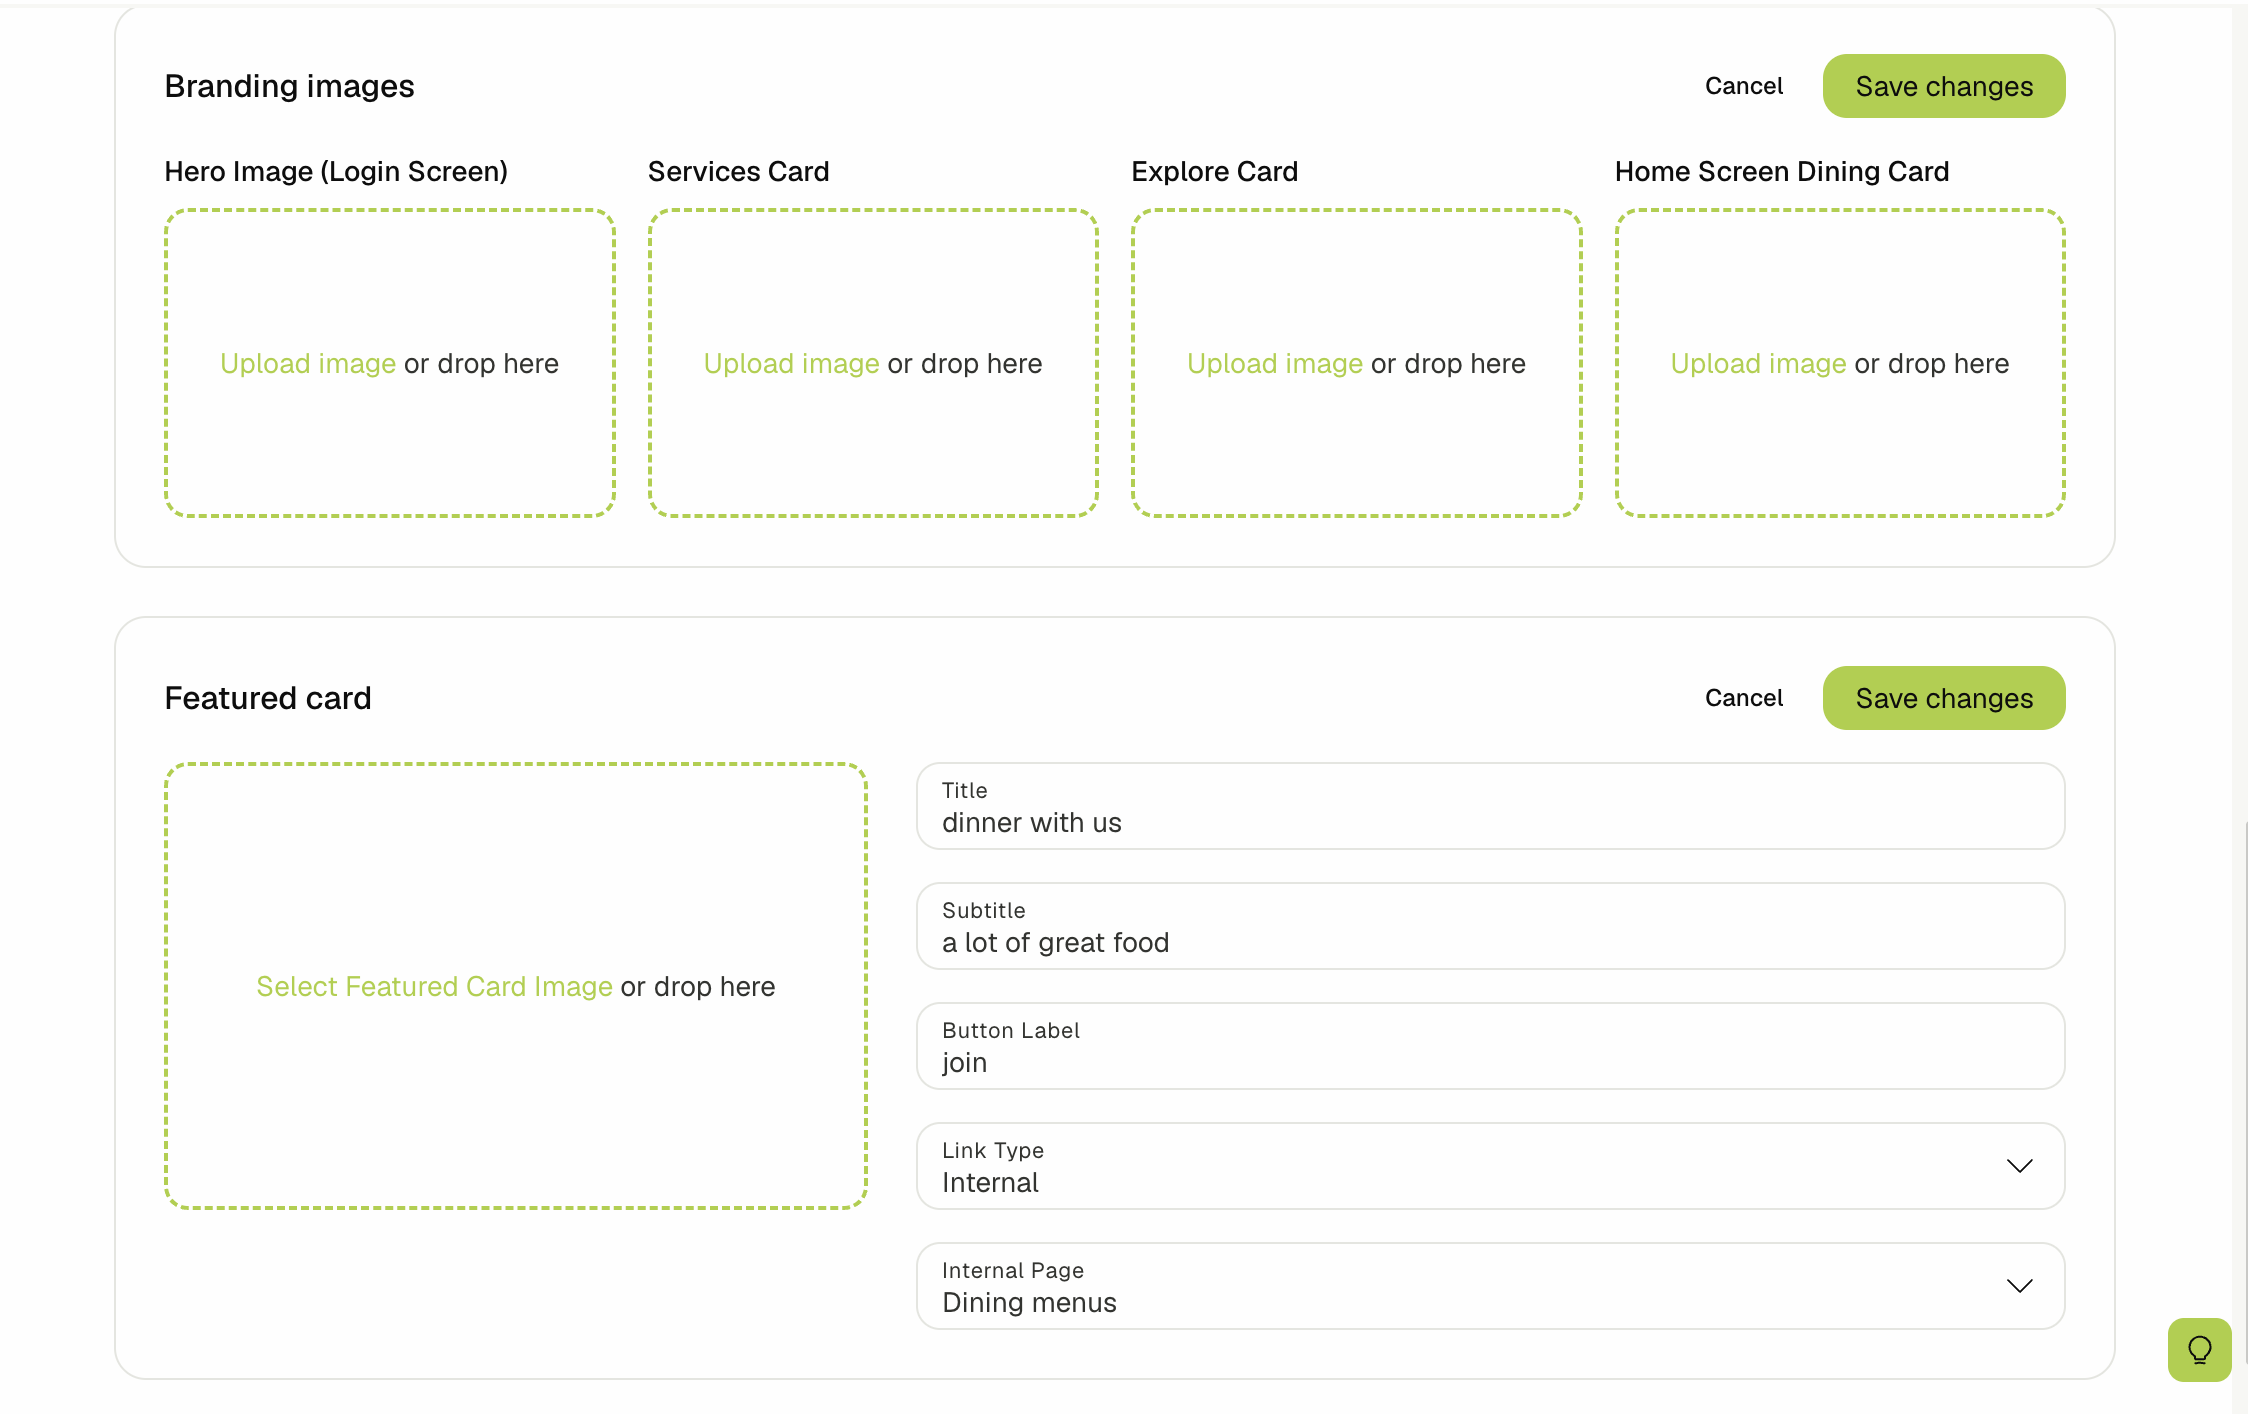
Branding images — Replace the guest-facing images. Click Upload image, or drop a file onto the area for the Hero Image (Login Screen), Services Card, Explore Card, or Home Screen Dining Card.
-
Featured card — Edit the Title, Subtitle, Button Label, and Link Type. An Internal link type lets you pick the Internal Page guests land on. Click Select Featured Card Image, or drop a file, to set the card's image.
-
Assigned Staff — Add the staff members who work at this property, or remove one who no longer does.
Click Save changes on the card you edited, or Cancel to leave it as it was. Each card is saved on its own.
Related Docs
- Connecting Oracle OPERA Cloud: the OPERA Cloud details, approvals, and initial import in full
- Managing Your OPERA Cloud Connection: what syncs, connection statuses, backfills, and reconnecting
- Roles & Permissions: the PMS integration and property permissions this guide refers to
- Managing Areas & Subareas: organize the spaces inside a property once it is set up
- Managing Reservations: work with the reservations imported from the PMS