Roles & Permissions
🔐 Roles & Permissions controls what each member of your team can see and do. You group permissions into a role, then assign that role to your users, so everyone only has access to the parts of the system their job needs.
This guide was verified against staging as of August 6, 2026.
📍 Accessing Roles & Permissions
Creating, editing, and deleting roles requires the Manage Roles permission.
- Log in to your tenant with your email address and password.
- Click your profile avatar in the top-right corner to open the account menu.
- Click Settings. The System Settings page opens.
- Click Roles & Permissions in the settings menu on the left.
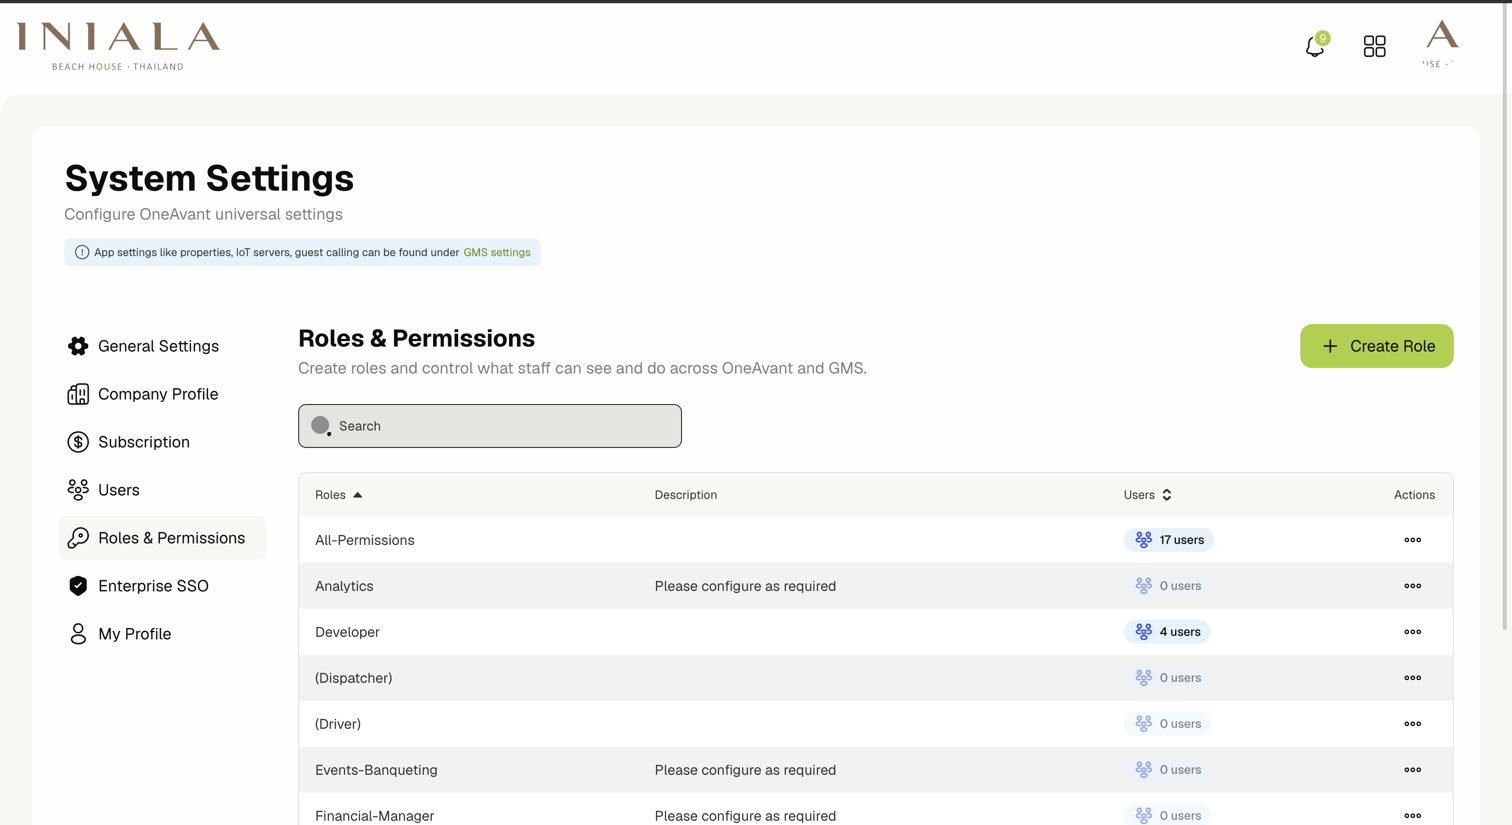
The settings menu also holds General Settings, Company Profile, Subscription, Users, Enterprise SSO, and My Profile. App-specific settings such as property locations, IoT servers, and guest calling live under GMS settings, not here.
📋 Viewing the Roles List
The roles list shows every role that exists in your tenant.
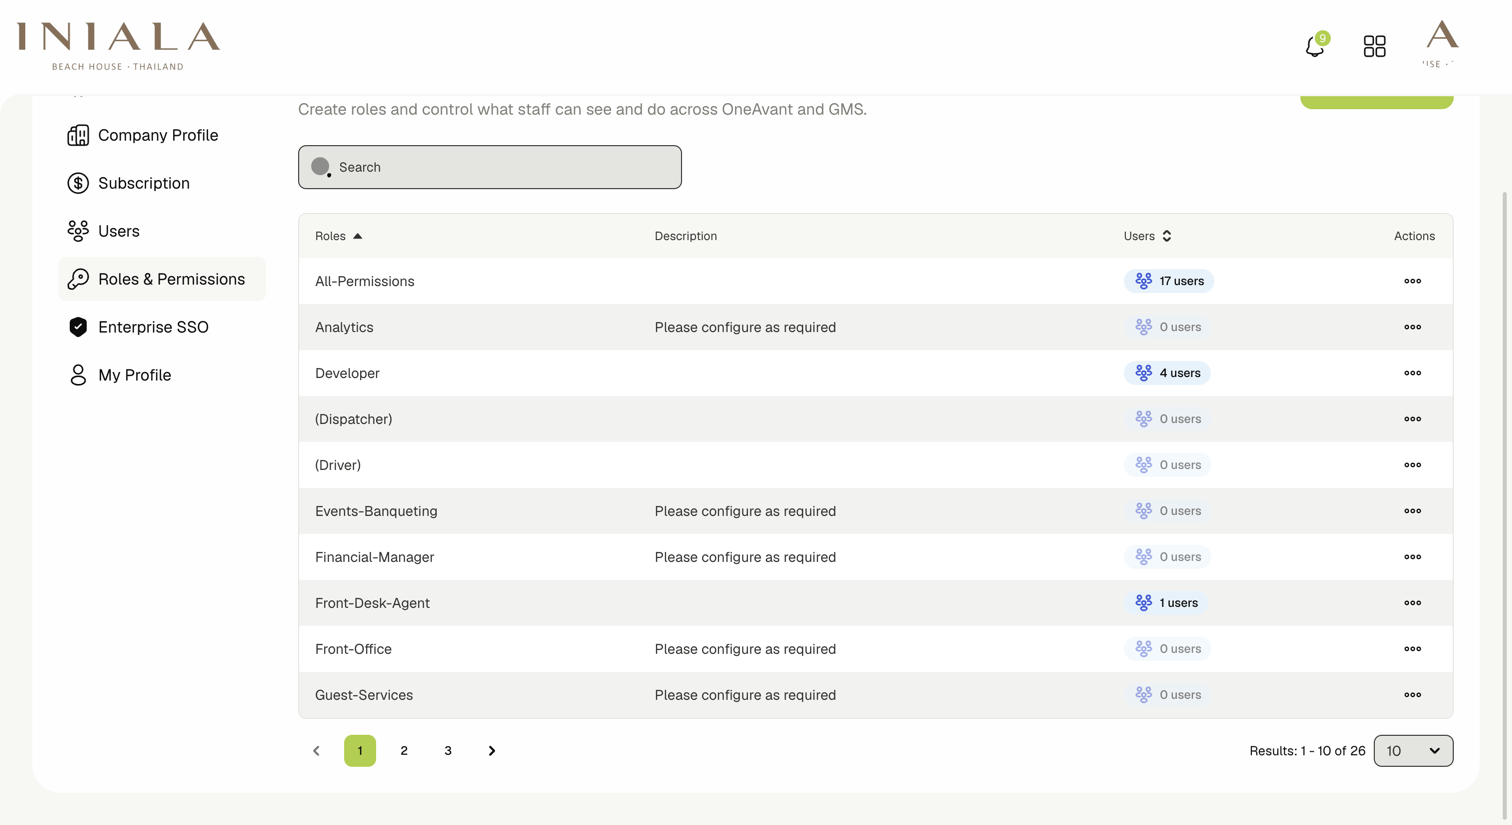
The list shows:
- Roles — The role name. Click the name to open the role and see exactly which permissions it grants. Click the column header to sort alphabetically.
- Description — The optional summary entered when the role was created. Long descriptions are shortened with an ellipsis.
- Users — How many users currently hold this role. Click the column header to sort by user count.
- Actions — The ••• menu for that role.
Role names differ from tenant to tenant. Depending on your tenant you may see pre-defined roles such as (Driver) and (Dispatcher) alongside the roles your own team has created.
🔍 Searching and Paging Through Roles
- Type part of a role name into the Search field. The list filters as you type.
- Click the ✕ inside the search field to clear it and show all roles again.
- Use the numbered page buttons, or the ‹ and › arrows, to move between pages.
- Change the number at the bottom-right of the table to show more roles per page.
The counter at the bottom of the table (for example Results: 1 - 10 of 26) tells you how many roles matched. When nothing matches, the table shows No roles found.
🔧 How Permissions Are Organized
Permissions are grouped in three levels. Understanding these levels makes the create and edit forms much easier to use.
| Level | What it is | Example |
|---|---|---|
| App | A card holding every permission for one product area. | Core permissions, GMS permissions |
| Feature group | A labelled block of related permissions inside an app. | GUIDEBOOKS, RESERVATIONS |
| Permission | A single thing the role can do. | Publish Guidebooks |
Each level has its own checkbox, and ticking a higher level ticks everything beneath it.
Core permissions cover organization-wide management — users, roles, billing, and integrations:
| Permission | What it allows |
|---|---|
| Manage Users | Create, edit, deactivate, and delete users. |
| Manage Roles | Create, edit, and delete roles and their permissions. |
| Manage Organization | Change organization-level settings. |
| View Company Profile | See the company profile. |
| Manage Api Tokens | Create and revoke API tokens. |
| Manage Webhooks | Configure webhooks. |
| View Subscription | See the current plan and usage. |
| Manage Subscription | Change the plan and billing details. |
GMS permissions cover the guest experience platform — properties, guests, devices, and services. They are split across 25 feature groups: LOCATIONS, RESERVATIONS, PRE CHECK IN, GUEST JOURNEY, GUESTS, ROOMS, ROOM TOKENS, DEVICES, IOT SERVERS, REPORT IMPORTS, PMS CONNECTION, SERVICES, CHATS, CALLING, SERVICE REQUESTS, ANNOUNCEMENTS, GUIDEBOOKS, UPSELLS, PDF MENUS, GMS SETTINGS, NOTIFICATIONS, WHATSAPP, GUEST LINKS, UPLOADS, and SERVICE MENU.
Permission names follow a consistent pattern, so you can usually tell what a permission does from its name alone:
- View … — The user can see the data but cannot change it.
- Manage … — The user can create, edit, and delete that data.
- Create … / Edit … / Delete … — A single action, used where the feature needs finer control than Manage.
- Assign … / Unassign … — The user can attach or detach staff.
- Publish … — The user can make content live for guests.
- Change … Status — The user can move an item through its lifecycle.
- … Notify — The user receives notifications for that feature.
Which app cards you see depends on the modules enabled for your tenant. A tenant with only GMS enabled sees Core permissions and GMS permissions; a tenant with more modules enabled sees a card for each.
➕ Creating a Role
- Click Create Role at the top-right of the roles list. The Create Role page opens.
- Fill in the role details:
- Role Name — Required. Use a name your team will recognize, such as
HousekeepingorFront-Desk-Agent. - Description (optional) — A short note explaining who the role is for.
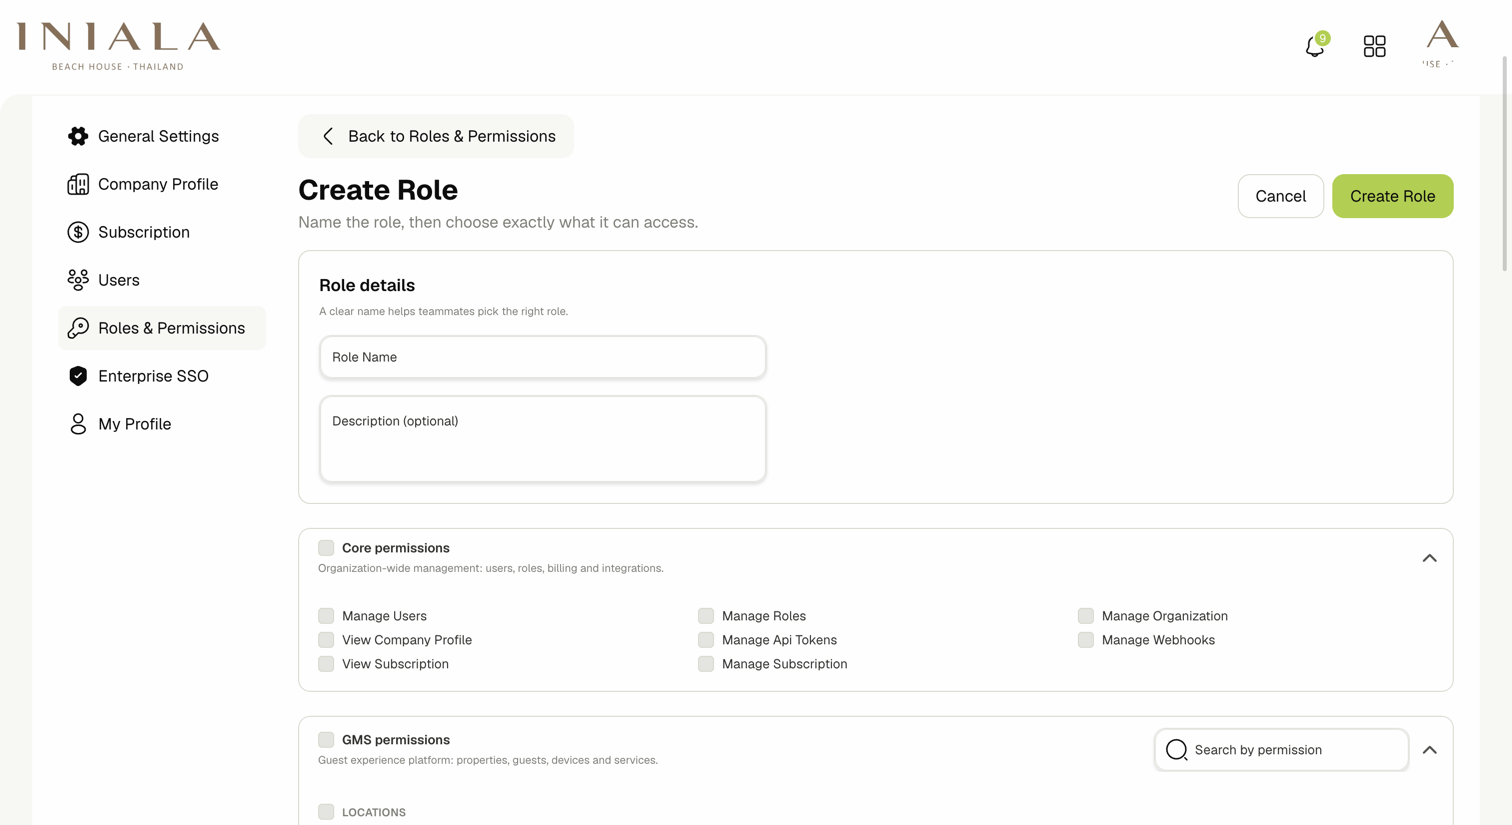
- Role Name — Required. Use a name your team will recognize, such as
- Select the permissions this role should grant. You have three ways to do it:
- Tick an individual permission to grant just that one.
- Tick a feature group checkbox to grant every permission in that group.
- Tick the checkbox next to the app name to grant every permission in that app.
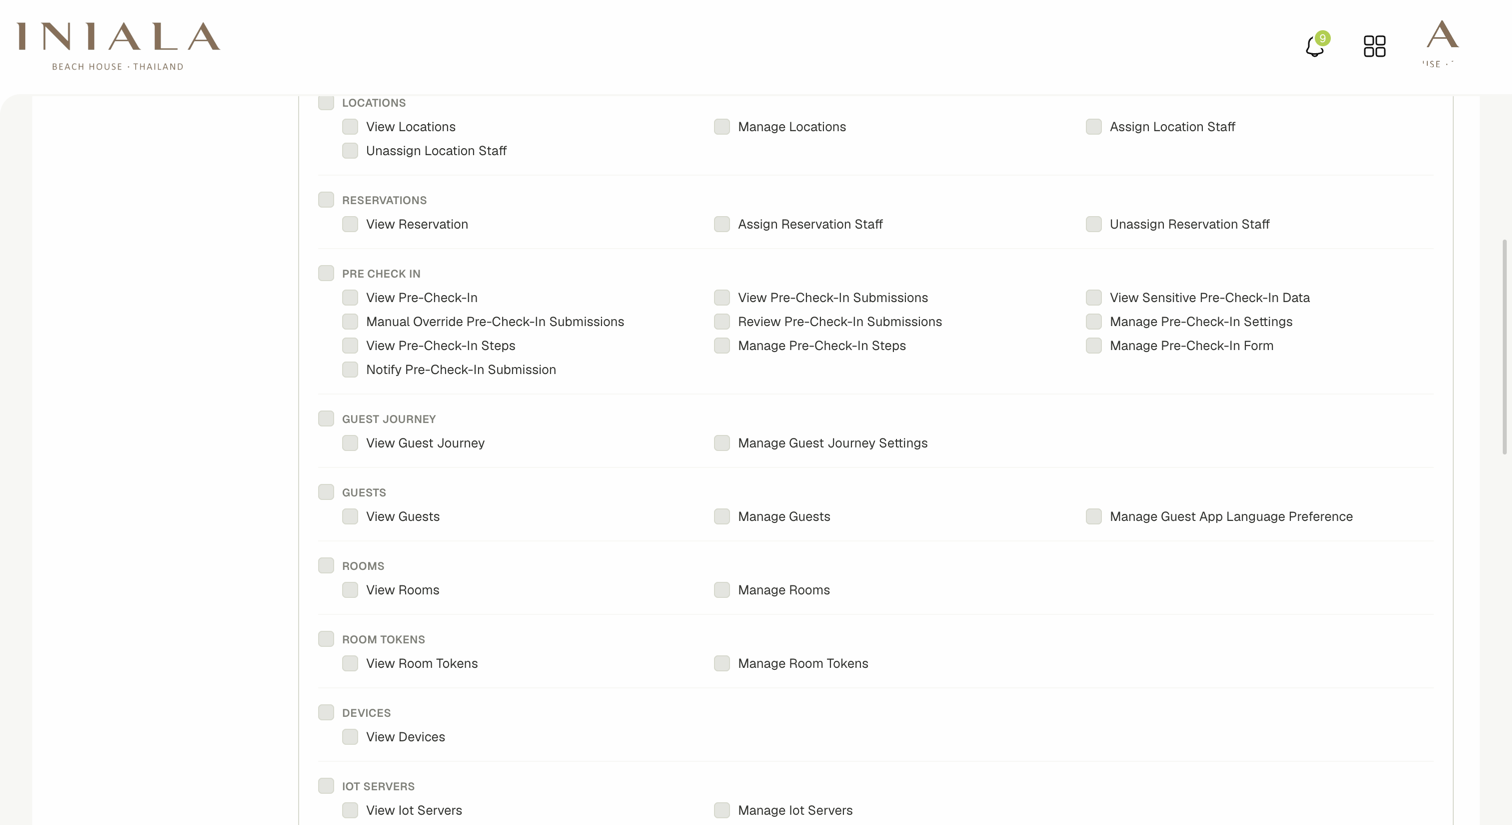
- (Optional) Type into Search by permission to narrow a long list down to matching permissions, then tick what you need.
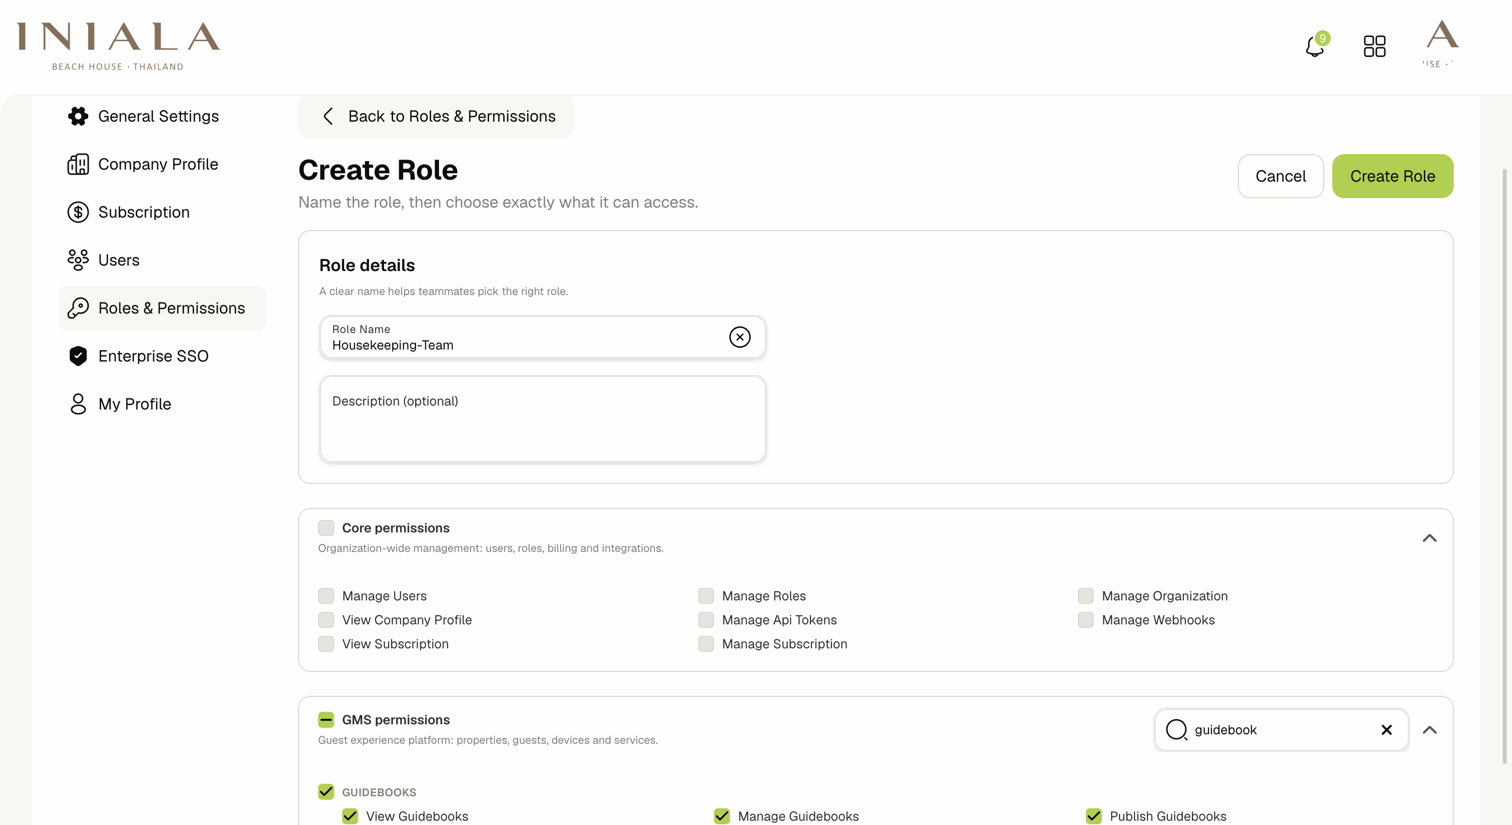
- (Optional) Click the ⌃ chevron on an app card to collapse it and shorten the page.
- Click Create Role at the top-right.
The message Role added successfully appears and you land on the new role's page.
Grant the smallest set of permissions the job actually needs. Pair every Manage permission with the matching View permission so the user can see the screen they are allowed to change.
A checkbox with a dash instead of a tick means some of the permissions beneath it are selected. Ticking it selects the rest; clearing it removes them all.
👁️ Viewing a Role's Permissions
- Click a role name in the list, or open the ••• menu and click View Role.
- Review the role.
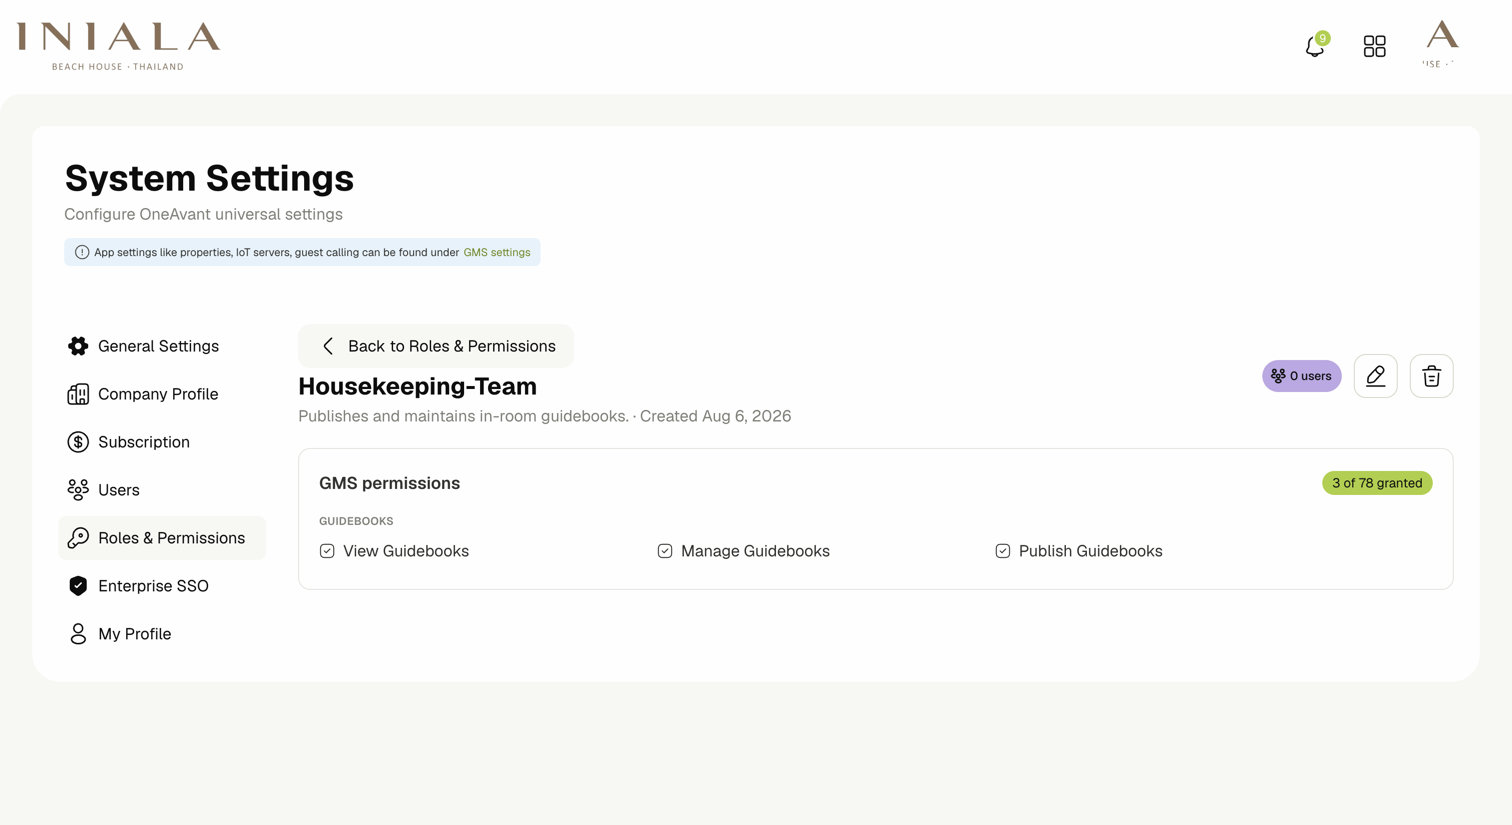
The role page shows:
- The role name, its description, and the date it was created.
- A users badge with the number of users holding the role.
- One card per app, with a badge such as 7 of 78 granted showing how much of that app the role covers.
- Only the permissions the role actually grants, listed under their feature group.
Apps where the role grants nothing are left out entirely. A role page showing only a GMS permissions card grants no Core permissions.
✏️ Editing a Role and Its Permissions
- Open the ••• menu on the role's row and click Edit Role. You can also click the pencil icon at the top-right of the role's page.
- Change the Role Name or Description (optional) if needed.
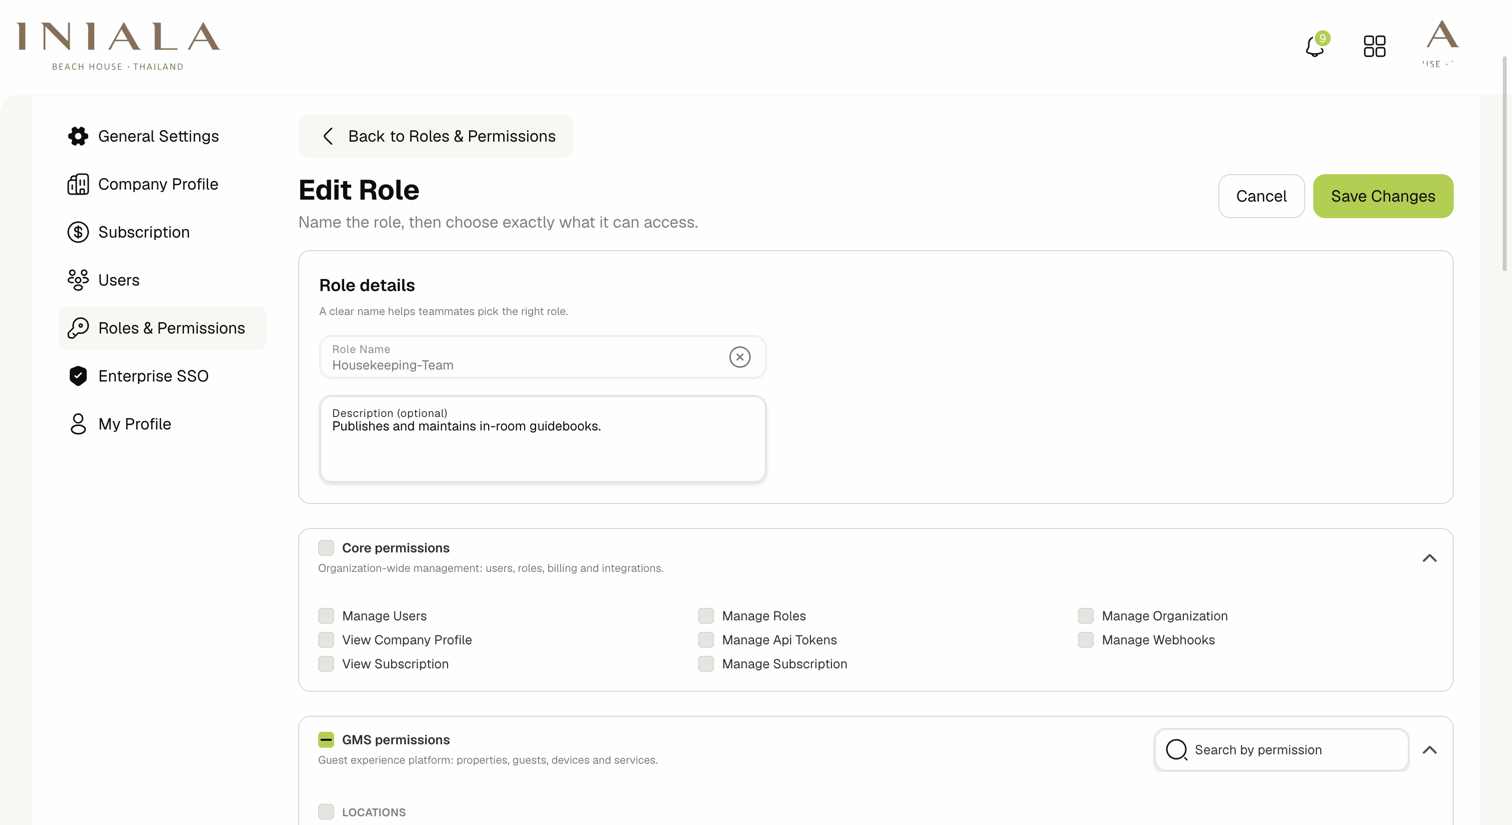
- Tick permissions to add them, or clear them to remove them. The form opens with the role's current permissions already selected.
- Click Save Changes at the top-right.
The message Role updated successfully appears and you return to the role's page with the new totals.
Permission changes take effect immediately for every user holding the role. Removing a permission can lock a colleague out of a screen they are working in.
To leave without saving, click Cancel or Back to Roles & Permissions.
🗑️ Deleting a Role
Deleting a role cannot be undone, and every user holding it loses those permissions immediately. Move users onto another role first.
- Open the ••• menu on the role's row and click Delete Role. You can also click the trash icon at the top-right of the role's page.
- Read the confirmation dialog. It names the role and tells you how many assigned users will be affected.
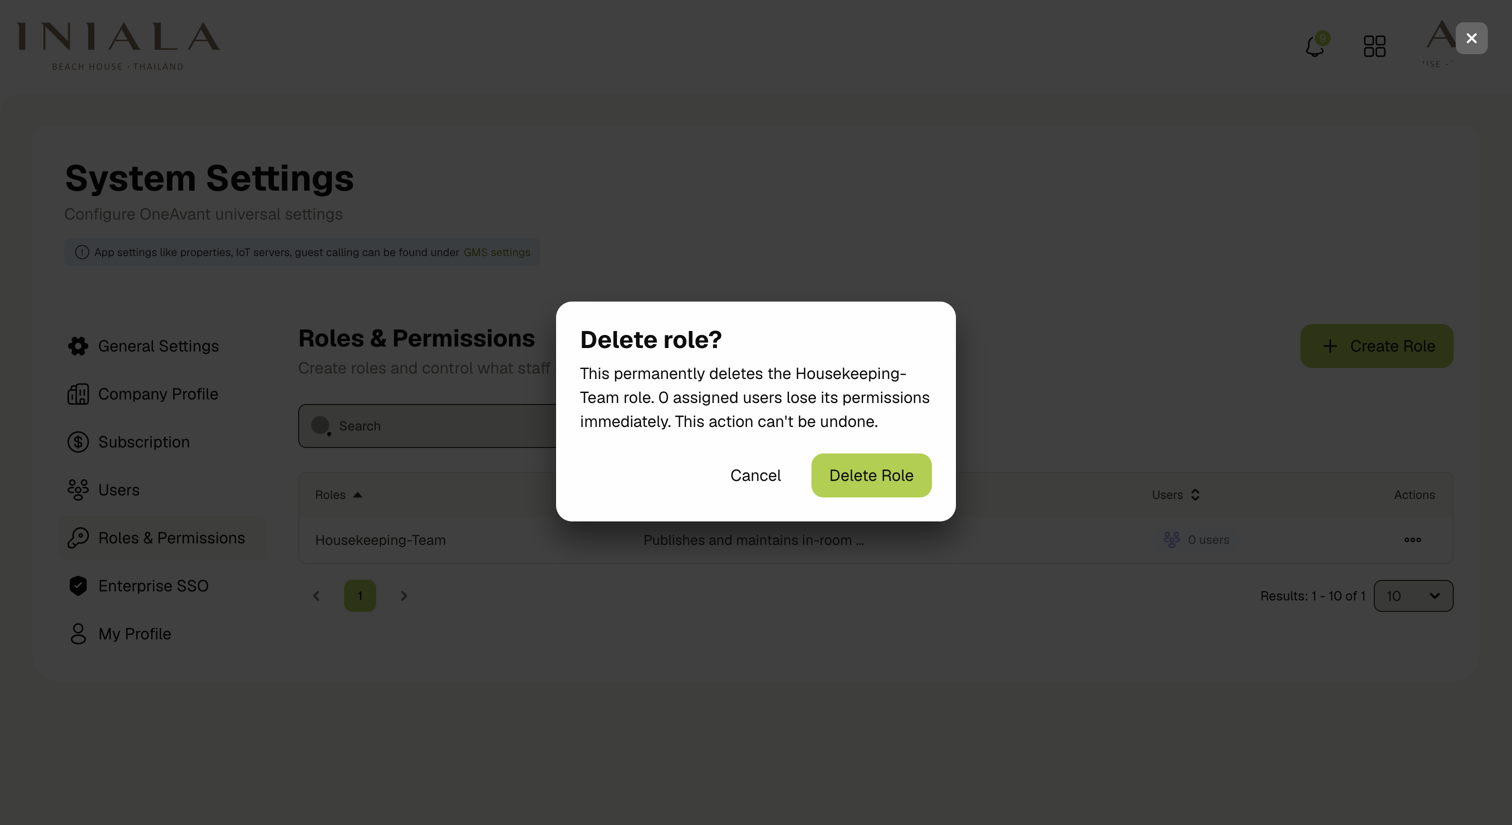
- Click Delete Role to confirm, or Cancel to keep the role.
The message Role deleted successfully appears and the role disappears from the list.
👥 Assigning a Role to a User
Roles do nothing until they are assigned. Users are managed on the Users page, not here.
- Click Users in the settings menu on the left.
- Create a new user, or open the ••• menu on an existing user's row and click Edit User.
- Select one or more roles in the Roles field.
- Save the user.
A user can hold several roles at once, and receives the combined permissions of all of them.
For the full user creation and invitation flow, see User Management.
🚫 Scope Notes
- Permissions are granted through roles only. You cannot grant a permission directly to a single user.
- A role's permissions apply across the whole tenant. You cannot grant a role different permissions at different property locations.
- Deleting a role does not delete the users who held it — they simply lose those permissions.
Related Docs
- User Management — create, invite, and edit users, and assign roles to them
- Property Locations — assign staff to the locations their role lets them manage
- Roles & Access — the extra access controls that apply to BI databoards