Production Planning
Planning schedules upcoming production runs and aggregates required materials across inventories. It is the central tool for creating production executions and managing the production calendar.
Planning Overview
Navigate to Production > Planning. The overview page shows:
- Total Operations / Planned / Produced — summary stats for the selected inventory and date range.
- Inventory filter — focus on a specific production floor or warehouse.
- Stats Date Range — adjust the date range for the summary cards and calendar.
- Planning Calendar — a calendar view showing scheduled production runs.
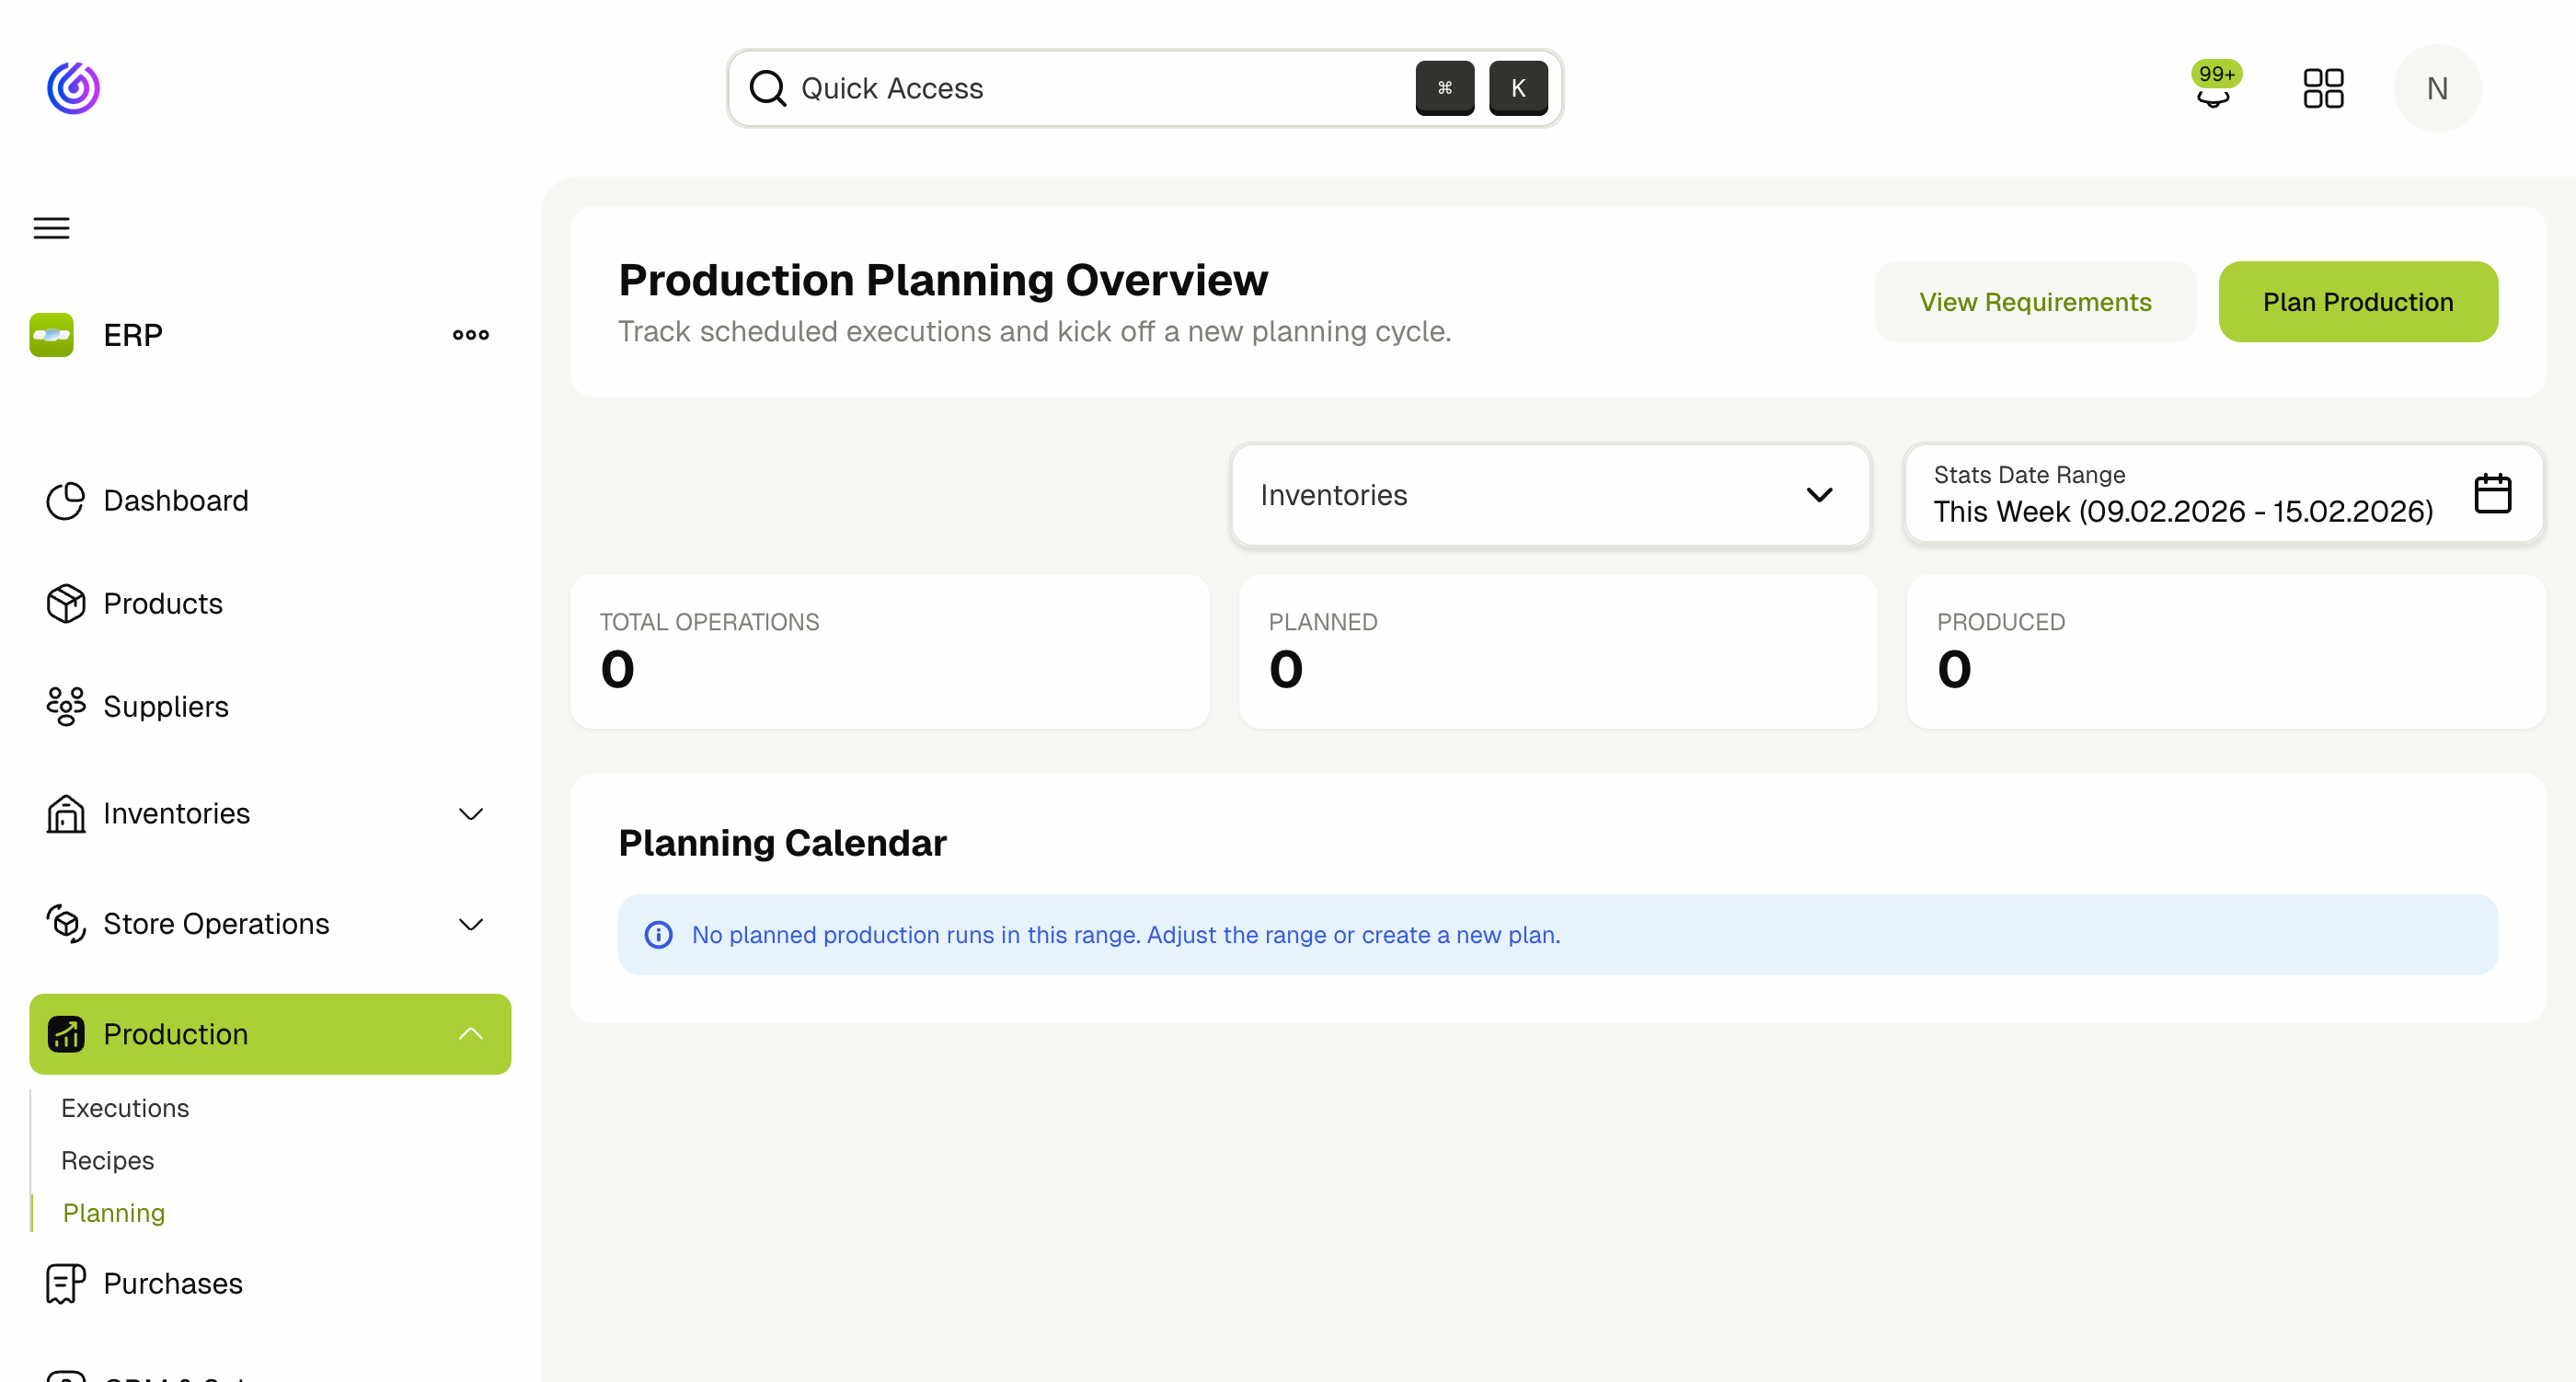
Key Actions
- Plan Production: Opens the planning wizard to create a new production plan.
- View Requirements: Review all materials required for planned production runs within the selected date range.
Plan Production Wizard
The planning wizard guides you through three steps: Inputs, Review & Save, and Results.
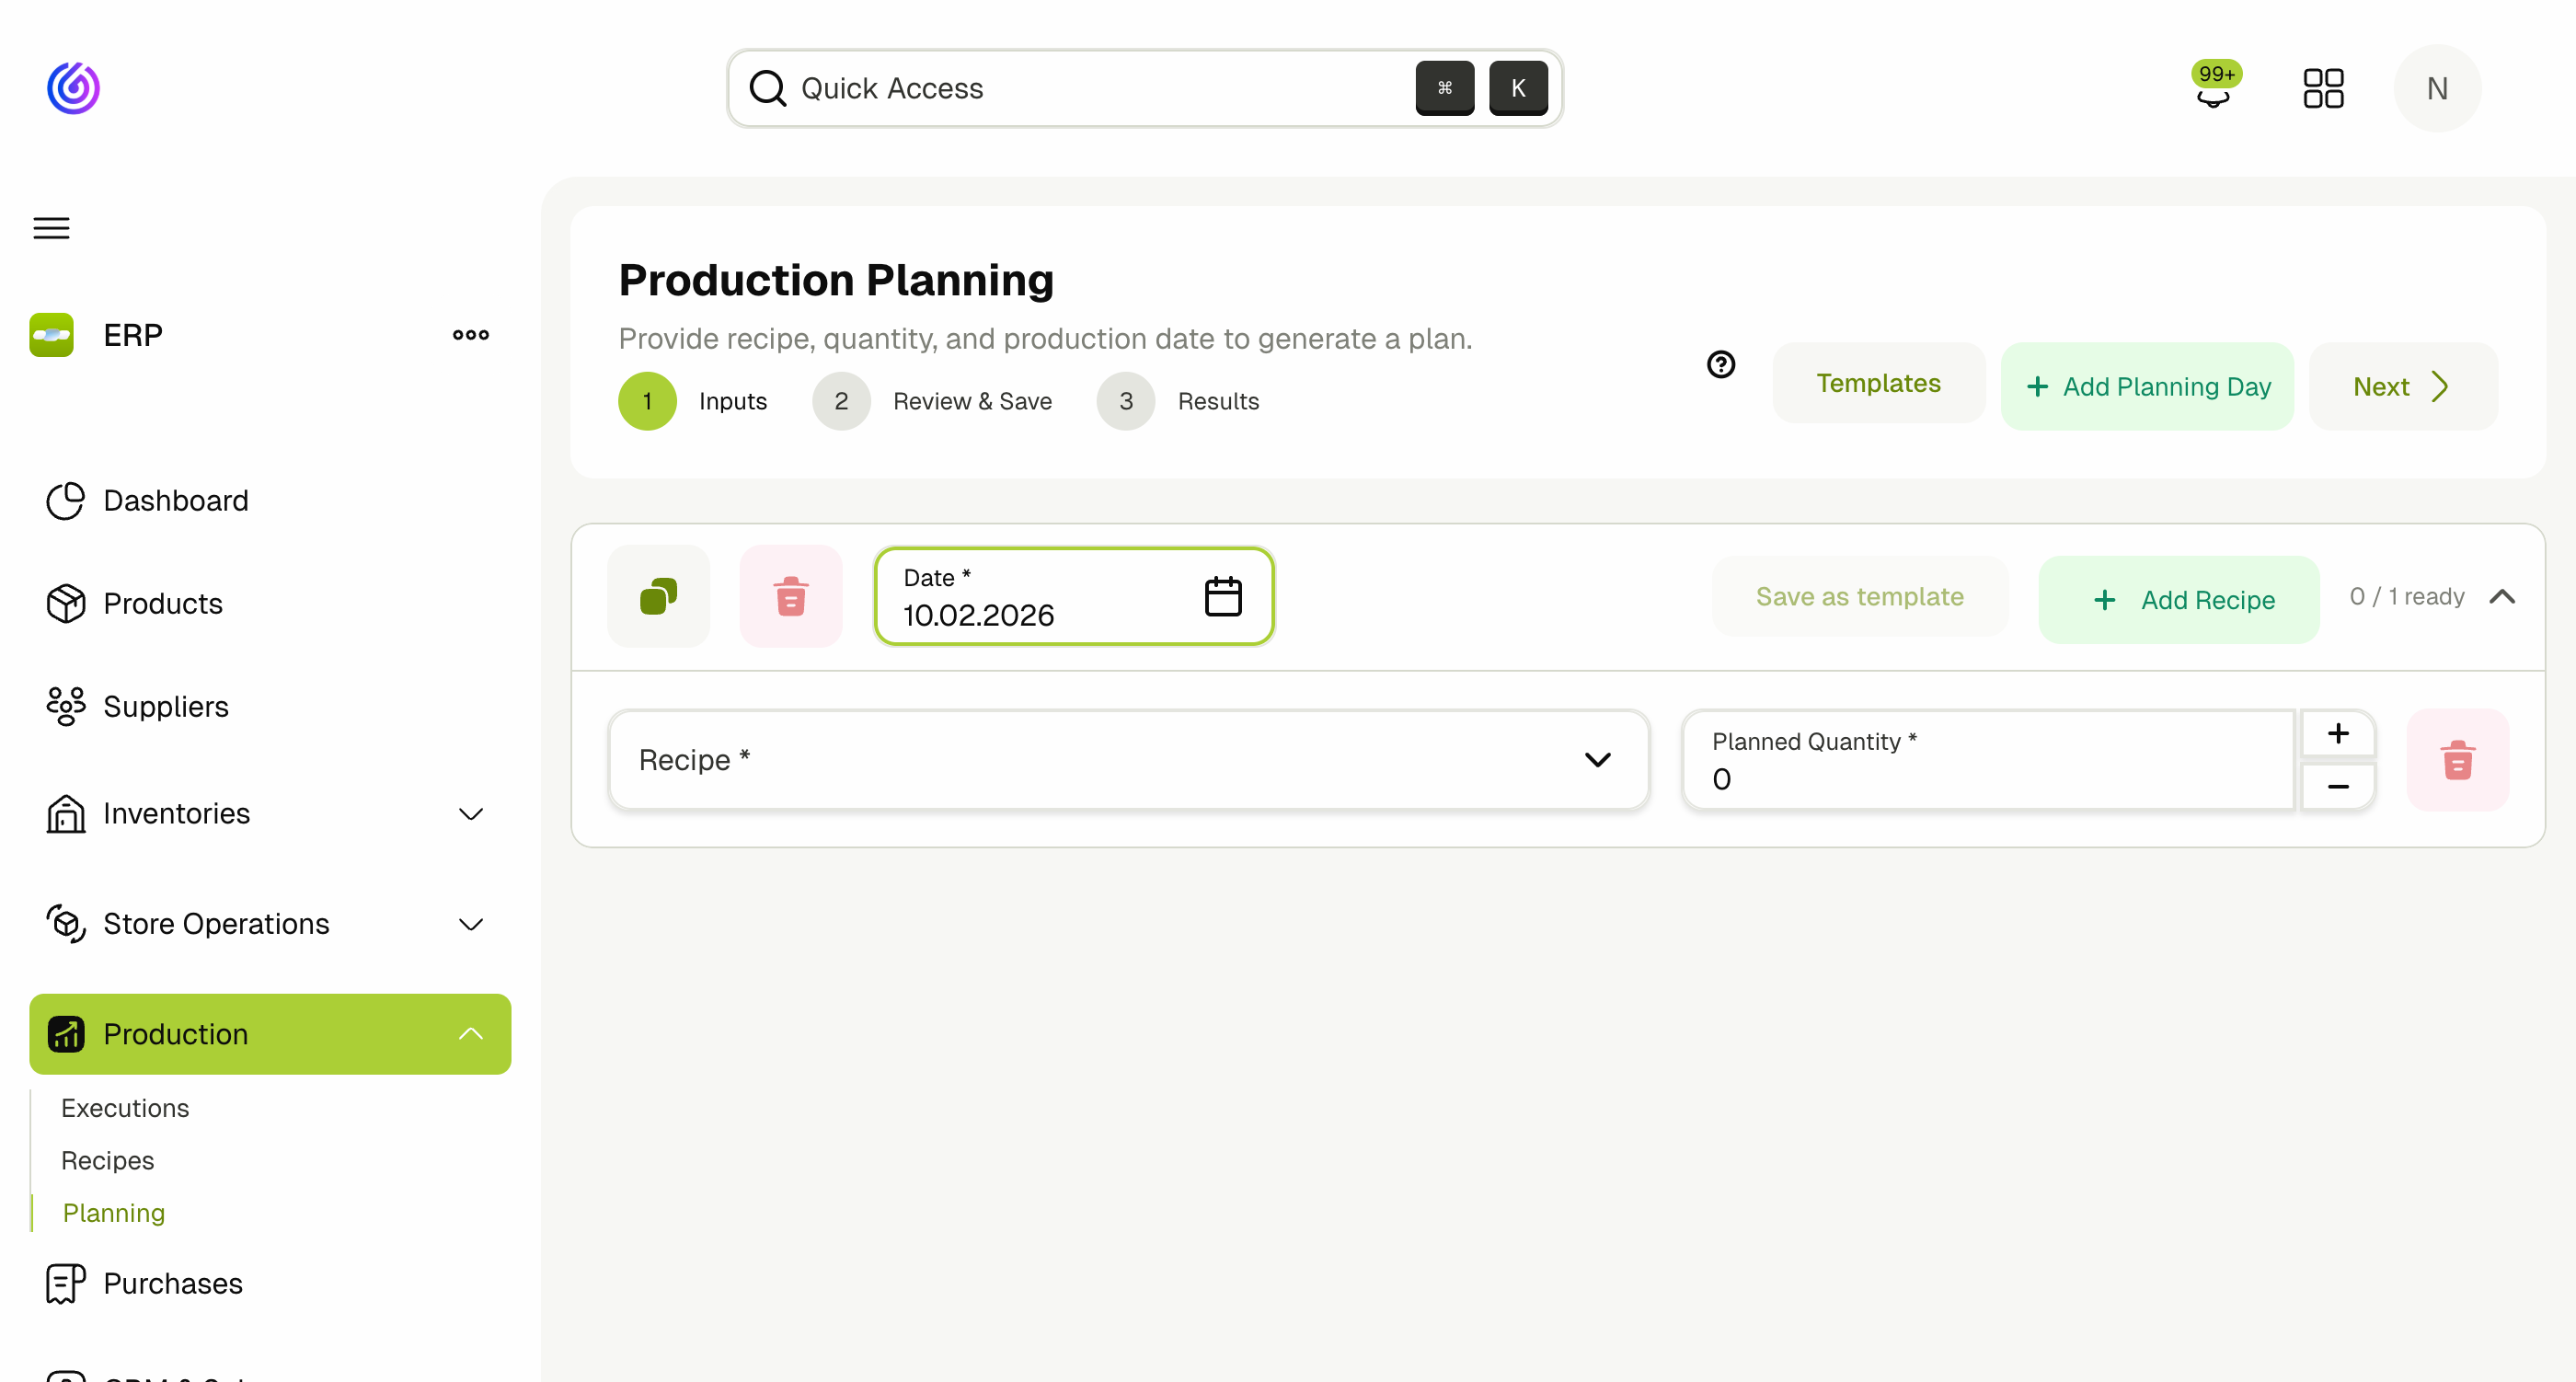
Step 1: Inputs
The planning wizard supports multi-day planning. Each day is displayed as a collapsible accordion section with its own date and recipe list.
- Click Plan Production from the overview page.
- Set the Production Date for the first planning day.
- Select a Recipe — only Active recipes are shown.
- Set the Planned Quantity for this recipe.
Do not select today's date or a date in the past. The system will not plan production for dates that have already passed.
- Click Add Recipe to add more recipes to the same day.
- Click Add Planning Day to add another production day with a different date and its own set of recipes.
- Use the Duplicate button (copy icon) on any day to duplicate it along with all its recipes — useful for repeating the same plan across multiple days.
- Click Next to proceed to Review & Save.
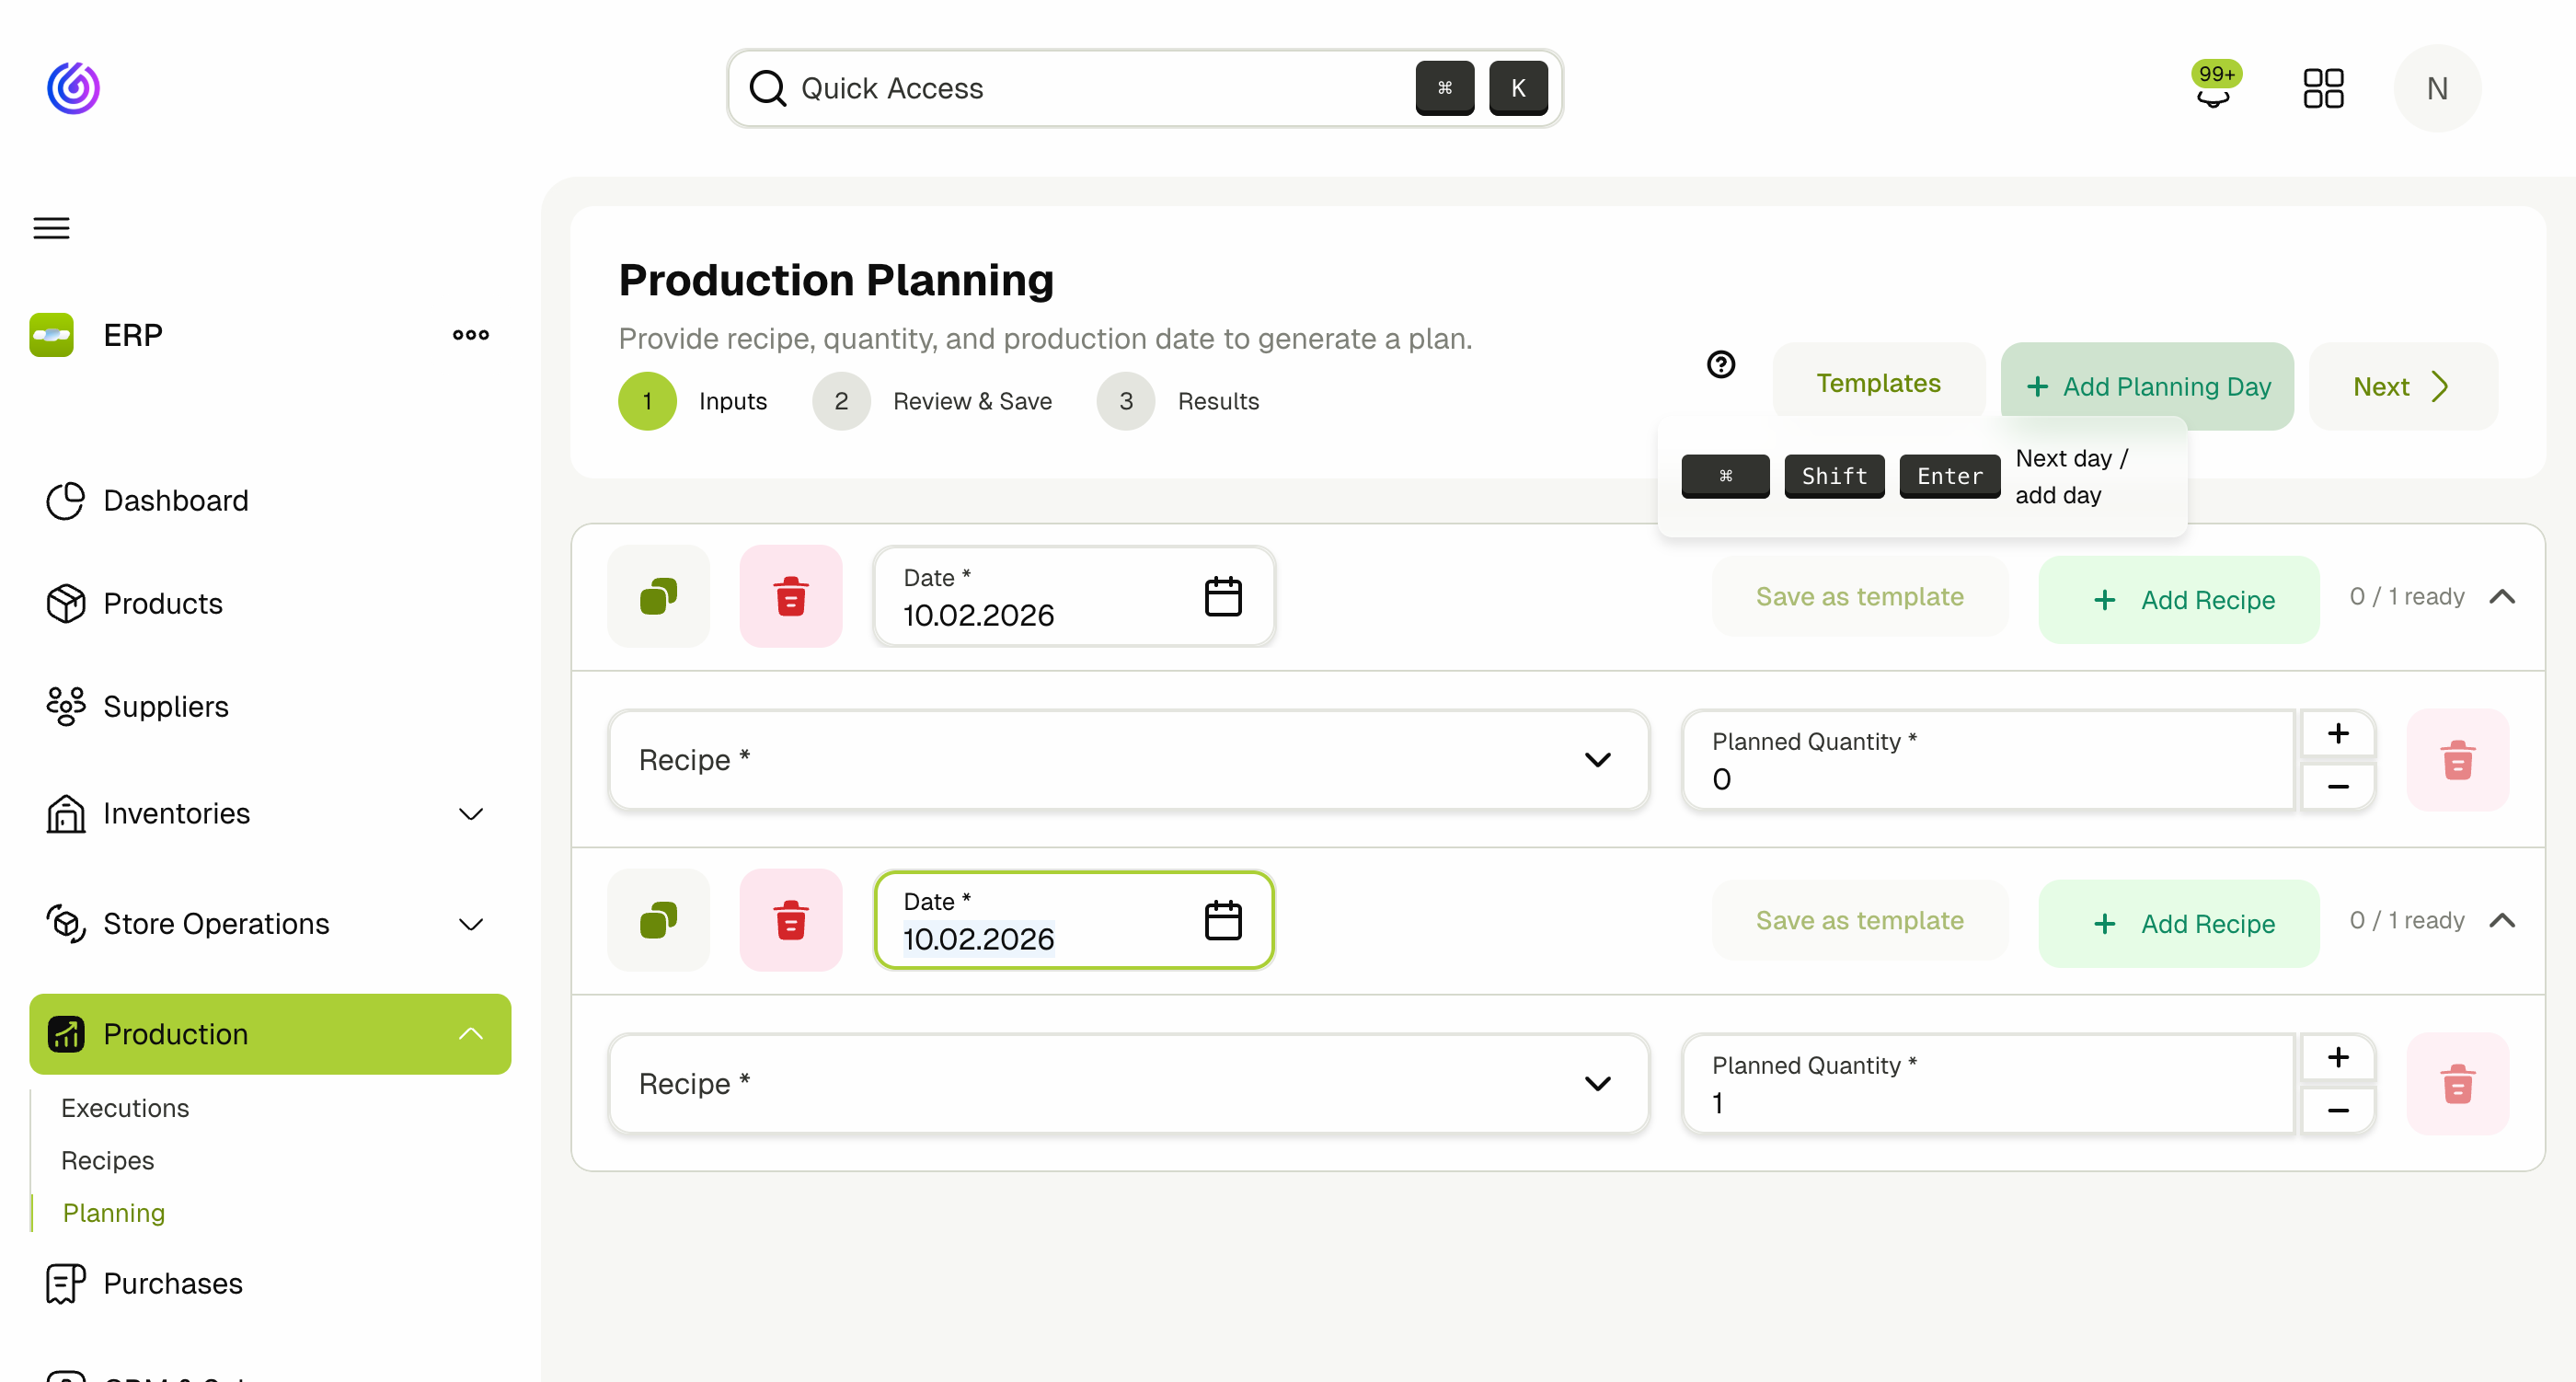
Keyboard Shortcuts
The planning wizard supports keyboard shortcuts for fast, spreadsheet-like navigation. Click the ? icon next to the Templates button to see the full list:
| Shortcut | Action |
|---|---|
Cmd/Ctrl + Enter | Go to Next (review step) |
Enter | Move to next recipe row (adds a row if on last) |
Shift + Enter | Move to previous recipe row |
Cmd/Ctrl + Shift + Enter | Move to next day (adds a day if on last) |
Cmd/Ctrl + Shift + D | Duplicate current day |
Backspace | Jump to recipe input (if quantity is empty), previous row (if recipe is empty), or remove day (if date is empty and more than one day) |
Templates
Templates allow you to save a set of recipes as a reusable plan that can be quickly applied to future production planning sessions.
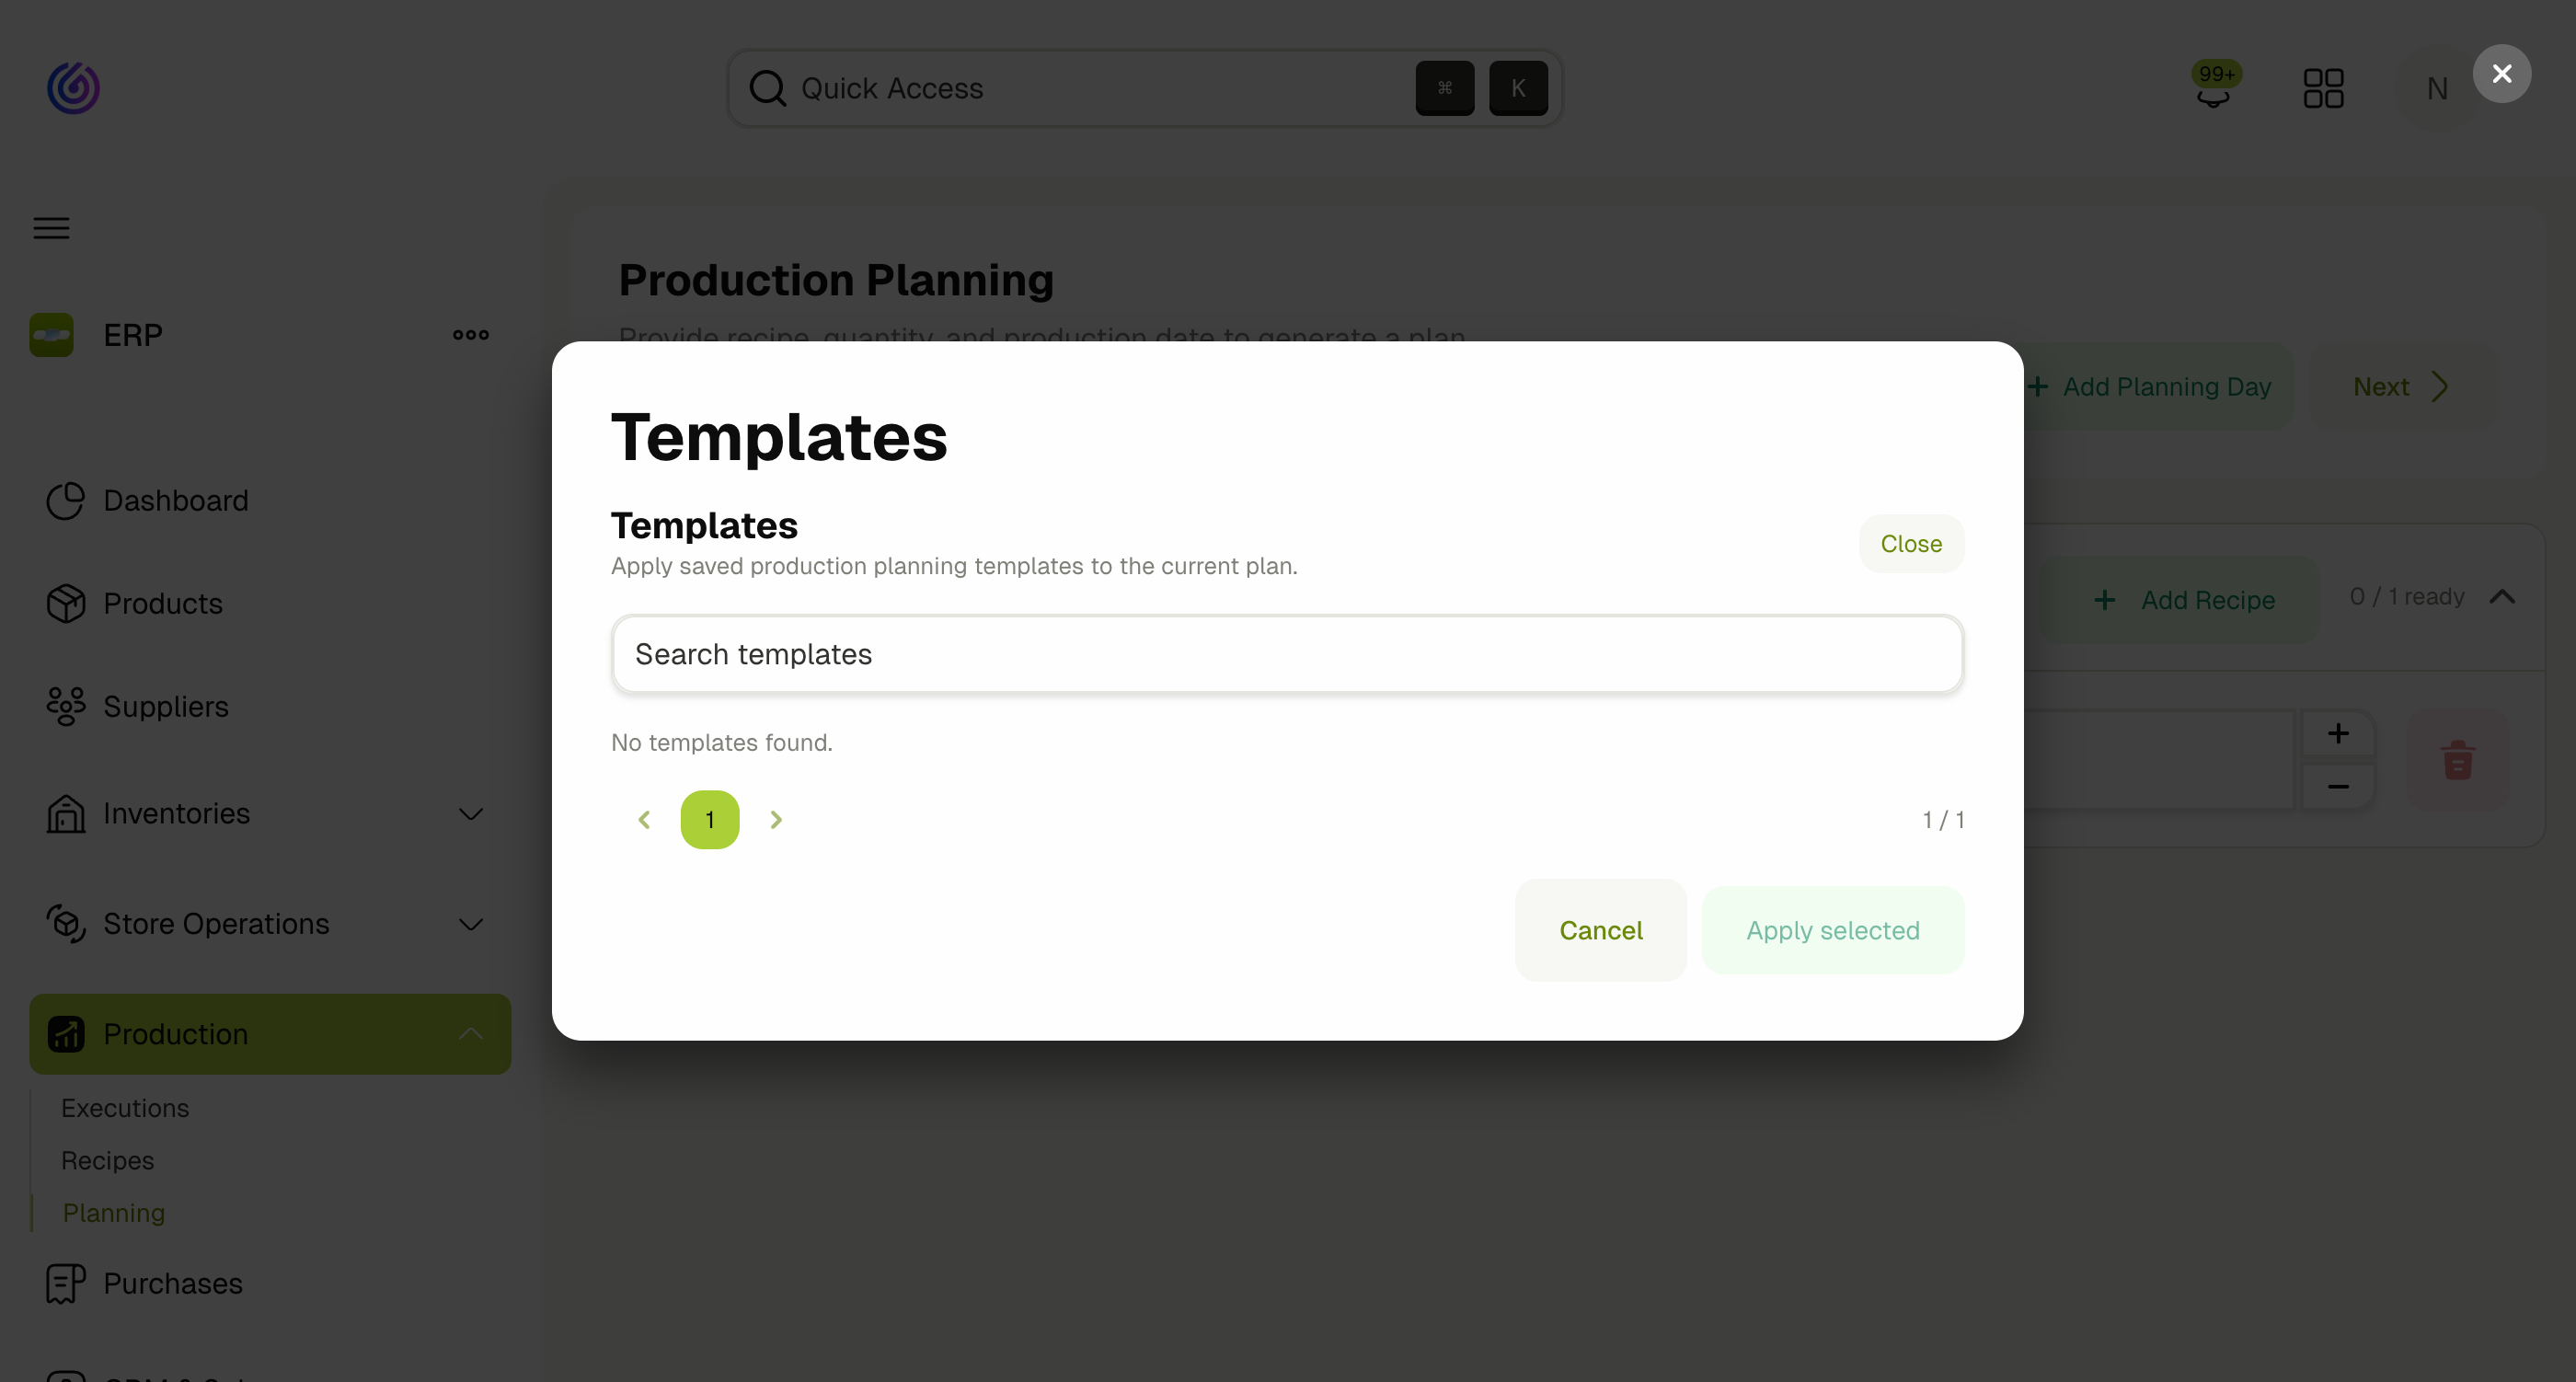
- Save as Template: From any planning day, click Save as template to save the current day's recipes and quantities as a named template.
- Apply Templates: Click the Templates button at the top of the wizard to open the templates dialog. Select one or more templates, set a Repeat count (to apply the same template multiple times), and click Apply selected to populate the wizard with the template's recipes.
- Delete Templates: If you have the delete permission, you can remove outdated templates from the dialog.
Templates require separate permissions: View Production Templates, Create Production Templates, and Delete Production Templates.
Step 2: Review & Save
The review step shows a table of all executions that will be created, including:
- Product — the product being produced.
- Inventory — the production floor.
- Production Date — the scheduled date.
- Lot Label — the label for traceability.
- Planned Qty — the quantity to produce.
This includes both the directly planned recipes and any sub‑recipe executions that the system automatically generates from the recipe dependency tree.
Preview options:
- Preview Executions — review the list of all executions before saving.
- Preview Recipe Cards — generate a printable PDF of the recipe cards for the planned executions.
At this stage, the plan is a draft. You can go Back to adjust inputs or click Save Plans to commit.
Step 3: Results
After saving, the results page confirms which plans were saved and shows the generated executions.
- Click New Plans to start another planning cycle.
- Return to the overview to see your new plans on the calendar.
Shared Recipe Merging
One of the most important behaviors of the planning system is shared recipe merging.
When you save a plan, the system checks whether an execution already exists for the same recipe, production floor, and production date:
- If no existing execution: A new execution is created.
- If an existing draft execution: The planned quantity is added to the existing execution. Requirements are updated accordingly.
This means:
- If you plan Pizza and Lasagna together, and both need Tomato Sauce on the same date, only one Tomato Sauce execution is created with the combined quantity.
- If you later plan Pasta for the same date, the Tomato Sauce execution is updated with the additional quantity — no duplicate is created.
- This merging works across separate planning sessions, not just within a single plan.
View Requirements
Click View Requirements from the overview to see an aggregated list of all materials required for planned executions within the selected date range.
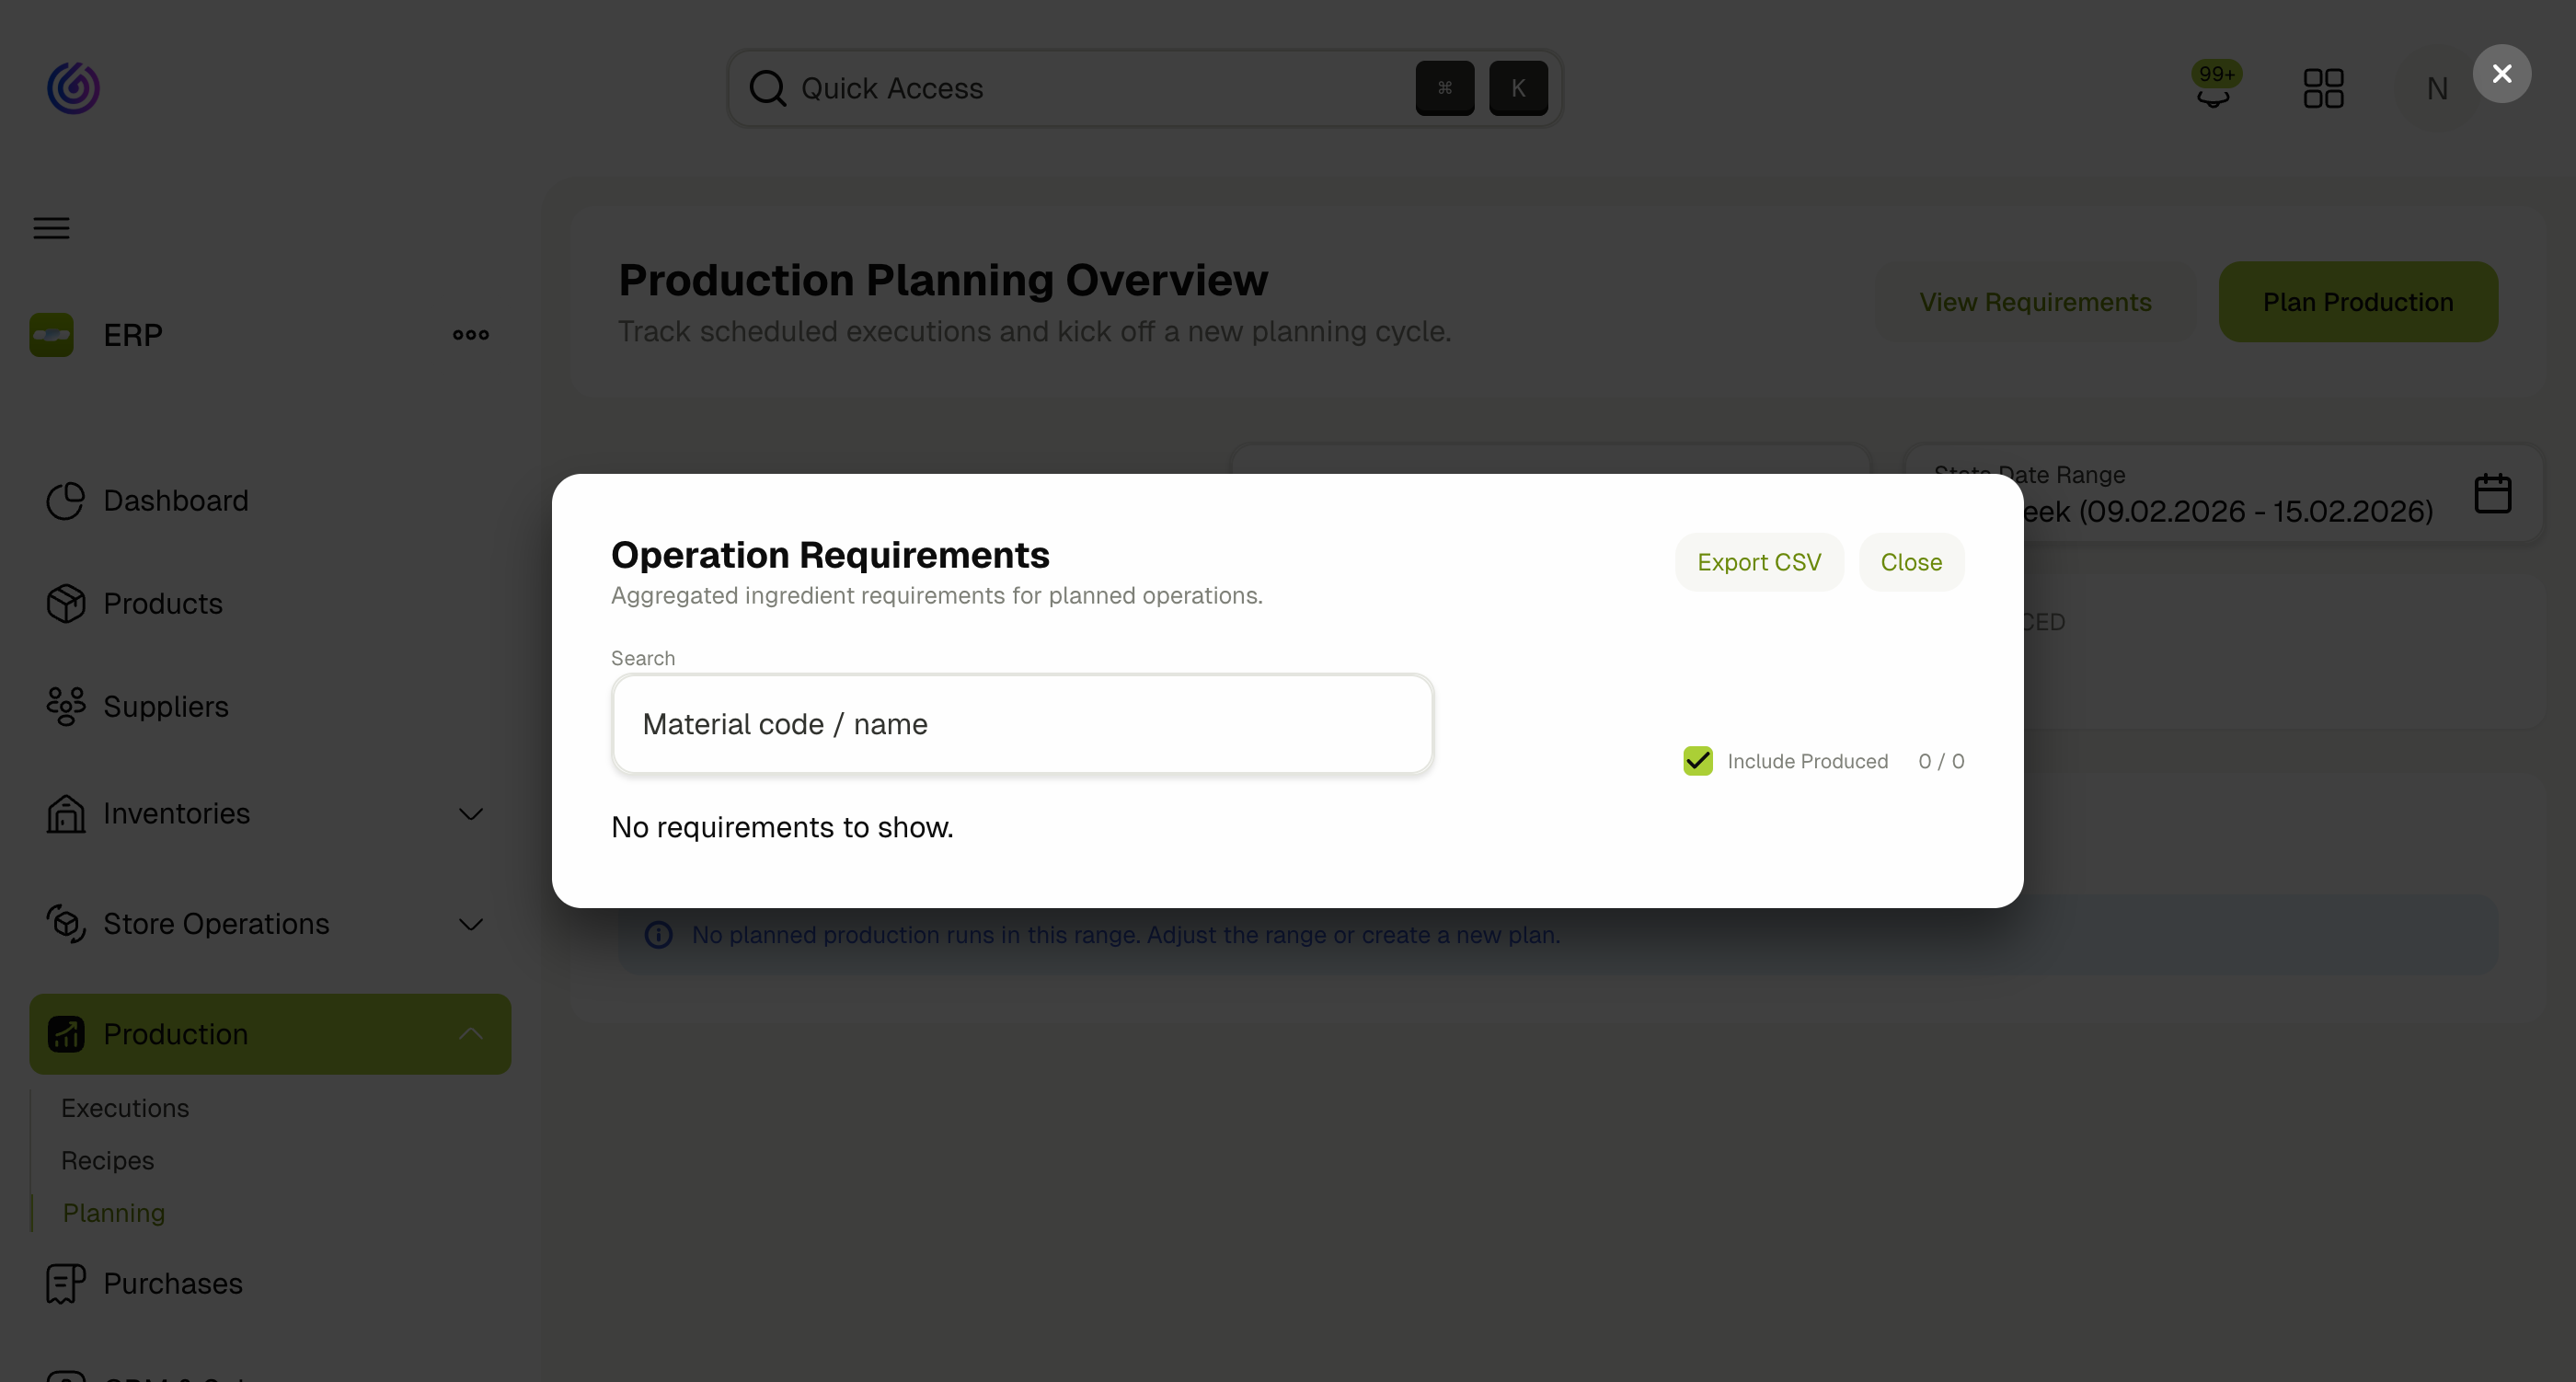
This view helps you:
- Identify which materials are needed and in what quantities.
- Spot materials with insufficient stock.
- Decide whether to create Purchase Requisitions for missing materials.
What Happens After Saving
When a production plan is saved, the system performs the following automatically:
- Creates Production Executions for each planned recipe and its sub‑recipes.
- Generates Material Requisitions (issuing reports) from the issuing inventory to the trolley inventory for all supplied ingredients. Only materials whose product type has the Has Suppliers option enabled are included in the requisition.
- Links executions through predecessor/dependency relationships so you can trace which executions depend on which sub‑recipes.
Automatic requisition generation requires that your system has an Issuing Inventory and a Trolley Inventory configured. Contact your technical support team to set this up.
After saving, proceed to:
- Store Operations to pick and issue materials from the requisitions.
- Purchases if the requisitions indicate missing stock.
- Trolley Building to stage materials for the production floor.
Permissions
| Permission | Description |
|---|---|
| View Production Plans | View production plans and planning calendar |
| Plan for Production | Create production plans and access planning wizard |
| View Production Templates | View production planning templates |
| Create Production Templates | Create production planning templates |
| Delete Production Templates | Delete production planning templates |
Related Docs
- Production Recipes — Define recipes and sub‑recipes
- Production Executions — Track and complete executions
- Trolley Building — Stage materials for production
- Store Operations — Material requisitions, picking, and issuing
- Purchases — Purchase requisitions for missing stock