Pre-Check-In
🧾 Pre-Check-In lets a property collect guest details before arrival, review the submission from the reservations workflow, and approve, reject, or update the record before the guest reaches the front desk.
This guide is based on GMS-1029 and the delivered stories available in
staging as of April 8, 2026.
📍 Accessing Pre-Check-In
- Open Reservations from the GMS sidebar.
- Click Pre-Check-In in the top-right corner.
This page is the staff control point for the selected property location. From here, staff can enable or disable pre-check-in and open the two configuration areas used by the feature:
- Data Collection Steps
- Preferences
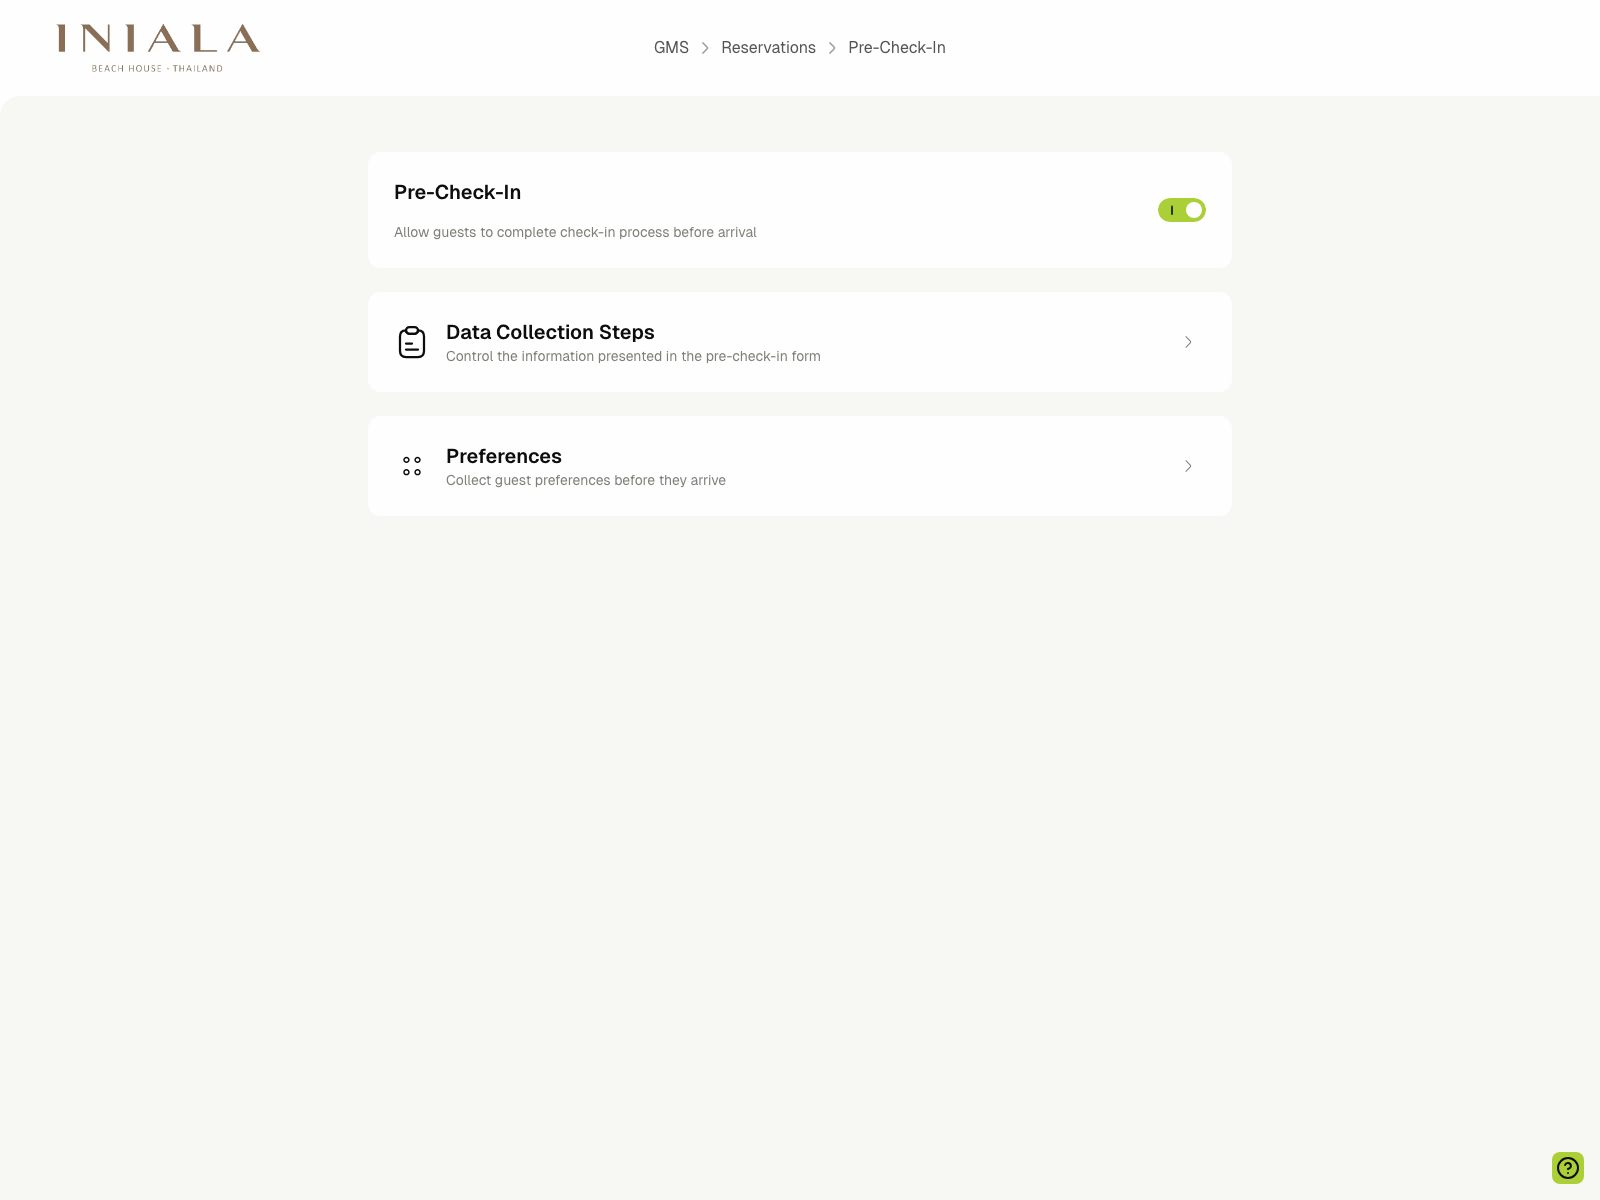
⚙️ Enabling the Flow
- Pre-check-in is controlled per property location.
- Turning the main toggle on allows guests for that property to start the secure pre-check-in flow before arrival.
- Turning it off removes the live entry point for new guest sessions for that property.
The overview page does not collect guest answers directly. It acts as the switchboard for the steps and questions that will appear in the guest journey.
🧩 Managing Data Collection Steps
The Data Collection Steps page controls the built-in parts of the guest form.
Each step shows:
- Whether the step is currently enabled
- Whether the step is required
- A short description of the data being collected
The current property configuration in staging includes these built-in sections:
- Contact Information
- Passport Upload
- Estimated Arrival Time & Special Requests
- Nationality & Address Information
- Approval
- Accompanying Guest Information
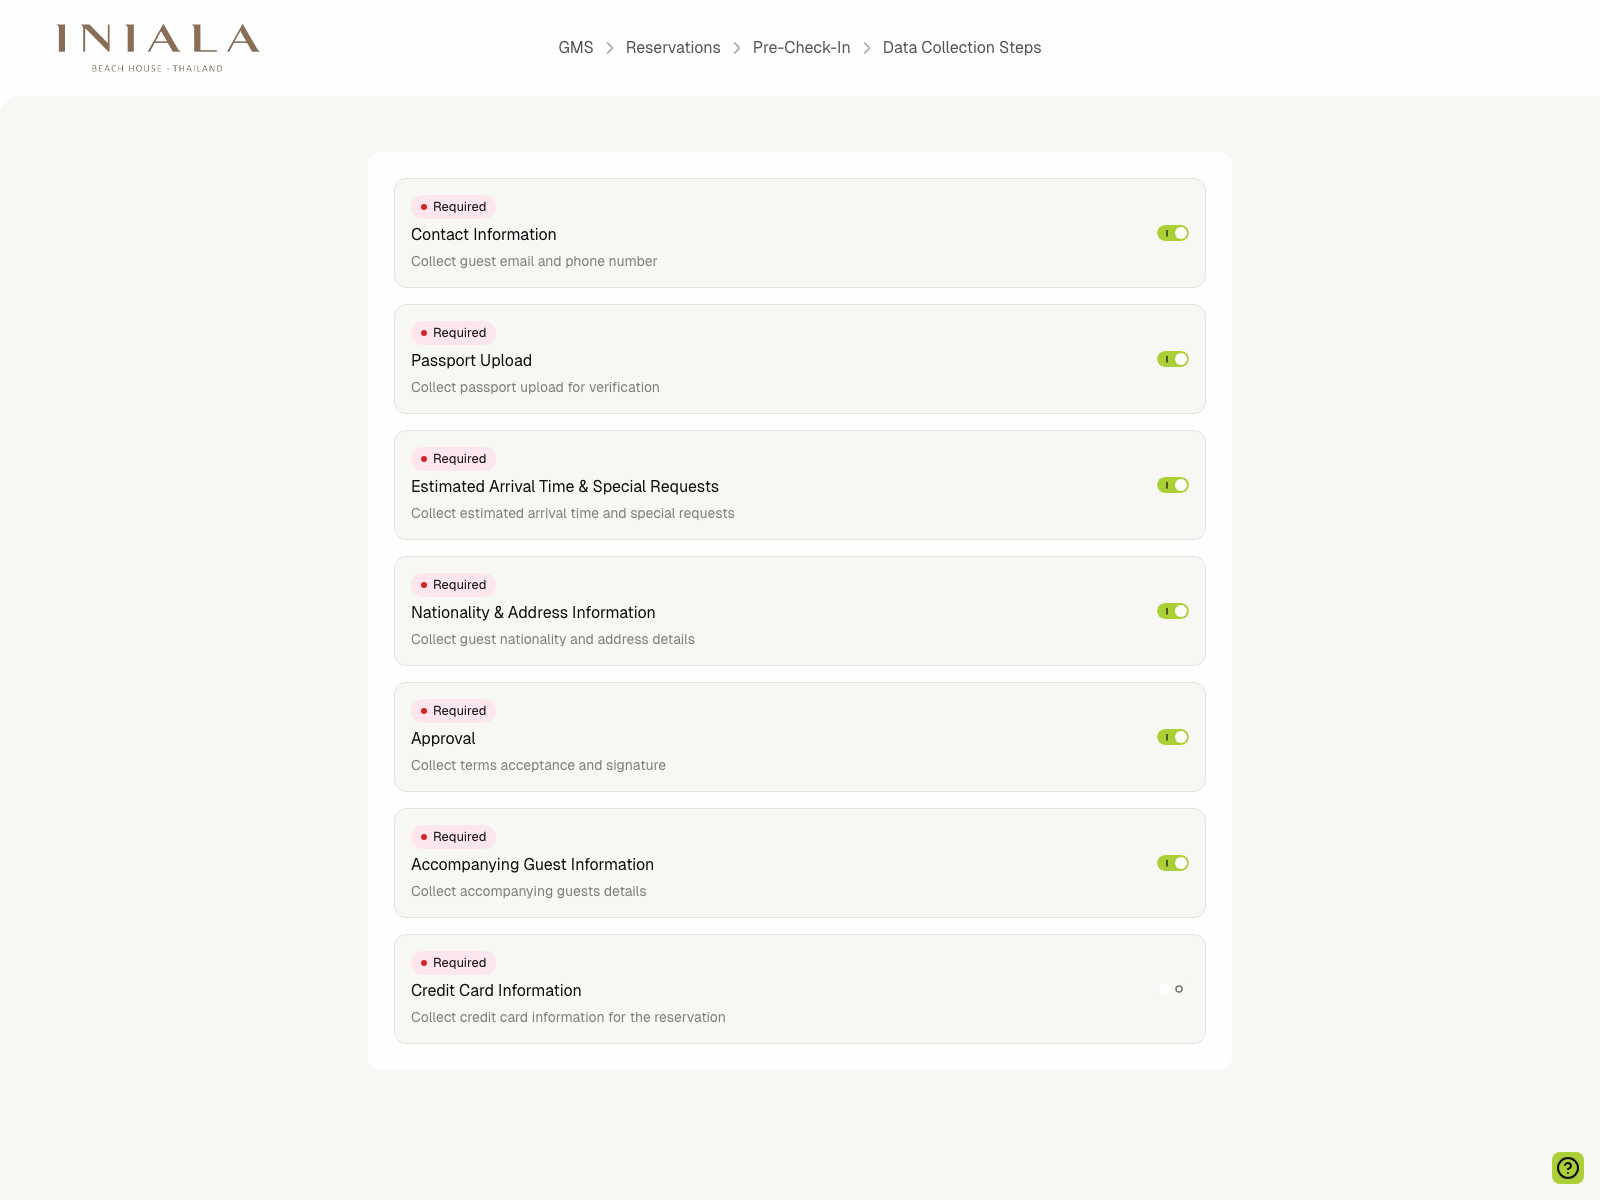
The screen also exposes a Credit Card Information step slot, but it is disabled in the current property configuration and is not part of the released guest flow documented here.
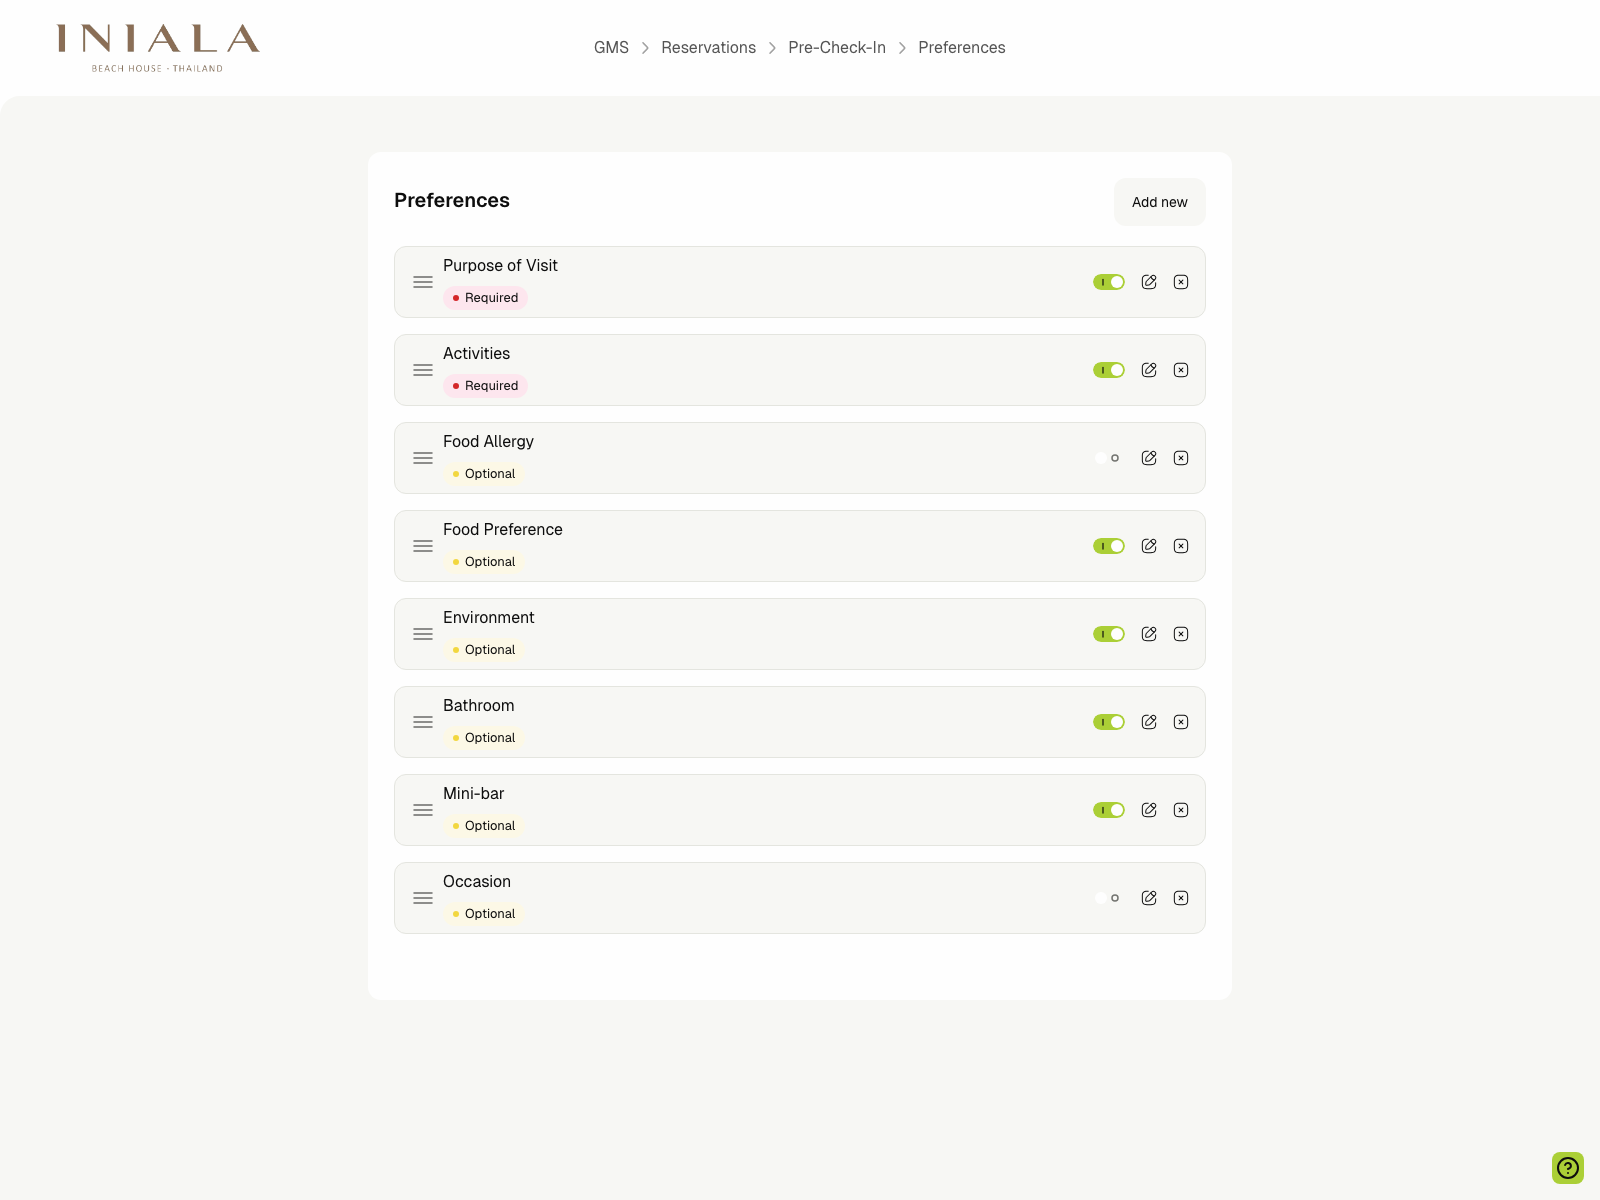
🎛️ Managing Preference Steps
The Preferences page is used for the property-specific questions that appear later in the guest flow.
Current examples in staging include:
- Purpose of Visit
- Activities
- Food Allergy
- Food Preference
- Environment
- Bathroom
- Mini-bar
- Occasion
Each preference can be marked as Required or Optional, and can be enabled or disabled independently.
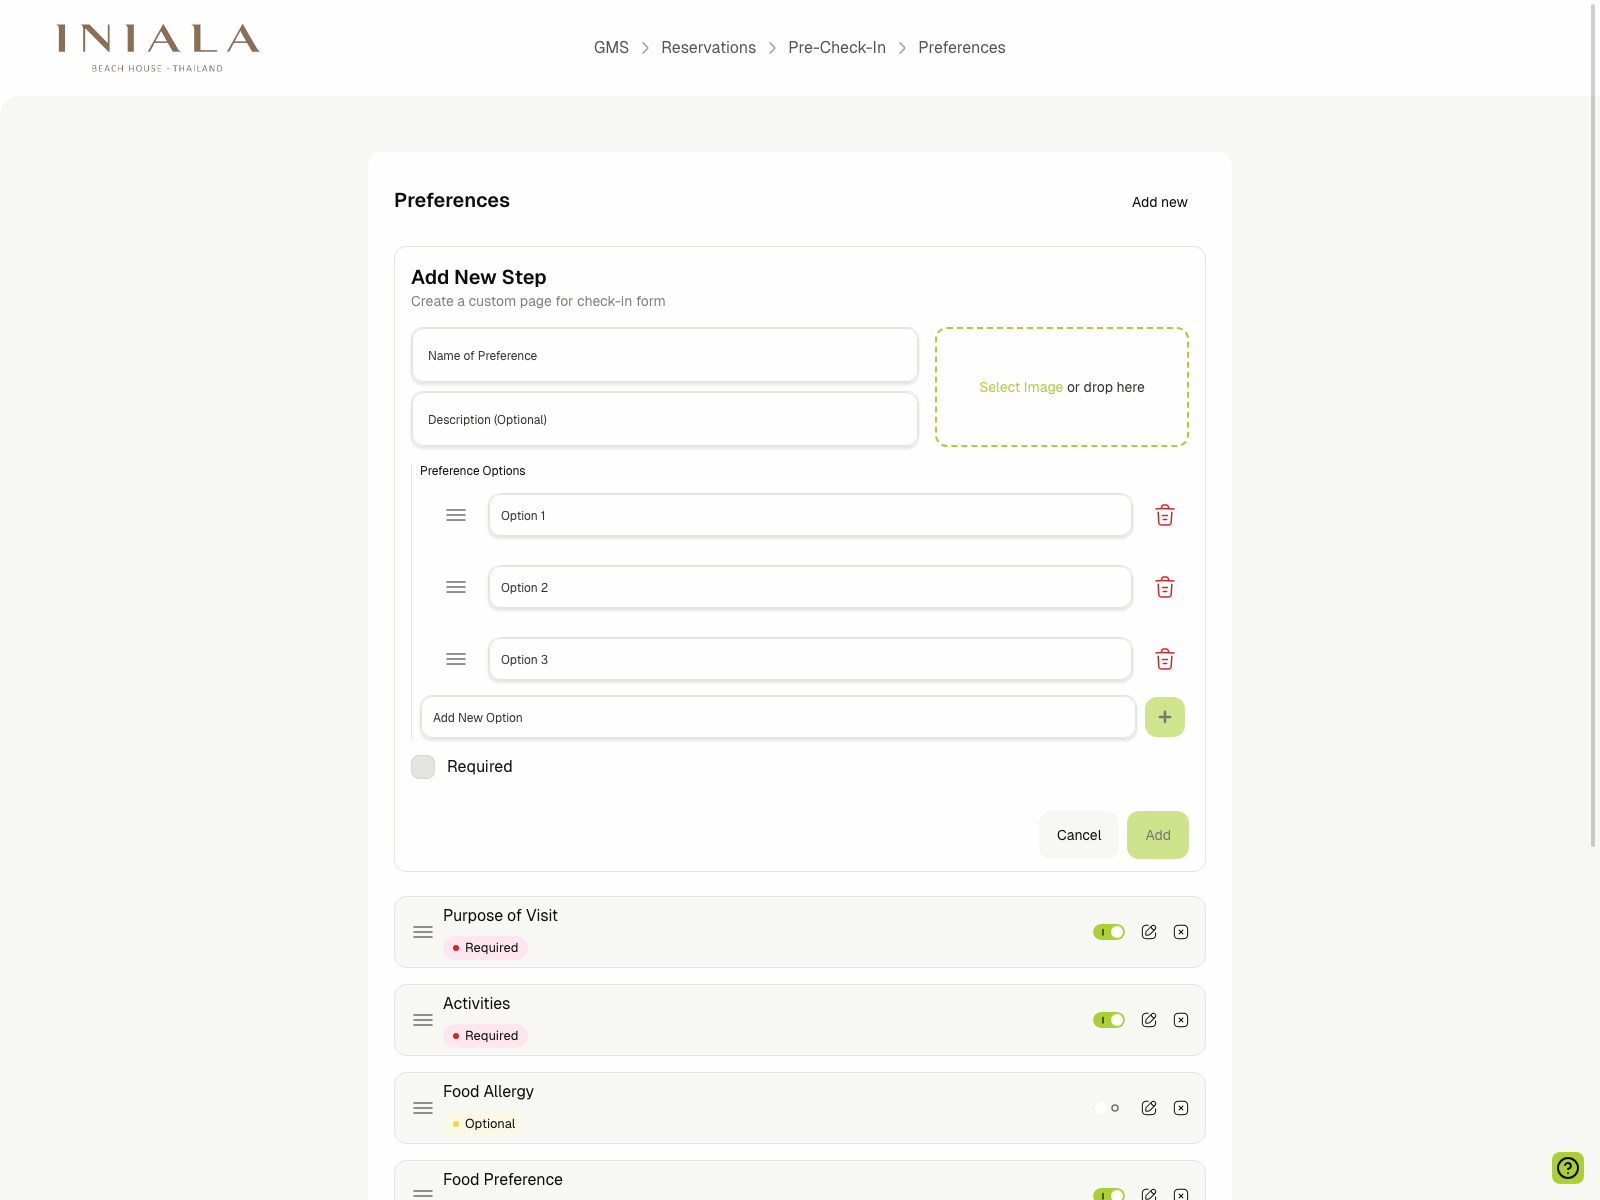
To create a custom preference step:
- Click Add new.
- Enter the preference name.
- Add an optional description.
- Upload an optional image.
- Add the answer options the guest can choose from.
- Mark the step as Required if needed.
- Click Add.
🔗 How Guests Start the Flow
Guests enter pre-check-in through a secure guest-side link. In the current guest app flow, the guest:
- Opens the pre-check-in entry page and enters their email address.
- Receives a email with a secure magic link.
- Clicks the link in the email to open the pre-check-in journey directly.
The pre-check-in flow does not rely on the guest manually entering an OTP for this experience. The email link is the step that grants access to the form.
If the guest leaves before finishing, the delivered scope also includes a resume behavior so the session can continue from the appropriate step when the secure link is used again.
If the link is invalid or expired, the guest app shows a dedicated recovery state and allows the guest to request a new link.
📱 Guest Pre-Check-In Experience
After the guest opens the magic link, Properlog guides them through the enabled steps one page at a time.
Depending on the property's setup, the guest flow can collect:
- First and last name
- Email address and phone number
- Nationality and address details
- Estimated arrival time
- Special requests
- Passport or ID uploads
- Accompanying guest information
- Terms acceptance and signature
- Preference selections
If a step is marked as Required, the guest must complete it before moving to the next step.
👥 Accompanying Guests
Accompanying guests are handled inside the same pre-check-in flow, not as a separate reservation workflow.
The delivered scope includes support for:
- Adding accompanying guests from the primary guest flow
- Capturing identity and nationality details for each accompanying guest
- Collecting supporting passport or ID uploads
- Copying the primary guest's address into an accompanying guest form when needed
📋 Tracking Statuses in Reservations
Once the feature is live, the Reservations list shows a dedicated Pre-Check-In status column.
This lets staff quickly identify reservations that are:
- Not started
- Pending
- Approved
- Rejected
This is the fastest operational view for spotting arrivals that still need follow-up.

🧾 Reviewing Submitted Details
Opening a reservation shows the submitted pre-check-in data directly inside the reservation details page.
The staff-side detail view can surface:
- Contact and address information
- Arrival time and special requests
- Uploaded passport or ID files
- Signature capture
- Preference selections
- Related upsell selections when applicable
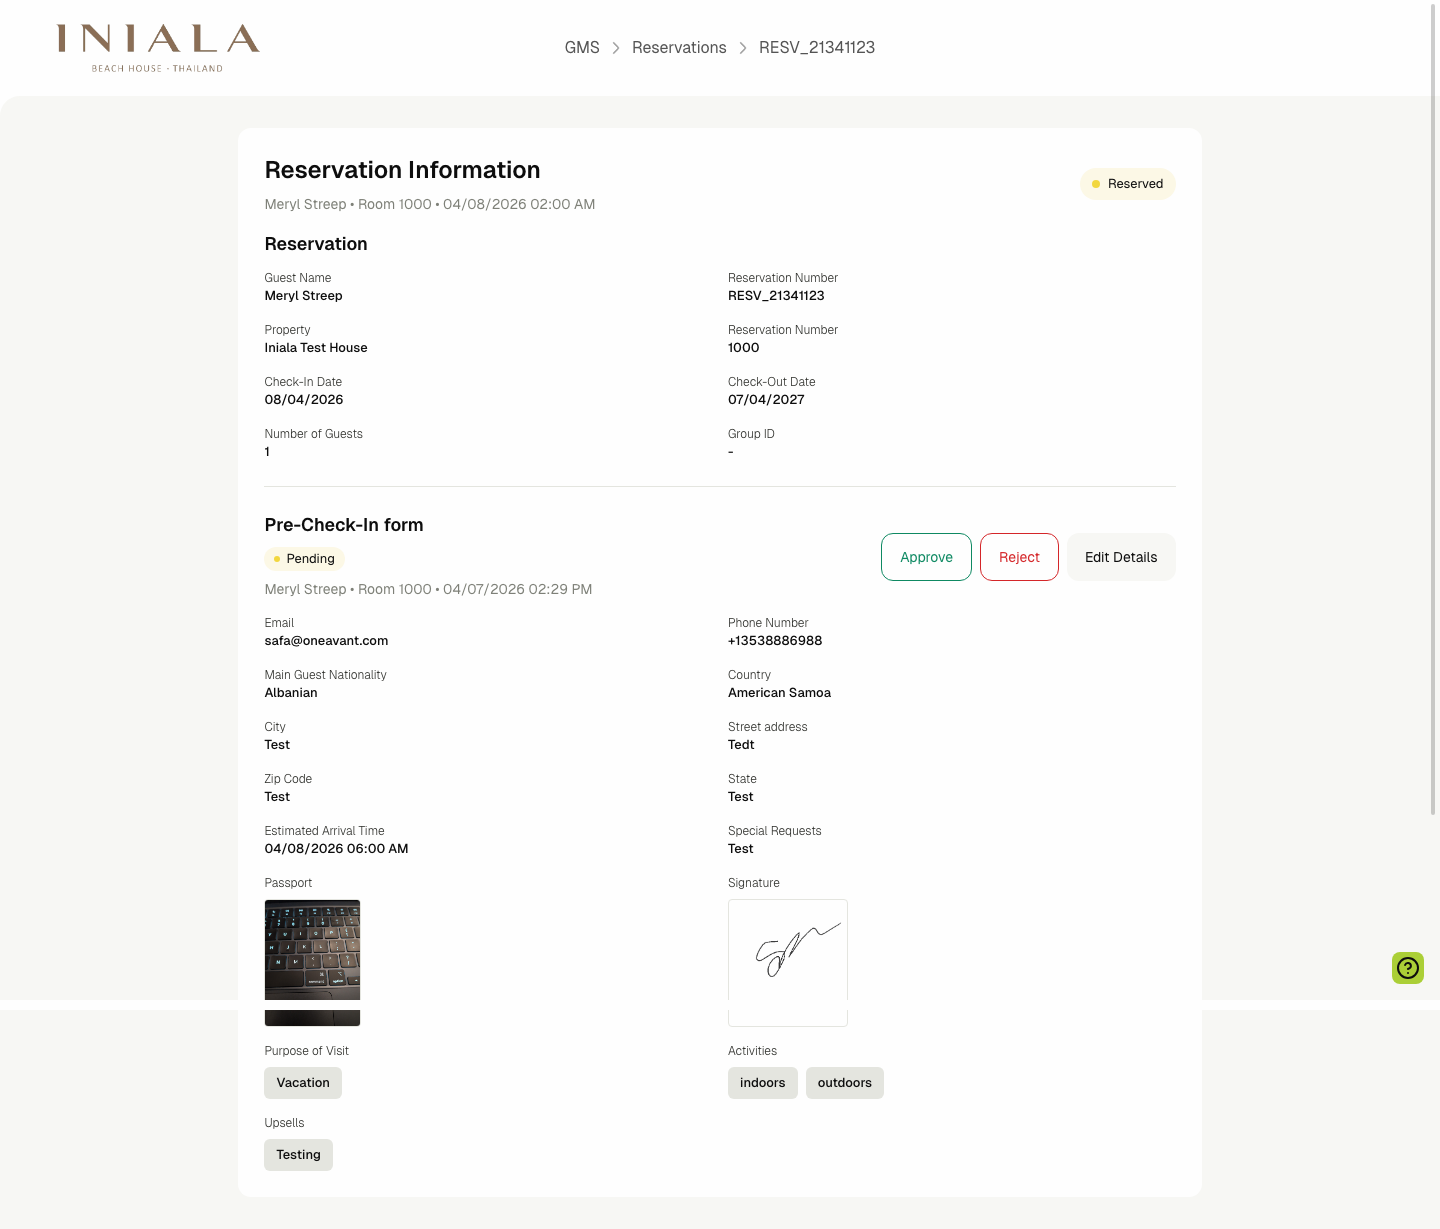
🛠️ Approving, Rejecting, and Editing
From the reservation detail page, authorized staff can:
- Approve a valid submission
- Reject a submission and provide a rejection reason
- Edit Details to correct or complete the guest's answers
- Apply staff-side overrides where the workflow allows it
These actions update the submission status and keep the reservation-side view and guest-side state aligned.
📧 Notifications and Guest Outreach
Pre-check-in also connects to the guest communication timeline.
The delivered scope includes:
- Automated Pre-Check-In CTA emails
- Reminder emails
- Submission confirmation emails
- Approval or rejection follow-up emails
- Staff notifications when a submission is ready for review
If the CTA email is disabled, the dependent reminder email should also be disabled.
📲 Guest App Status
The guest app reads the reservation's pre-check-in status so the guest sees the correct next state without manual updates.
The delivered flow includes statuses such as:
- Not Started
- Pending or submitted and awaiting review
- Approved
- Rejected
This keeps the guest-facing flow synchronized with the staff review workflow.